1. හැඳින්වීම
This manual provides essential information for the safe and effective operation, maintenance, and troubleshooting of your STANLEY FATMAX FMHT1-77441 Rotary Laser Level. Please read this manual thoroughly before using the product and retain it for future reference.
The STANLEY FATMAX FMHT1-77441 is a self-leveling rotary laser level with a green beam, designed for alignment, horizontal and vertical leveling, squaring, and inclined plane applications. Its robust FATMAX design ensures durability for intensive professional use.
2 ආරක්ෂිත තොරතුරු
අවවාදයයි: This product emits a Class 2 laser beam. Direct eye exposure to the laser beam may cause eye injury. Do not stare into the laser beam. Do not intentionally direct the laser beam at others.
- Always wear appropriate laser safety glasses when operating the device, especially in bright conditions where the beam may be difficult to see.
- Ensure the laser is set up on a stable surface to prevent accidental movement.
- Do not attempt to modify or disassemble the laser level. This may result in hazardous laser radiation exposure and will void the warranty.
- උපාංගය දරුවන්ට ළඟාවිය නොහැකි ලෙස තබා ගන්න.
- Operate the laser level only in well-ventilated areas.
- Avoid using the laser level near highly reflective surfaces that could redirect the beam.

Figure 2.1: Laser safety glasses for eye protection.
3. පැකේජ අන්තර්ගතය
Upon unpacking, verify that all items are present and undamaged. The standard package for the FMHT1-77441 Rotary Laser Level typically includes:
- STANLEY FATMAX FMHT1-77441 Rotary Laser Level
- දුරස්ථ පාලකය
- Laser Detector (Receiver)
- ලේසර් ඉලක්ක තහඩුව
- ලේසර් ආරක්ෂිත වීදුරු
- Rechargeable NiMH Batteries (4 product-specific)
- බැටරි චාජර්
- පරිශීලක අත්පොත (මෙම ලේඛනය)
- රැගෙන යන නඩුව
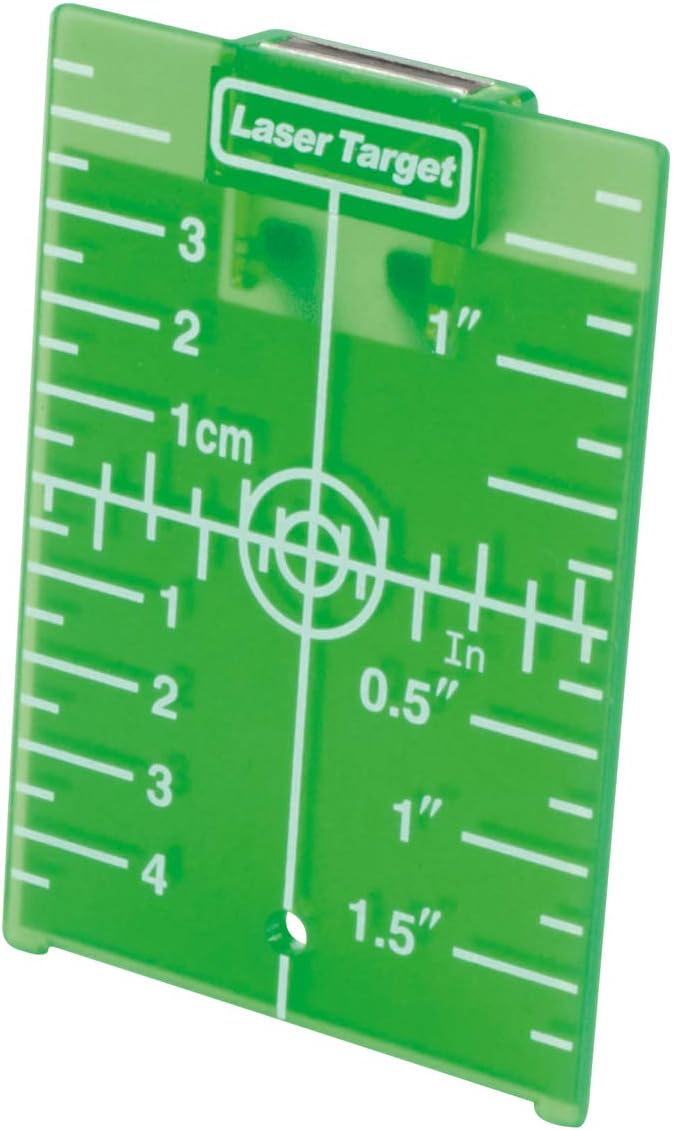
Figure 3.1: Main unit and typical accessories.
4. නිෂ්පාදන ලක්ෂණ
The FMHT1-77441 Rotary Laser Level is engineered with advanced features for precision and durability:
- FATMAX Design: Enhanced robustness and ergonomics for intensive professional use.
- ස්වයං-මට්ටම්: Automatic leveling for quick and accurate setup in horizontal and vertical applications.
- Green Laser Diode: Class 2 green laser beam for improved visibility in various lighting conditions.
- Dual Plumb Beams: Projects both up (green) and down (red) plumb points for precise vertical alignment.
- Manual Slope Adjustment: Allows for manual adjustment of slopes on both X and YZ axes, up to 10%.
- ආරක්ෂිත වීදුරු: Durable glass protects the laser head from damage.
- ඉහළ නිරවද්යතාව: Provides an accuracy of 1.5mm at 30 meters.
- විස්තීරණ පරාසය: Operates with a range of up to 300 meters with a detector.
- Rubberized Protection: Rubber grip and protective elements on the base enhance solidity and impact resistance.
- ADS Alarm: An Automatic Displacement System (ADS) alarm signals any accidental movement or displacement of the level, ensuring measurement integrity.
- ඇලවීමේ කාර්යය: Enables the laser to be set at an angle for specific applications.
- 5/8" නූල: Compatible with standard tripods and mounting accessories.
5. පිහිටුවීම
5.1. බැටරි ස්ථාපනය සහ ආරෝපණය කිරීම
- ලේසර් මට්ටමින් බැටරි මැදිරිය සොයා ගන්න.
- Insert the NiMH rechargeable batteries, ensuring correct polarity.
- බැටරි මැදිරිය ආරක්ෂිතව වසා දමන්න.
- Connect the battery charger to the laser level and a power outlet. Allow sufficient time for a full charge before first use.
5.2. ලේසර් මට්ටම සවි කිරීම
- ට්රයිපොඩ් සවි කිරීම: The laser level features a 5/8" thread on its base. Securely attach it to a compatible tripod. Ensure the tripod is stable and level.
- බිත්ති සවි කිරීම: For vertical applications, the laser level can be mounted to a wall bracket (sold separately) using the integrated mounting points.

Figure 5.1: Laser level mounted on a tripod for horizontal applications.
6. මෙහෙයුම් උපදෙස්
6.1. බල ගැන්වීම / අක්රිය කිරීම
- To power on, press the power button. The laser will begin its self-leveling sequence.
- To power off, press and hold the power button until the laser beam extinguishes.
6.2. Self-Leveling Operation
Once powered on, the laser level will automatically self-level. If the device is outside its self-leveling range, an alarm may sound, and the laser beam may flash. Adjust the device's position until it self-levels.
6.3. Horizontal Leveling
- Place the laser level on a stable surface or tripod.
- Power on the device. It will self-level to project a horizontal plane.
- Use the laser detector to locate the beam at desired points across the work area.

Figure 6.1: Horizontal leveling application.
6.4. Vertical Leveling and Squaring
- Mount the laser level vertically using a wall bracket or a tripod configured for vertical operation.
- Power on the device. It will self-level to project a vertical plane.
- The up (green) and down (red) plumb points can be used for precise vertical alignment and squaring tasks.

Figure 6.2: Vertical leveling application.
6.5. Manual Slope Adjustment (Tilt Function)
For inclined plane applications, the FMHT1-77441 allows manual slope adjustment up to 10% on both X and YZ axes.
- Engage the manual mode (refer to the device's control panel or remote for specific button). This will disable self-leveling.
- Use the directional buttons on the device or remote control to adjust the laser plane to the desired angle.
- Confirm the angle with an external measuring tool if high precision is required for the slope.

Figure 6.3: Remote control for adjusting laser functions.
6.6. Using the Laser Target Plate
The laser target plate enhances the visibility of the laser beam, especially over longer distances or in bright conditions. Place the target plate at the desired measurement point to easily identify the laser line.

Figure 6.4: Laser target plate for improved beam visibility.
7. නඩත්තු කිරීම
- පිරිසිදු කිරීම: Regularly clean the laser level with a soft, damp cloth. Do not use harsh chemicals or abrasive cleaners. Ensure the laser output window is clean for optimal performance.
- ගබඩා: Store the device in its carrying case in a dry, cool place when not in use. Remove batteries if storing for extended periods to prevent leakage.
- ක්රමාංකනය: While the device is self-calibrating, periodic professional calibration is recommended to ensure continued accuracy, especially after significant impacts or prolonged use.
- බැටරි සත්කාර: Follow the manufacturer's instructions for charging and discharging NiMH batteries to maximize their lifespan.
8. දෝශ නිරාකරණය
| ගැටලුව | විය හැකි හේතුව | විසඳුම |
|---|---|---|
| ලේසර් කදම්භය දෘශ්යමාන නොවේ හෝ ඉතා අඳුරු නොවේ. |
|
|
| Laser beam is flashing or alarm is sounding. |
|
|
| වැරදි මිනුම්. |
|
|
9. පිරිවිතර
| ආදර්ශ අංකය | FMHT1-77441 |
| වෙළඳ නාමය | ස්ටැන්ලි ෆැට්මැක්ස් |
| ලේසර් පන්තිය | 2 පන්තිය |
| ලේසර් වර්ණය | කොළ පාටයි |
| නිරවද්යතාව | මීටර් 1.5 දී ±30 මි.මී |
| වැඩ කරන පරාසය | Up to 300 m (with detector) |
| බෑවුම් ගැලපීම | Manual, up to 10% on X and YZ axes |
| බලශක්ති ප්රභවය | NiMH Rechargeable Batteries (4x product-specific) |
| ත්රිපාද නූල් | 5/8" |
| මානයන් (L x W x H) | 28.5 x 40.5 x 48 සෙ.මී |
| බර | කිලෝ ග්රෑම් 7.08 කි |
| ද්රව්ය | රබර්, වීදුරු |
| මෙහෙයුම් ආකාරය | Auto-leveling, Manual |
10. වගකීම් සහ සහාය
Specific warranty information for the STANLEY FATMAX FMHT1-77441 Rotary Laser Level is not provided within this manual. Please refer to the warranty card included with your product or visit the official STANLEY webසවිස්තරාත්මක වගකීම් නියමයන් සහ කොන්දේසි සඳහා අඩවිය.
For technical support, service, or spare parts, please contact your local STANLEY dealer or authorized service center. Contact information can typically be found on the STANLEY official webඅඩවිය.