1. නිෂ්පාදන අවසන්view
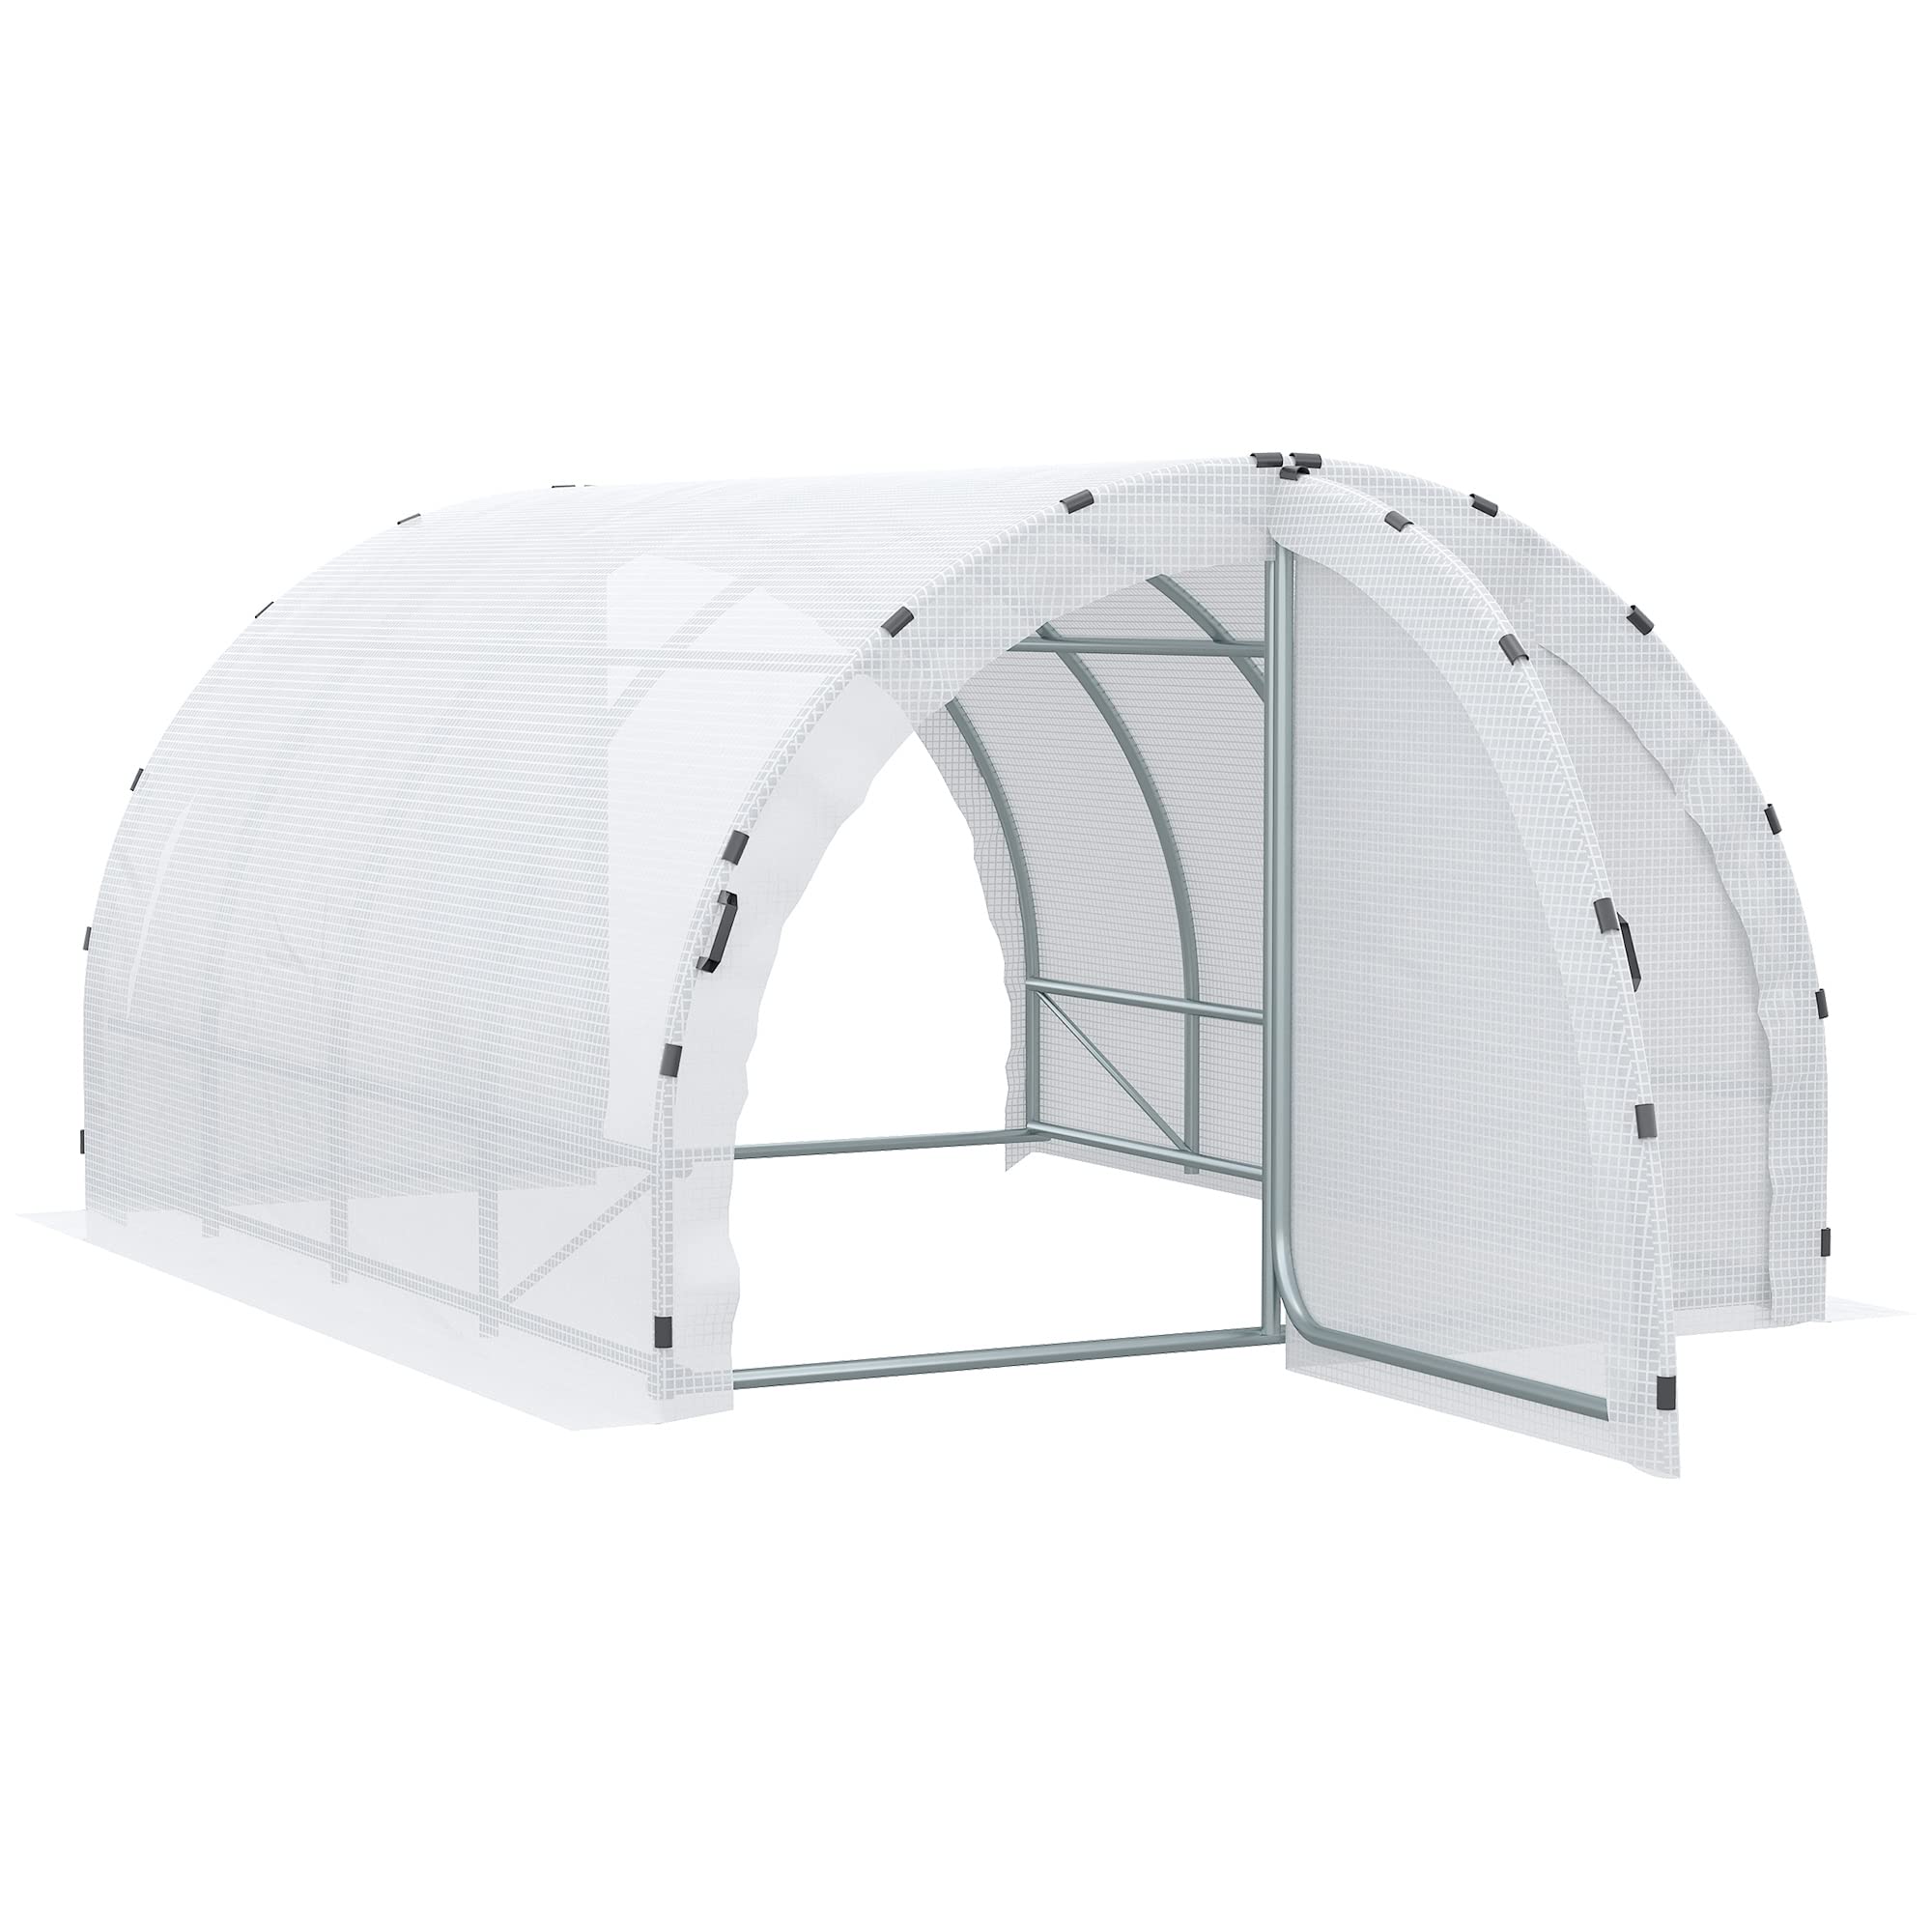
This manual provides detailed instructions for the assembly, operation, and maintenance of your Outsunny 12m² Tunnel Greenhouse, model 845-076WT0531. Designed for cultivating various plants, this greenhouse offers protection against weather elements and pests, ensuring optimal growth conditions. Its robust construction and thoughtful design aim to provide a reliable environment for your gardening needs.
2 ආරක්ෂිත තොරතුරු
එකලස් කිරීමට සහ භාවිතා කිරීමට පෙර කරුණාකර සියලුම ආරක්ෂක අනතුරු ඇඟවීම් සහ උපදෙස් හොඳින් කියවන්න. මෙම උපදෙස් අනුගමනය කිරීමට අපොහොසත් වීමෙන් නිෂ්පාදනයට තුවාල හෝ හානි සිදුවිය හැකිය.
- නැංගුරම් දැමීම: Always ensure the greenhouse is securely anchored to the ground to prevent overturning, especially in strong winds. Use all provided anchoring hardware.
- ස්ථානය: Avoid placing the greenhouse directly under trees or near power lines to prevent potential damage from falling branches or electrical hazards.
- තියුණු වස්තූන්: Do not leave sharp or pointed objects inside the greenhouse that could puncture the cover or cause injury.
- නිතිපතා පරීක්ෂා කිරීම: Periodically check the stability of the frame and the integrity of all fixings and the cover. Address any loose connections or damage immediately.
- වාතාශ්රය: Ensure adequate ventilation, especially during prolonged sun exposure, to prevent excessive heat buildup and potential fire risks.
- එකලස් කිරීම: Assembly should be performed by at least two adults. Wear appropriate safety gear, such as gloves, during assembly.
3. පැකේජ අන්තර්ගතය
එකලස් කිරීම ආරම්භ කිරීමට පෙර, පහත ලැයිස්තුගත කර ඇති සියලුම සංරචක පවතින බවත් හානි වී නොමැති බවත් තහවුරු කර ගන්න. කිසියම් කොටසක් අස්ථානගත වී හෝ හානි වී ඇත්නම්, කරුණාකර පාරිභෝගික සහාය අමතන්න.
- Galvanized Steel Frame Components (tubes, connectors, crossbars)
- Polyethylene (PE) Cover (140 g/m², anti-UV treated)
- Door Panels with Hinges and Handles
- Ground Anchoring Stakes/Ropes
- Clamps and Fasteners for Cover Attachment
- Assembly Hardware (screws, bolts, nuts)
4. සැකසීම සහ එකලස් කිරීම
Follow these steps for proper assembly of your tunnel greenhouse. It is recommended to assemble the greenhouse on a flat, level surface with sufficient space.
- අඩවිය සූදානම් කරන්න: Choose a suitable location, clear of debris, and ensure the ground is level. Consider sun exposure and wind direction.
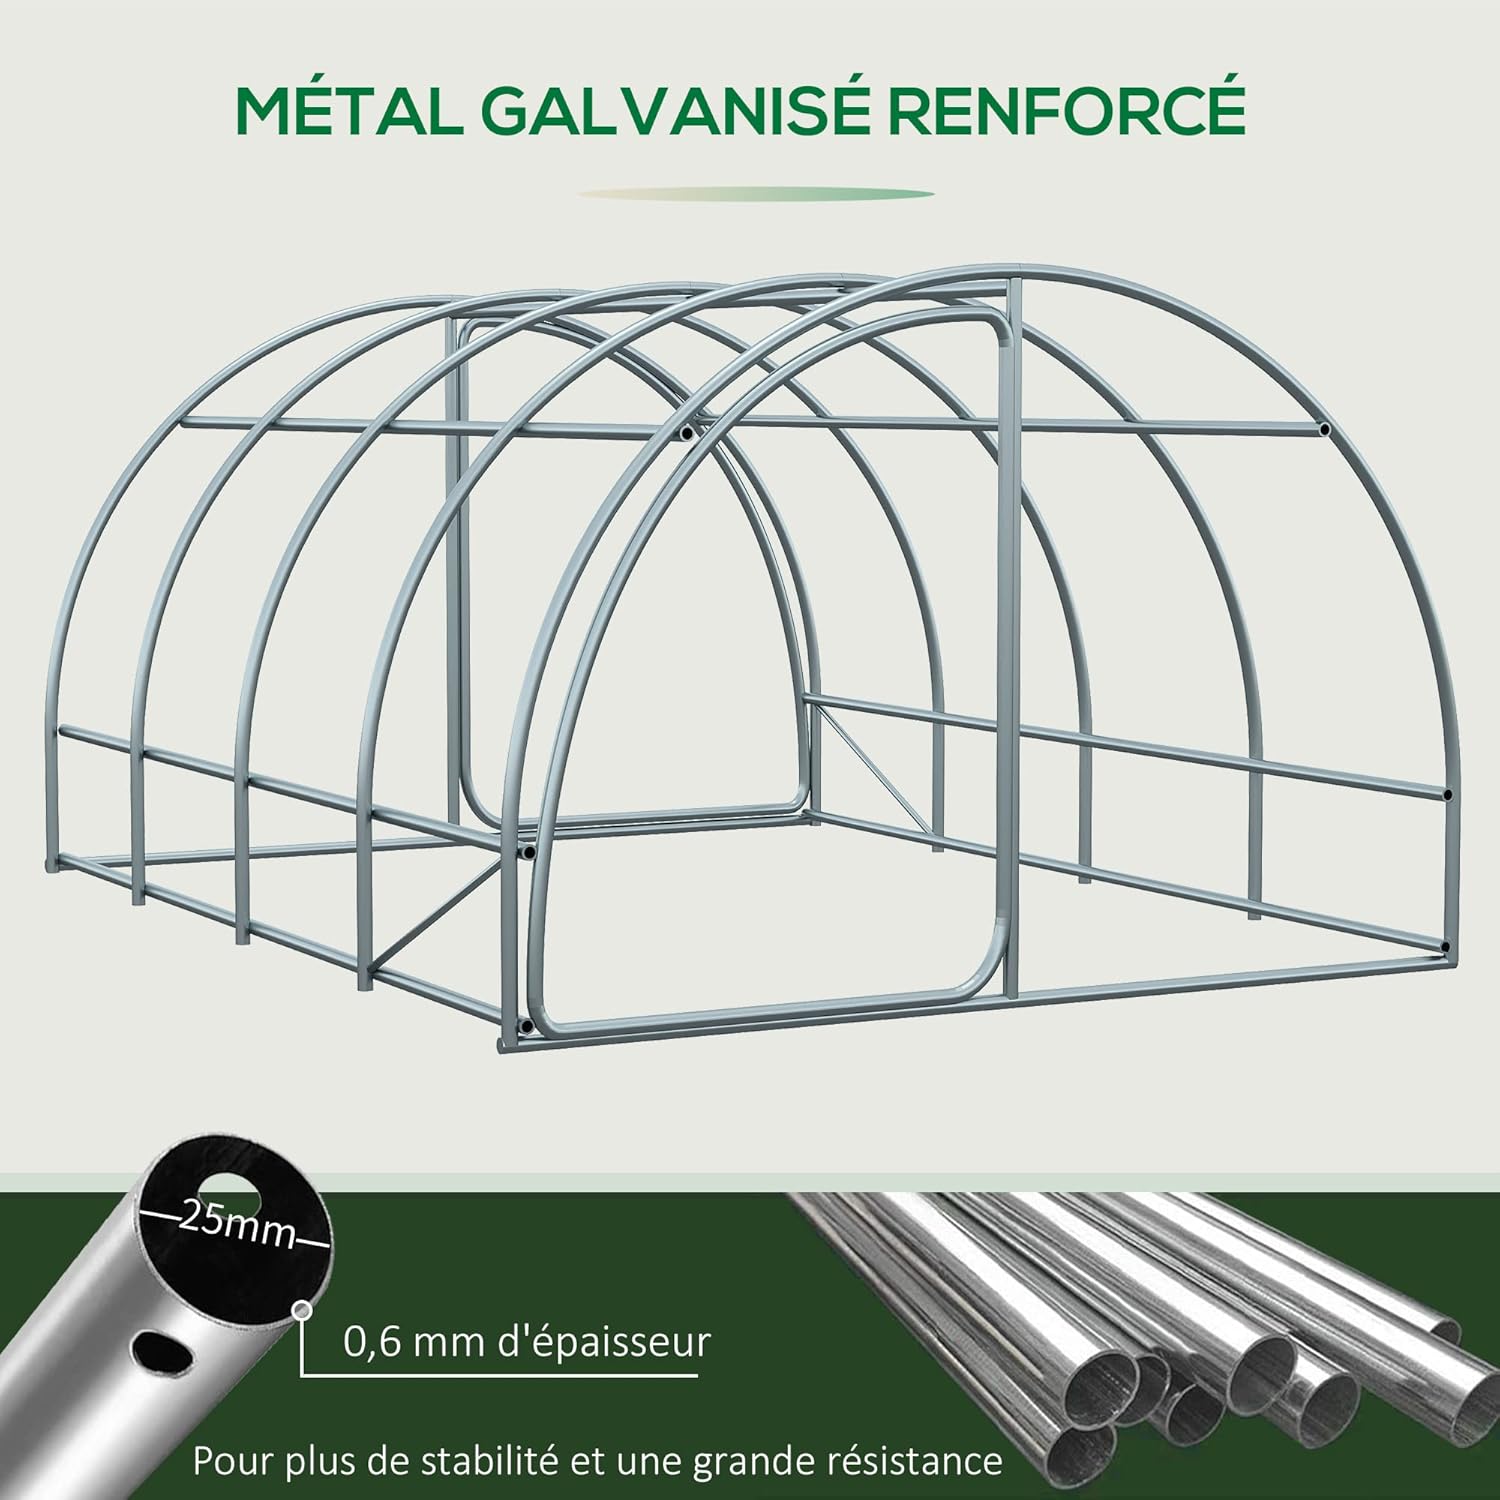
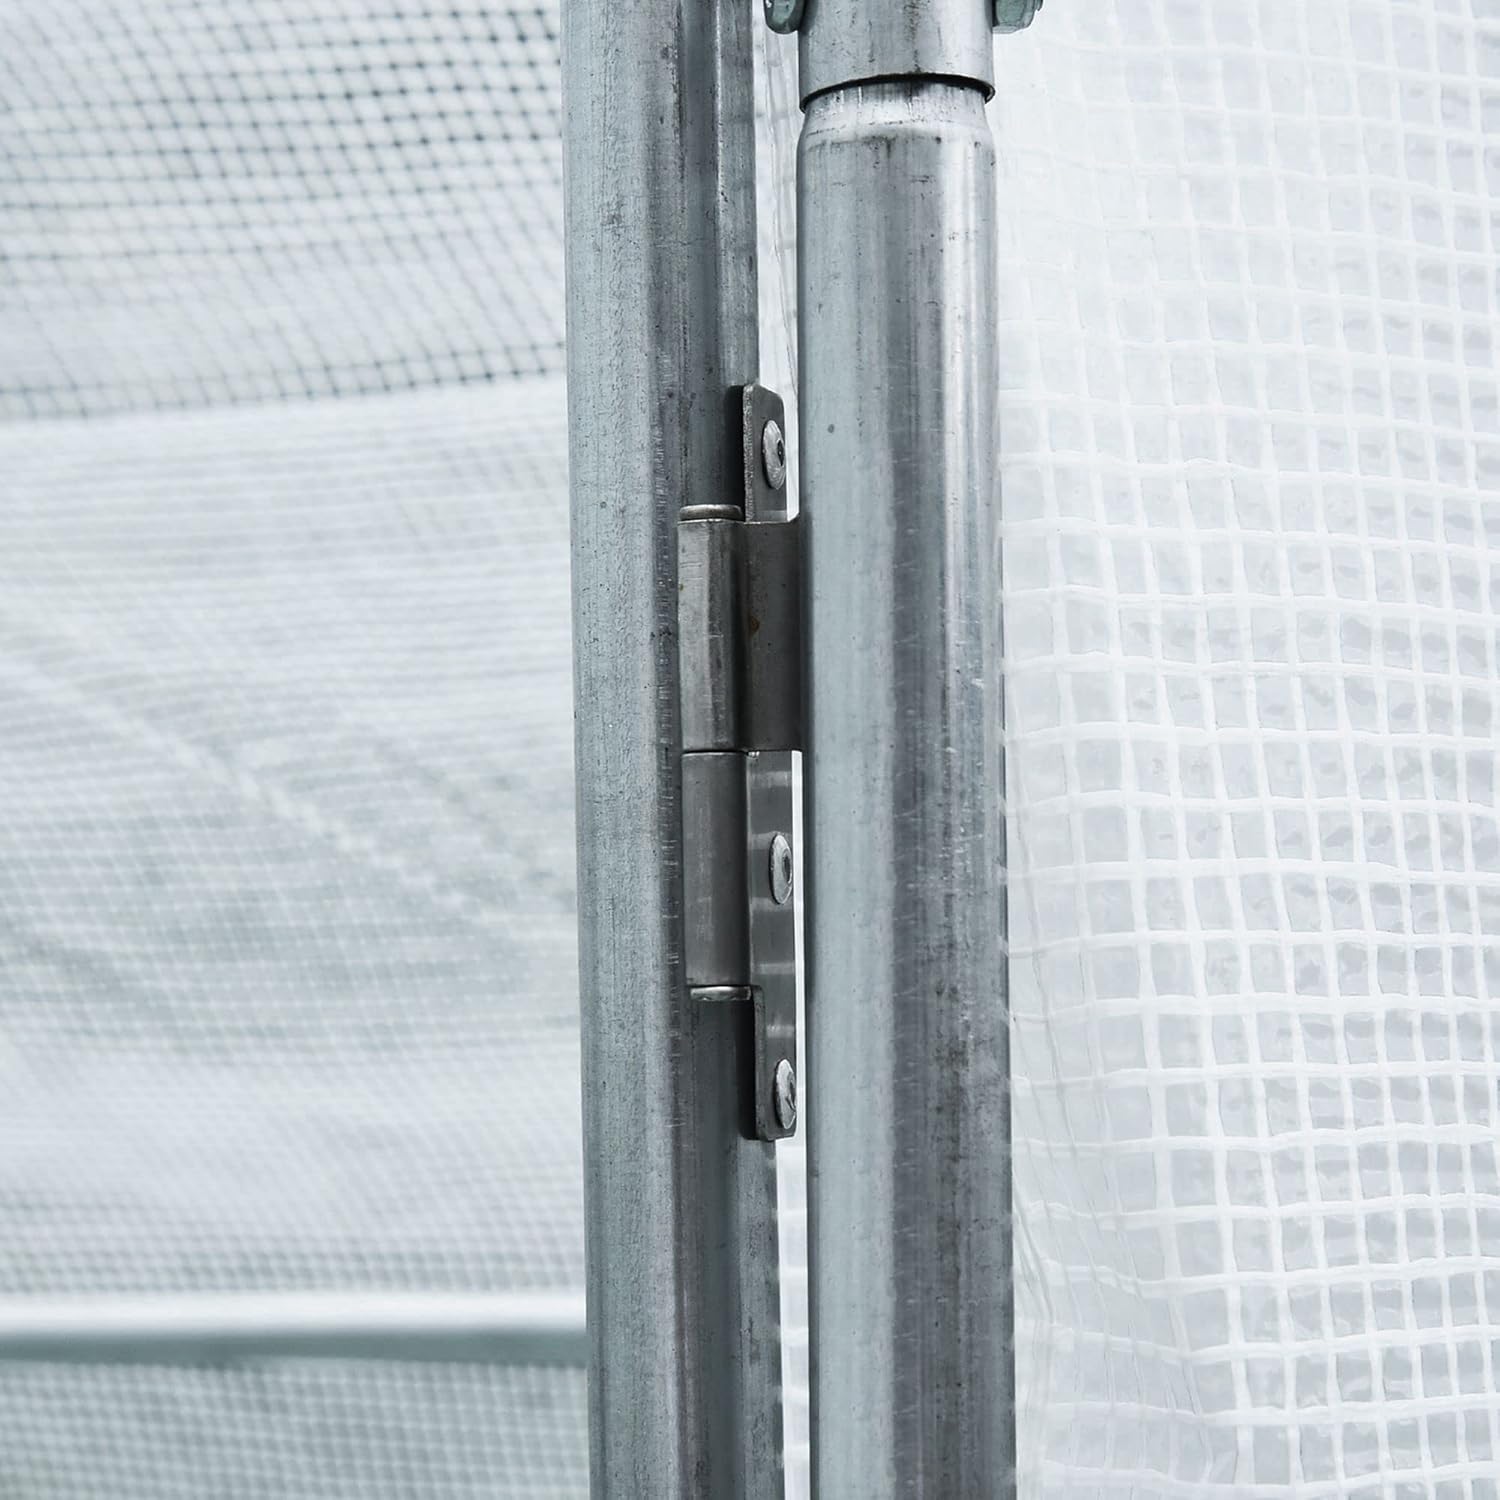
- රාමුව එකලස් කරන්න: Connect the galvanized steel tubes according to the provided diagram. Ensure all connections are secure using the supplied screws and bolts. The frame features 25mm diameter, 0.6mm thick reinforced tubes for stability.
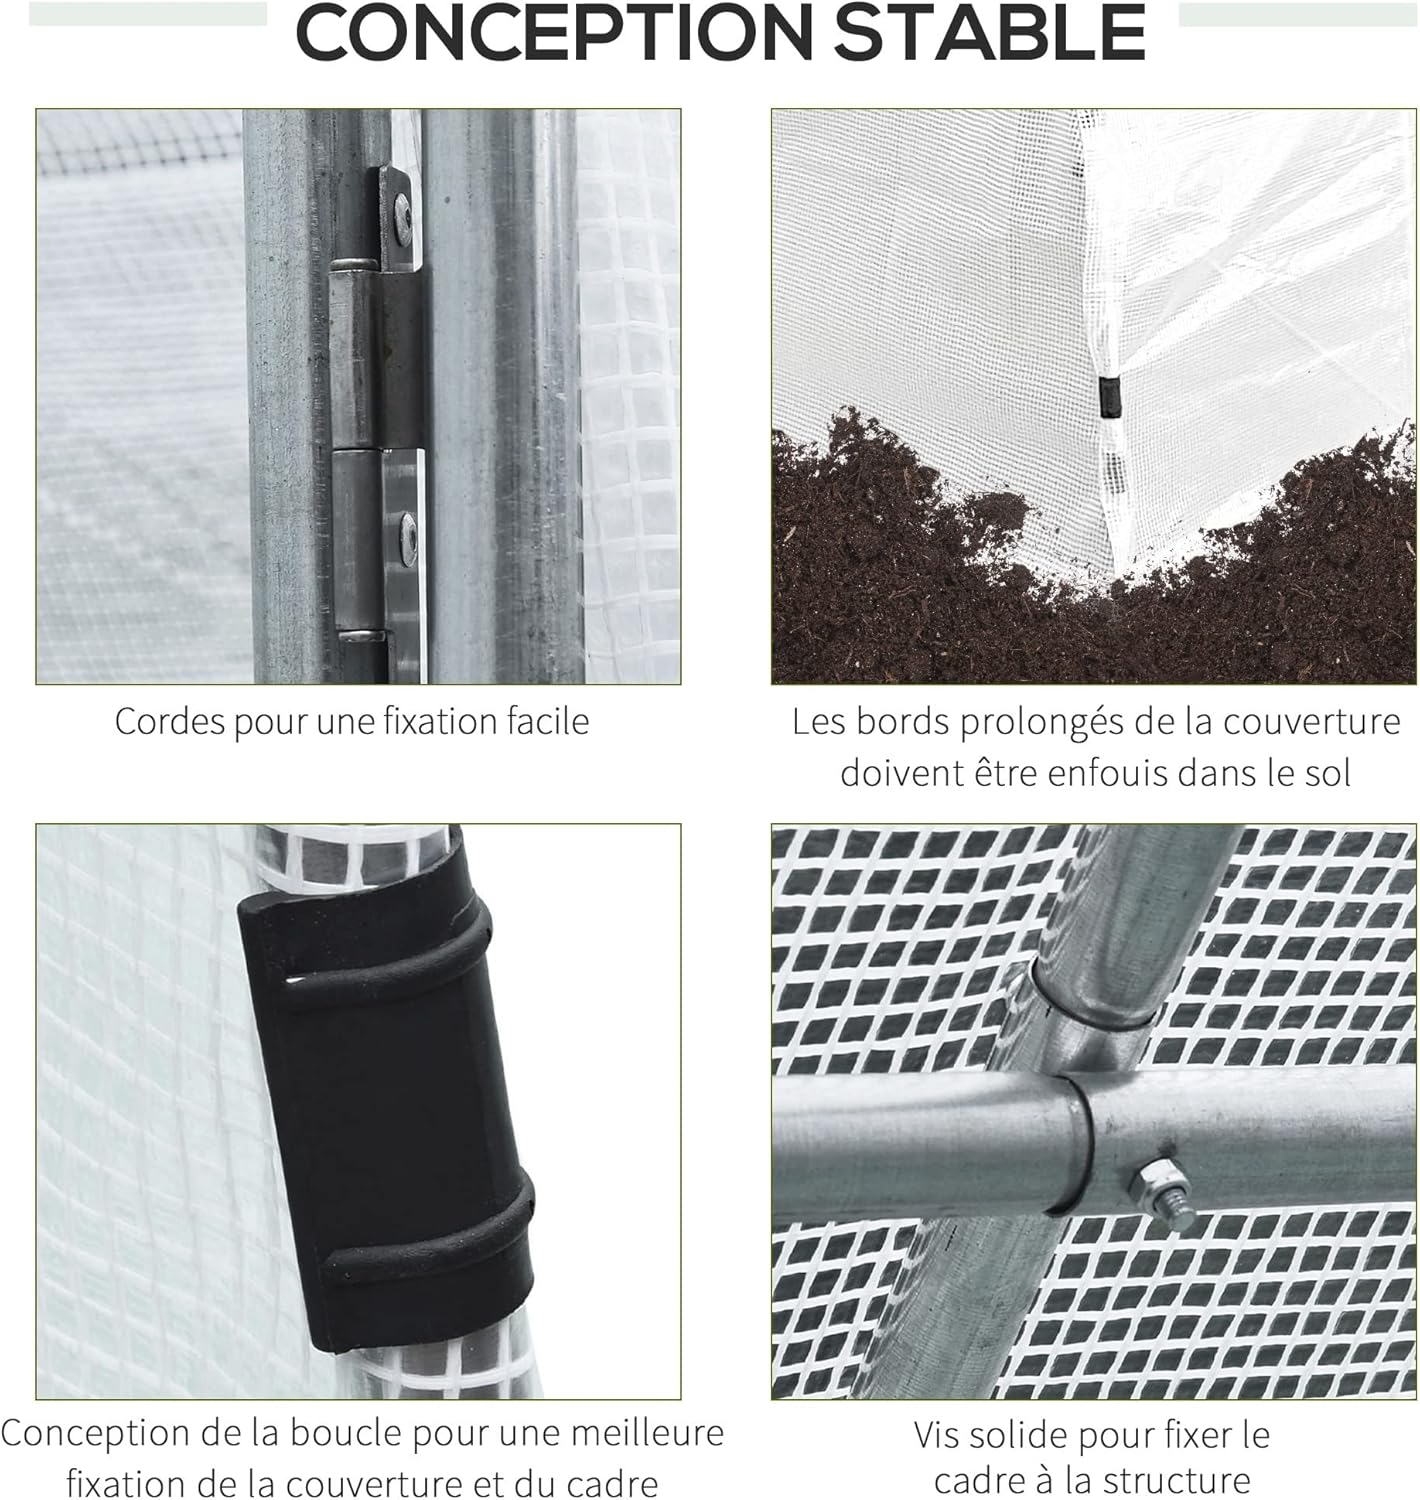
- කවරය අමුණන්න: Carefully drape the 140 g/m² anti-UV polyethylene cover over the assembled frame. Ensure it is centered and evenly distributed. The cover is designed with prolonged edges for optimal ground anchoring.
- කවරය සුරක්ෂිත කරන්න: Use the innovative clamp system to firmly attach the cover to the tubular chassis. Ensure all clamps are tightly fastened to prevent the cover from shifting in the wind.
- දොරවල් සවි කරන්න: Attach the two hinged door panels at the designated ends of the greenhouse. Ensure they open and close smoothly and that the handles and closing cords are functional.
- බිම් නැංගුරම් දැමීම: Bury the prolonged edges of the cover into the soil and use the provided ground anchoring stakes and ropes to secure the entire structure firmly to the ground. This is crucial for stability.
5. මෙහෙයුම් උපදෙස්
The Outsunny tunnel greenhouse is designed to create an optimal environment for plant growth. Here are guidelines for its effective use:
- වාතාශ්රය: The greenhouse features two doors with hinges, handles, and closing cords, allowing for optimal ventilation. Open the doors during warm periods to regulate temperature and humidity, preventing overheating and promoting air circulation.
- ශාක වගාව: Utilize the 12m² ground surface for cultivating a variety of plants, including flowers, vegetables, and fruits. The greenhouse provides protection against adverse weather conditions, birds, and harmful UV rays.
- උෂ්ණත්ව පාලනය: Monitor the internal temperature. In colder weather, keep doors closed to retain heat. In warmer weather, ensure adequate airflow to prevent heat stress on plants.


6. නඩත්තු කිරීම
Regular maintenance will extend the lifespan of your Outsunny tunnel greenhouse and ensure its continued performance.
- රාමු පරීක්ෂාව: Periodically check all frame connections for tightness. Tighten any loose screws or bolts. Inspect the galvanized steel for any signs of rust or damage.
- ආවරණ රැකවරණය: Inspect the polyethylene cover for tears, punctures, or excessive wear. Minor damage can often be repaired with specialized greenhouse repair tape. Clean the cover gently with mild soap and water to remove dirt and algae, which can reduce light transmission. Avoid harsh chemicals.
- නැංගුරම් පරීක්ෂාව: Regularly verify that the ground anchors and ropes are secure, especially after strong winds or heavy rainfall. Re-anchor if necessary.
- හිම ඉවත් කිරීම: In areas with heavy snowfall, gently remove accumulated snow from the greenhouse roof to prevent structural damage due to excessive weight.
7. දෝශ නිරාකරණය
Here are solutions to common issues you might encounter with your greenhouse:
- හරිතාගාර අස්ථාවරත්වය: If the greenhouse feels unstable, immediately check all frame connections and ground anchors. Ensure all screws are tightened and ground stakes are firmly in place. Re-bury the prolonged edges of the cover if they have become exposed.
- Cover Damage (Tears/Punctures): Inspect the cover for the source of the damage. For small tears, use a durable greenhouse repair tape. For larger damage, consider replacing the cover if available.
- දුර්වල වාතාශ්රය/අධික උනුසුම් වීම: Ensure both doors are fully open during warm periods to allow for maximum airflow. If plants are still overheating, consider adding additional shading during peak sun hours.
- වහලය මත ජලය එක්රැස් වීම: Ensure the cover is taut and properly secured to prevent water from pooling, which can cause sagging or damage. Adjust clamps and anchoring ropes as needed.
8. පිරිවිතර
| විශේෂාංගය | විස්තර |
|---|---|
| ආදර්ශ අංකය | 845-076WT0531 |
| සමස්ත මානයන් (L x W x H) | 400 x 300 x 200 cm (12 m² surface area) |
| බර | කිලෝ ග්රෑම් 35.5 කි |
| රාමු ද්රව්ය | ගැල්වනයිස් කරන ලද ලෝහ |
| Frame Tube Diameter | 25 මි.මී |
| Frame Tube Thickness | 0.6 මි.මී |
| ආවරණ ද්රව්ය | 140 g/m² Polyethylene (PE) |
| Cover Features | Anti-UV, Tear-resistant, Heat retention, Sun protection, Bird protection |
| දොරවල් ගණන | 2 (hinged, with handles and closing cords) |
| වර්ණය | සුදු |

9. වගකීම් සහ සහාය
For warranty information, please refer to the terms and conditions provided at the time of purchase or contact your retailer. Spare parts availability information is not provided in this manual.
For further assistance, technical support, or to inquire about replacement parts, please contact Outsunny customer support through their official website or your point of purchase. When contacting support, please have your model number (845-076WT0531) and purchase date ready.


