හැඳින්වීම
This manual provides detailed instructions for the safe installation, operation, and maintenance of your Project Source 11-Inch Flush Mount Light fixture. Please read this manual thoroughly before beginning installation and retain it for future reference. This product is designed for indoor use only.
ආරක්ෂිත තොරතුරු
WARNING: Risk of Electric Shock. Disconnect power at the fuse or circuit breaker before installing or servicing.
- සියලුම විදුලි සම්බන්ධතා දේශීය කේත, ආඥාපනත හෝ ජාතික විදුලි කේතය (NEC) ට අනුකූල විය යුතුය.
- ස්ථාපන ක්රියාවලිය පිළිබඳව ඔබට විශ්වාසයක් නොමැති නම් සුදුසුකම් ලත් විදුලි කාර්මිකයෙකුගෙන් විමසන්න.
- මෙම සවිකිරීම තෙත් හෝ තෙතමනය සහිත ස්ථානයක ස්ථාපනය නොකරන්න.amp ස්ථාන.
- Ensure all wires are properly connected and secured to prevent short circuits.
- උපරිම වොට් නොඉක්මවන්නtagමෙම සවිකිරීම සඳහා නිශ්චිතව දක්වා ඇත.
- වීදුරු කොටස් කැඩී යාම වැළැක්වීම සඳහා ප්රවේශමෙන් හසුරුවන්න.
පැකේජයේ අන්තර්ගතය
ස්ථාපනය ආරම්භ කිරීමට පෙර සියලුම සංරචක පවතින බව තහවුරු කර ගන්න:
- Project Source 11-Inch Flush Mount Light Fixture (2 units)
- Mounting Hardware Kit (screws, wire nuts)
- උපදෙස් අත්පොත (මෙම ලේඛනය)
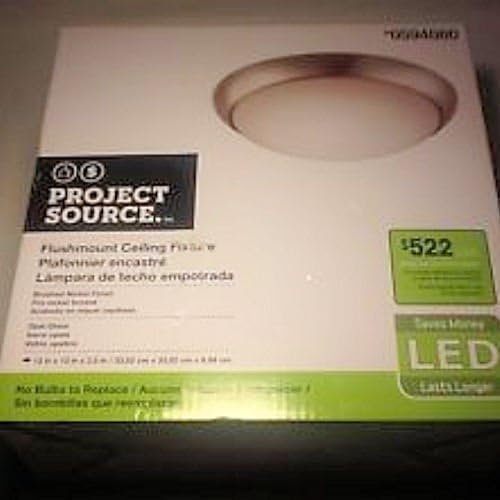
Image: The retail packaging box for the Project Source 11-Inch Flush Mount Light. The box is white with green accents, featuring an image of the light fixture and "PROJECT SOURCE" branding.
සැකසුම සහ ස්ථාපනය
අවශ්ය මෙවලම් (ඇතුළත් කර නැත):
- ෆිලිප්ස් හෙඩ් ඉස්කුරුප්පු නියන
- වයර් තීරු
- විදුලි පටි (විකල්ප)
- ආරක්ෂිත වීදුරු
ස්ථාපන පියවර:
- බලය අක්රිය කරන්න: ආලෝක සවිකිරීමේ ස්ථානයට බලය පාලනය කරන පරිපථ කඩනය හෝ ෆියුස් පෙට්ටිය සොයා ගන්න. ඉදිරියට යාමට පෙර විදුලිය සම්පූර්ණයෙන්ම අක්රිය කරන්න.
- පැරණි සවිකිරීම ඉවත් කරන්න (අදාළ නම්): Carefully remove any existing light fixture, noting the wiring connections.
- රැහැන් ඇදීම සූදානම් කරන්න: If necessary, strip approximately 1/2 inch of insulation from the ends of the house supply wires.
- සම්බන්ධක වයර්:
- සම්බන්ධ කරන්න කළු සවිකිරීමේ සිට වයර් දක්වා කළු (hot) wire from the ceiling box using a wire nut.
- සම්බන්ධ කරන්න සුදු සවිකිරීමේ සිට වයර් දක්වා සුදු (neutral) wire from the ceiling box using a wire nut.
- සම්බන්ධ කරන්න කොළ හෝ හිස් තඹ සවිකිරීමේ සිට බිම් වයර් දක්වා කොළ හෝ හිස් තඹ ground wire from the ceiling box using a wire nut.
Ensure all wire nuts are securely tightened. Wrap electrical tape around wire nuts for added security if desired.
- සවිකිරීමේ සවිකිරීම: Carefully tuck all wires into the junction box. Align the fixture's mounting holes with the screws on the junction box or mounting bracket. Secure the fixture to the ceiling using the provided screws.
- Install Glass Diffuser: Gently place the glass diffuser into the fixture and secure it according to the fixture's design (e.g., twist-lock, spring clips, or decorative nuts).
- බලය ප්රතිස්ථාපනය කරන්න: Turn the power back on at the circuit breaker or fuse box. Test the light fixture to ensure it functions correctly.

Image: A pair of Project Source 11-Inch Flush Mount Light fixtures. Each fixture features a brushed nickel base and a domed, frosted white glass diffuser, designed to provide soft, diffused light.
මෙහෙයුම් උපදෙස්
The Project Source 11-Inch Flush Mount Light is designed for simple operation. Once properly installed and wired, the light fixture is controlled by a standard wall switch connected to the circuit. Flip the wall switch to the "ON" position to illuminate the fixture, and to the "OFF" position to turn it off.
Note: This fixture uses integrated LED technology and does not require bulb replacement.
නඩත්තු කිරීම
To ensure the longevity and appearance of your light fixture, follow these simple maintenance guidelines:
- පිරිසිදු කිරීම: පිරිසිදු කිරීමට පෙර, පරිපථ කඩනයේදී සවිකිරීමේ බලය විසන්ධි කර ඇති බවට වග බලා ගන්න. මෘදු, වියලි හෝ තරමක් d භාවිතා කරන්න.amp cloth to wipe down the exterior surfaces. Do not use abrasive cleaners, solvents, or polishes as they may damage the finish or glass.
- වීදුරු රැකවරණය: The frosted glass diffuser can be carefully removed for cleaning if necessary. Wash with mild soap and water, rinse thoroughly, and dry completely before reattaching.
- බල්බ ආදේශ කිරීමක් නැත: This fixture features integrated LED components. There are no bulbs to replace. If the light stops working, refer to the Troubleshooting section.
දෝෂගවේෂණය
If your light fixture is not functioning as expected, consult the following common issues and solutions:
| ගැටලුව | විය හැකි හේතුව | විසඳුම |
|---|---|---|
| ආලෝකය ක්රියාත්මක නොවේ. |
|
|
| සැහැල්ලු දැල්වීම හෝ අඳුරු වීම. |
|
|
| Glass diffuser is loose. |
|
|
If the problem persists after trying these solutions, contact a qualified electrician or customer support.
පිරිවිතර
| විශේෂාංගය | විස්තර |
|---|---|
| වෙළඳ නාමය | ව්යාපෘති මූලාශ්රය |
| ආකෘතිය | 11-Inch Flush Mount Light (2-Pack) |
| නිෂ්පාදන මානයන් | අඟල් 11 x 11 x 3 |
| අයිතමයේ බර | රාත්තල් 4.1 කි |
| ද්රව්ය | වීදුරු |
| උපරිම ගැළපෙන වොට්tage | වොට් 120 |
| බල්බ වර්ගය | ඒකාබද්ධ LED |
| ශෛලිය | සම්භාව්ය |
වගකීම් සහ සහාය
This product is a refurbished item. Please refer to the seller's specific return and warranty policy at the point of purchase for details regarding coverage and support for refurbished products. General support for Project Source products may be available through their official channels.
තාක්ෂණික සහාය හෝ වැඩිදුර විමසීම් සඳහා, කරුණාකර සිල්ලර වෙළෙන්දා හෝ නිෂ්පාදකයා සෘජුවම අමතන්න.


