හැඳින්වීම
This manual provides essential information for the proper installation and understanding of the Dorman 926-092 Body Mount Retaining Nut. This component is designed to meet original equipment specifications for fit, form, and function, ensuring reliable performance in automotive applications. Please read these instructions carefully before proceeding with installation.
නිෂ්පාදනය අවසන්view
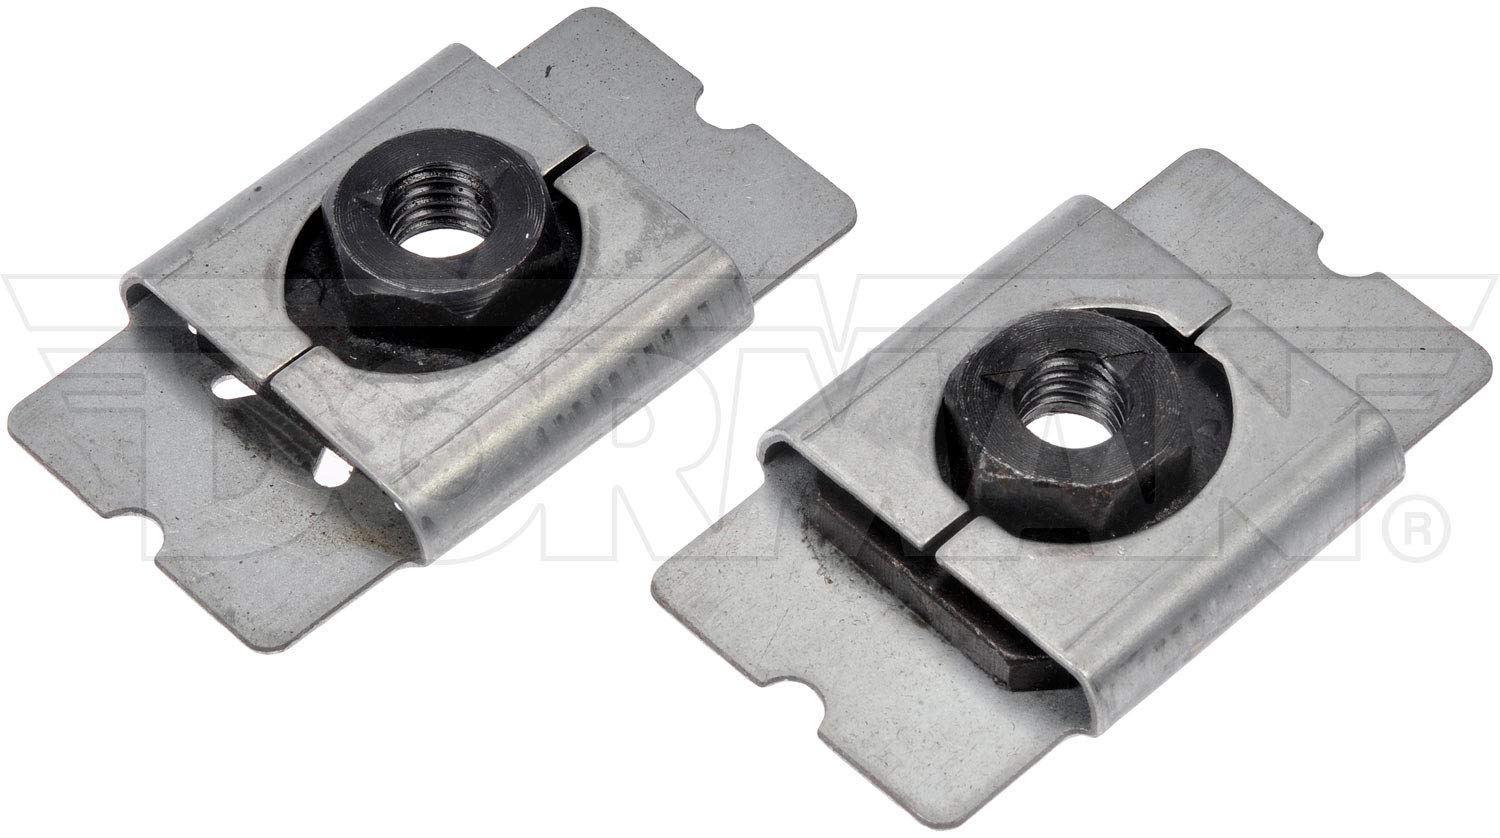
රූපය: Dorman 926-092 Body Mount Retaining Nut. This image displays the hex-head retaining nut, typically used in body mount applications.
The Dorman 926-092 is a high-quality retaining nut engineered for specific automotive body mount applications. It features a hex fastener type, 3/8-24 UNC thread size, and a machined silver finish. Constructed from alloy steel, this nut is designed for durability and secure fastening.
පිරිවිතර
| වෙළඳ නාමය | ඩෝර්මන් |
| ආදර්ශ අංකය | 926-092 |
| ද්රව්ය | ඇලෝයි වානේ |
| ගාංචු වර්ගය | හෙක්ස් |
| නූල් ප්රමාණය | 3/8-24 UNC |
| නූල් විලාසය | Unified National Coarse (UNC) |
| නූල් ආවරණය | සම්පුර්ණයෙන්ම නූල් කර ඇත |
| නූල් පන්තිය | Class 2A or Class 2B |
| බාහිර නිමාව | යන්ත්රගත කර ඇත |
| වර්ණය | රිදී |
| මානයන් (L x W x H) | අඟල් 3.5 x 2 x 1.37 |
| අයිතමයේ බර | අවුන්ස 8.64 කි |
| කෑලි ගණන | 1 |
| OEM කොටස අංකය | 2L1Z-78101C38-AA |
| UPC | 037495919050 |
ස්ථාපන උපදෙස්
The Dorman 926-092 Body Mount Retaining Nut is designed for direct replacement and should be installed by a qualified technician or an individual with appropriate automotive repair experience. Always refer to your vehicle's specific service manual for detailed torque specifications and procedures.
අවශ්ය මෙවලම්:
- Appropriate wrench or socket for a hex fastener (size specific to application).
- ව්යවර්ථ යතුර.
- Vehicle service manual for specific torque values and procedures.
- ආරක්ෂිත වීදුරු සහ අත්වැසුම්.
ස්ථාපන පියවර:
- ආරක්ෂාව පළමුව: Ensure the vehicle is safely supported on a lift or jack stands on a level surface. Disconnect the battery if necessary, following vehicle manufacturer guidelines.
- Access the Body Mount: Locate the body mount assembly requiring the retaining nut replacement. This may involve removing other components to gain access.
- පැරණි ගෙඩිය ඉවත් කරන්න (අදාළ නම්): If replacing an existing nut, carefully remove the old fastener using the appropriate tools. Inspect the threads on the body mount stud for damage. Clean any rust or debris from the stud.
- Position the New Nut: Place the Dorman 926-092 retaining nut onto the body mount stud.
- අතින් තද කිරීම: Hand-tighten the nut to ensure it threads correctly without cross-threading.
- ව්යවර්ථය සිට පිරිවිතර දක්වා: Using a torque wrench, tighten the nut to the vehicle manufacturer's specified torque value. Refer to your vehicle's service manual for the exact specification. Over-tightening or under-tightening can lead to component failure.
- අවසාන පරීක්ෂාව: Verify that the nut is securely fastened and that all surrounding components are properly reinstalled.
වැදගත්: Always follow the vehicle manufacturer's specific instructions for body mount replacement and torque specifications. Failure to do so can compromise vehicle safety and performance.
මෙහෙයුම
Once properly installed and torqued to specification, the Dorman 926-092 Body Mount Retaining Nut functions by securely holding the vehicle's body to its frame. Its design ensures a tight, vibration-resistant connection, contributing to the structural integrity and ride quality of the vehicle. No further operational steps are required beyond correct installation.
නඩත්තු කිරීම
The Dorman 926-092 Body Mount Retaining Nut requires minimal maintenance after proper installation. Periodic inspection during routine vehicle service is recommended to ensure its continued integrity:
- දෘශ්ය පරීක්ෂාව: Check for any signs of corrosion, damage, or loosening.
- ව්යවර්ථ පරීක්ෂාව: If any loosening is suspected or during major suspension/body work, verify the torque of the nut against the vehicle manufacturer's specifications.
- පිරිසිදු කිරීම: Keep the area around the body mounts free from excessive dirt, salt, and debris to prevent premature corrosion.
If any damage or significant corrosion is observed, replacement of the nut may be necessary to maintain vehicle safety.
දෝෂගවේෂණය
Most issues related to a body mount retaining nut stem from improper installation or severe operating conditions. Below are common concerns and their potential solutions:
- Nut Will Not Thread On:
- Ensure the correct nut size and thread pitch (3/8-24 UNC) are being used for the stud.
- Inspect the stud threads for damage (e.g., cross-threading, rust, deformation). Clean or repair threads as necessary.
- Verify the nut itself is not damaged.
- Nut Loosens After Installation:
- Confirm the nut was torqued to the vehicle manufacturer's exact specifications using a calibrated torque wrench.
- Inspect the body mount bushing and surrounding components for wear or damage that could lead to movement.
- Ensure no foreign material is preventing proper seating of the nut.
- Corrosion or Rust:
- While the nut is made of alloy steel, exposure to harsh environments can still cause corrosion. Regular cleaning and inspection can help.
- If severe, replacement is recommended to maintain structural integrity.
If issues persist, consult a professional automotive technician.
වගකීම් තොරතුරු
Dorman products are manufactured to high-quality standards. For specific warranty details regarding the Dorman 926-092 Body Mount Retaining Nut, please refer to the official Dorman product warranty policy available on the ඩෝර්මන් නිෂ්පාදන webඅඩවිය or contact Dorman customer service directly. Keep your proof of purchase for any warranty claims.
පාරිභෝගික සහාය
For technical assistance, installation questions, or product inquiries, please contact Dorman Products customer support. You can find contact information and additional resources on the official ඩෝර්මන් නිෂ්පාදන webඅඩවිය.


