1. හැඳින්වීම
Welcome to the user manual for your Modecom Oberon Pro Glass USB 3.0 White PC Case. This manual provides essential information for the proper installation, operation, and maintenance of your computer chassis. Please read this manual thoroughly before beginning assembly to ensure correct setup and to prevent damage to your components or the case itself.
ආරක්ෂිත පූර්වාරක්ෂාවන්:
- කිසියම් සංරචකයක් ස්ථාපනය කිරීමට හෝ ඉවත් කිරීමට පෙර සෑම විටම බිත්ති අලෙවිසැලෙන් බල සැපයුම විසන්ධි කරන්න.
- විද්යුත් ස්ථිතික විසර්ජනය (ESD) වළක්වා ගැනීම සඳහා සංරචක ප්රවේශමෙන් හසුරුවන්න. ප්රති-ස්ථිතික මැණික් කටු පටියක් භාවිතා කිරීම සලකා බලන්න.
- කුඩා කොටස් සහ ඇසුරුම් ද්රව්ය දරුවන්ගෙන් ඈත් කර තබන්න.
- අධික උනුසුම් වීම වැළැක්වීම සඳහා නඩුව වටා නිසි වාතාශ්රය සහතික කරන්න.
2. නිෂ්පාදන අවසන්view
The Modecom Oberon Pro Glass is a stylish mid-tower PC case designed to house your computer components. It features a tempered glass side panel for showcasing your build and a clean white finish. The front panel includes convenient USB 3.0 ports for high-speed data transfer.
රූපය 2.1: ඉදිරිපස-දකුණ view of the Modecom Oberon Pro Glass PC Case. This image displays the white exterior, the front panel with ventilation, and the top-mounted I/O ports including USB 3.0.
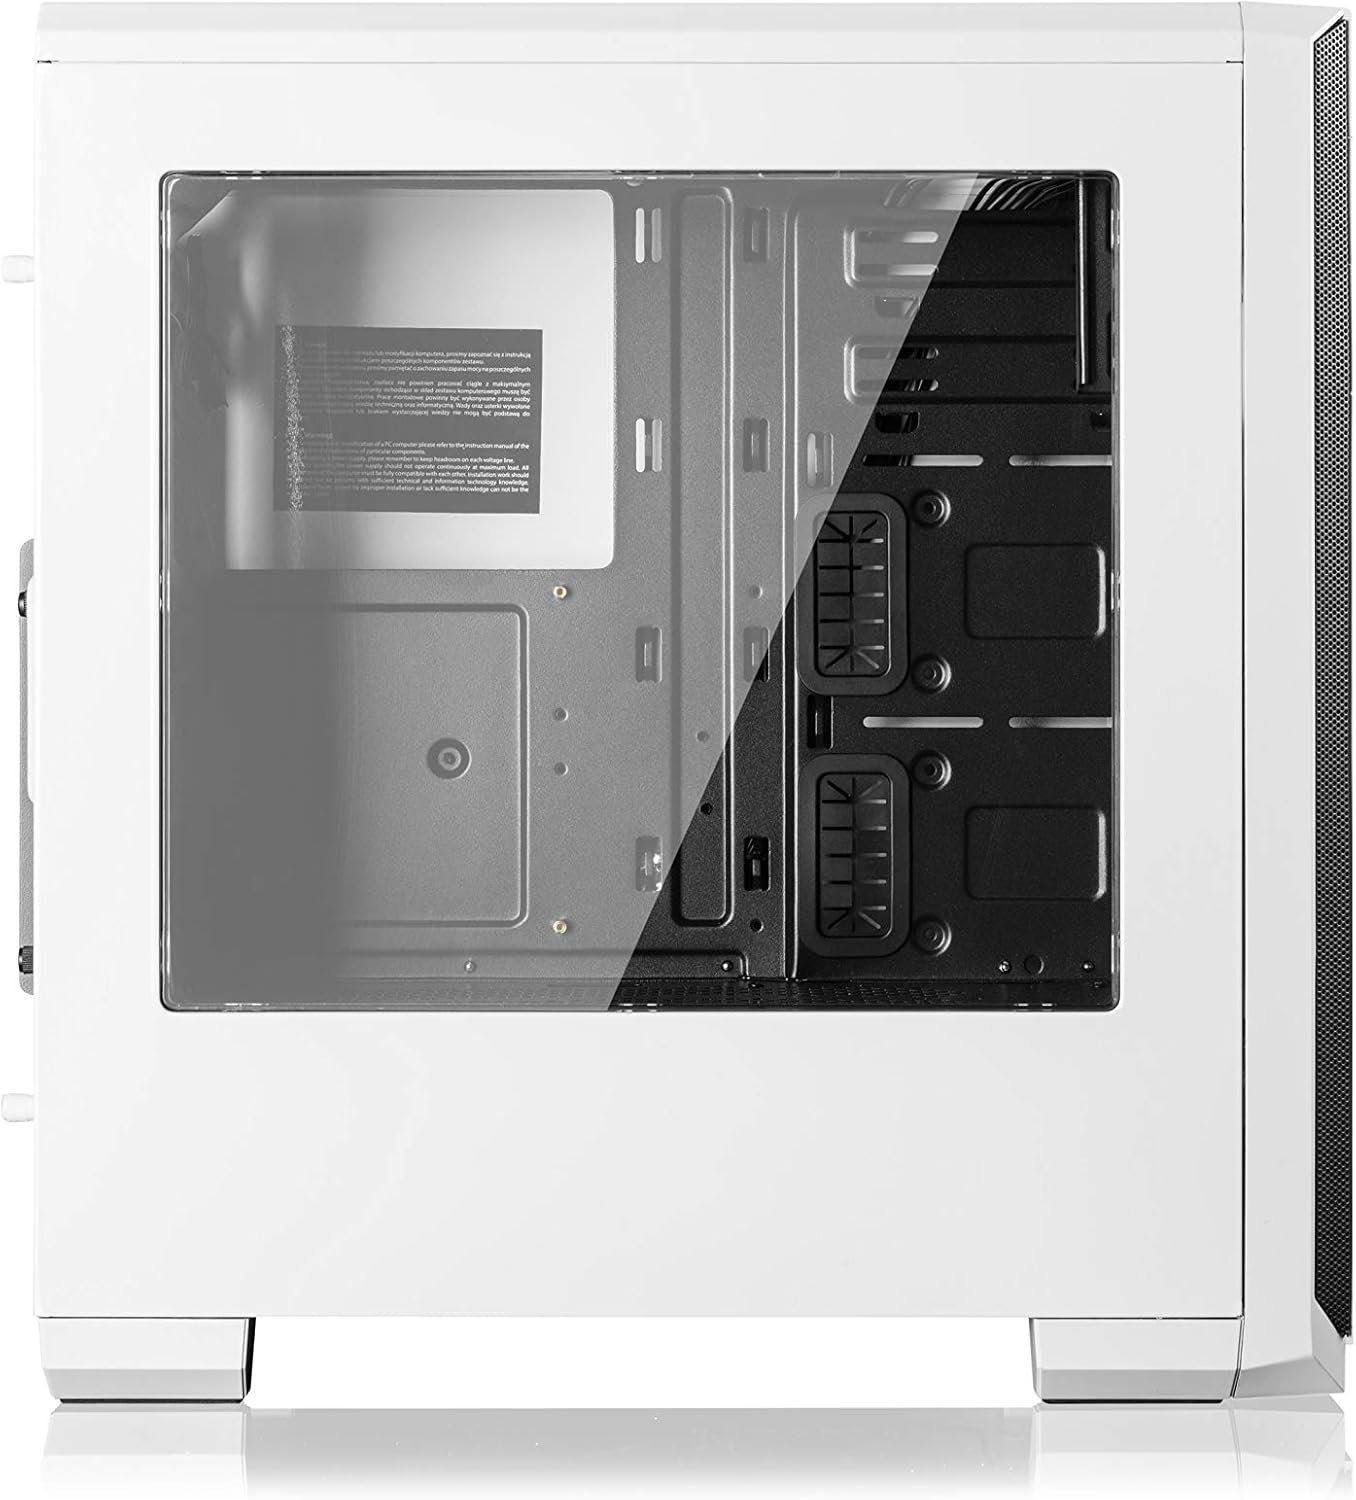
රූපය 2.2: පැත්ත view of the Modecom Oberon Pro Glass PC Case, highlighting the tempered glass side panel. This panel allows for a clear view of the internal components when installed.
3. පිහිටුවීම සහ ස්ථාපනය
Follow these steps to install your computer components into the Modecom Oberon Pro Glass PC Case.
3.1 ඉවත් කිරීම සහ මූලික පරීක්ෂාව
- පරිගණක කවරය එහි ඇසුරුම්වලින් ප්රවේශමෙන් ඉවත් කරන්න.
- Inspect the case for any signs of damage during transit. Contact your retailer immediately if damage is found.
- Remove the tempered glass side panel by unscrewing the thumb screws, typically located at the rear corners of the panel. Set the panel aside on a soft, flat surface to prevent scratches.
3.2. මවු පුවරු ස්ථාපනය

රූපය 3.1: අභ්යන්තරය view of the Modecom Oberon Pro Glass PC Case, showing the motherboard tray, drive bays, and cable management cutouts.
- Install the I/O shield that came with your motherboard into the designated opening at the rear of the case.
- Ensure the motherboard standoffs are correctly aligned for your motherboard's form factor (ATX, Micro ATX, or ITX). Install additional standoffs if necessary.
- ඔබේ මවු පුවරුව ස්ටෑන්ඩ්ඕෆ් මත ප්රවේශමෙන් තබන්න, ඉස්කුරුප්පු සිදුරු පෙළගස්වන්න.
- සපයා ඇති ඉස්කුරුප්පු වලින් මවු පුවරුව සුරක්ෂිත කරන්න. ඕනෑවට වඩා තද නොකරන්න.
3.3. බල සැපයුම් ඒකකය (PSU) ස්ථාපනය
- Position your PSU in the dedicated compartment, typically at the bottom rear of the case.
- Align the screw holes on the PSU with those on the case's rear panel.
- Secure the PSU with the provided screws.
3.4. Storage Drive Installation (HDD/SSD)
- Locate the 3.5" HDD bays and 2.5" SSD mounting points within the case.
- For 3.5" HDDs, slide the drive into a bay and secure it with screws or tool-less clips if available.
- For 2.5" SSDs, mount them to the designated trays or screw points, typically behind the motherboard tray or in specific drive cages.
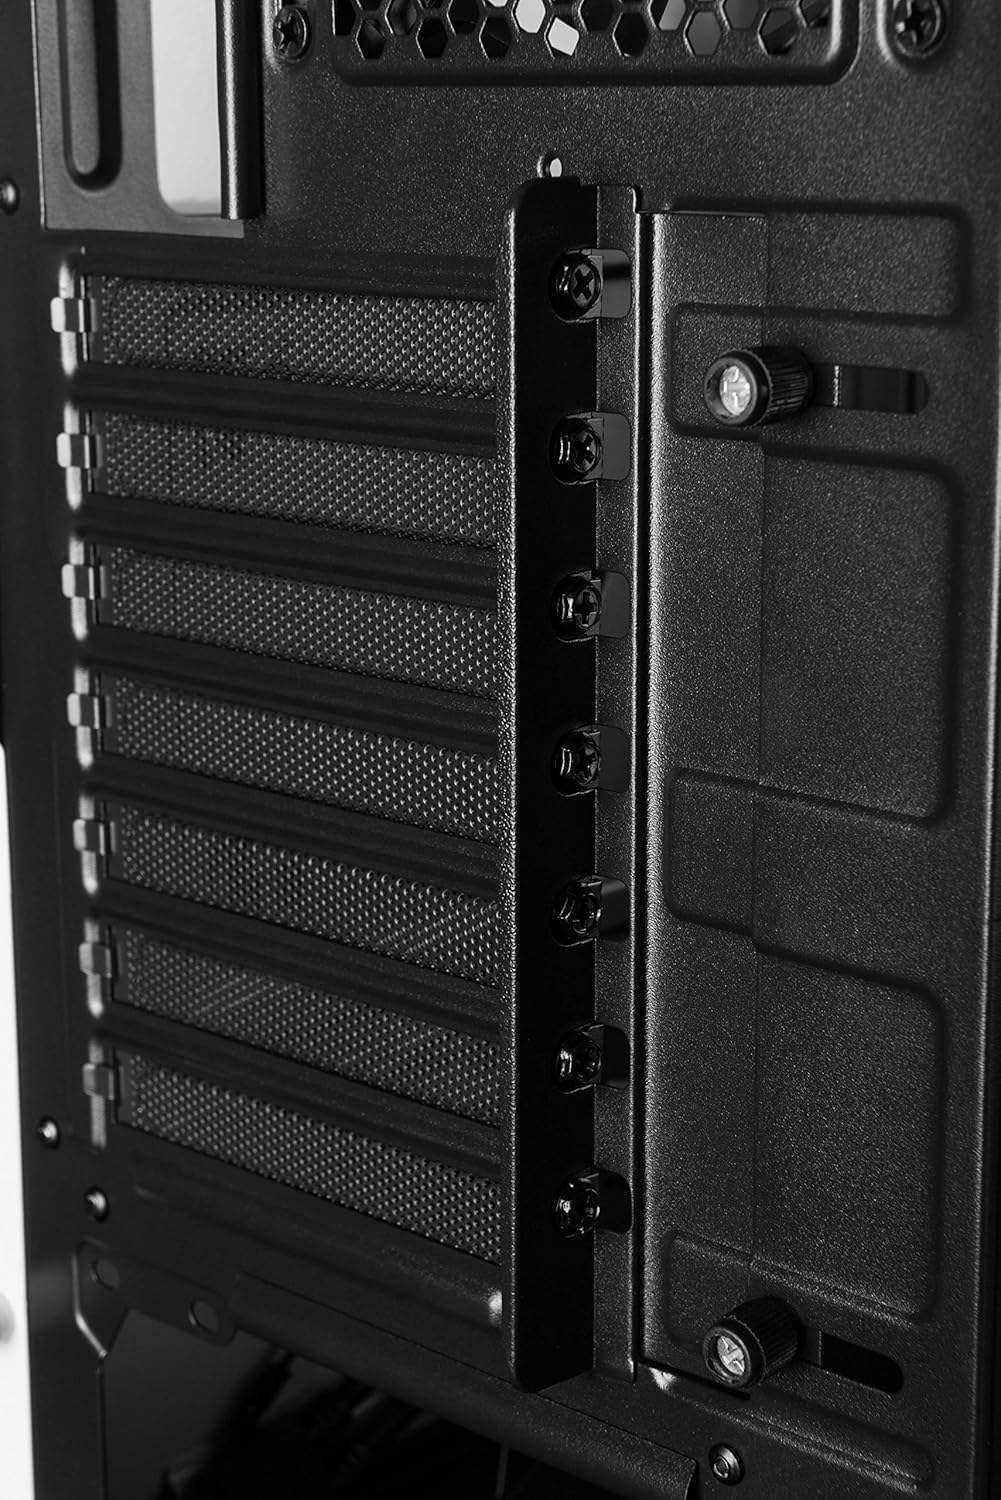
3.5. Expansion Card Installation (GPU, PCIe cards)

රූපය 3.2: පසුපස අභ්යන්තරය view of the Modecom Oberon Pro Glass PC Case, illustrating the expansion slot covers and thumb screws for securing PCIe cards.
- Remove the necessary expansion slot covers from the rear of the case, corresponding to your card's slot on the motherboard.
- Insert your expansion card (e.g., graphics card) firmly into the PCIe slot on the motherboard.
- Secure the card to the case with the provided screws or retention mechanism.
3.6. Front Panel Connector Installation
- Connect the front panel cables (USB 3.0, HD Audio, Power Switch, Reset Switch, Power LED, HDD LED) to their respective headers on your motherboard. Refer to your motherboard manual for exact pin layouts.
3.7. කේබල් කළමනාකරණය
- Utilize the cable routing cutouts and tie-down points behind the motherboard tray to organize cables. This improves airflow and aesthetics.
- Once all components are installed and cables managed, reattach the tempered glass side panel and secure it with the thumb screws.
4. මෙහෙයුම
After successful installation, your PC is ready for operation.
- බල ගැන්වීම: නඩුවේ ඉහළ I/O පුවරුවේ ඇති බල බොත්තම ඔබන්න.
- Using Front Panel Ports: The front panel includes USB 3.0 ports and audio jacks. Connect your USB devices (e.g., flash drives, external hard drives) to the USB ports for data transfer. Plug your headphones or microphone into the respective audio jacks.
5. නඩත්තු කිරීම
නිතිපතා නඩත්තු කිරීම ඔබේ පරිගණක සංරචකවල ප්රශස්ත ක්රියාකාරිත්වය සහ කල්පැවැත්ම සහතික කිරීමට උපකාරී වේ.
- දූවිලි පෙරහන්: Periodically remove and clean the dust filters (if present) to maintain good airflow and prevent dust buildup inside the case. Use compressed air or a soft brush.
- බාහිර පිරිසිදු කිරීම: Wipe the exterior surfaces of the case with a soft, damp රෙදි. නිමාව හෝ තෙතමනය සහිත වීදුරුවට හානි කළ හැකි උල්ෙල්ඛ පිරිසිදු කරන්නන් හෝ ද්රාවක වලින් වළකින්න.
- තෙම්පරාදු වීදුරු පැනලය: Clean the tempered glass with a glass cleaner and a microfiber cloth to avoid streaks and scratches.
6. දෝශ නිරාකරණය
ඔබට ගැටළු ඇති වුවහොත්, පහත සඳහන් මූලික දෝශ නිරාකරණ පියවර සලකා බලන්න:
- පද්ධතිය ක්රියාත්මක නොවේ:
- PSU එක ක්රියාත්මක කර බිත්ති අලෙවිසැලට නිසි ලෙස සම්බන්ධ කර ඇති බවට වග බලා ගන්න.
- ඉදිරිපස පැනල බල ස්විච් කේබලය මවු පුවරුවේ ශීර්ෂයට නිවැරදිව සම්බන්ධ වී ඇති බව තහවුරු කරගන්න.
- මවු පුවරුවට සහ සංරචක වලට ඇති සියලුම බල සම්බන්ධතා පරීක්ෂා කරන්න.
- USB පෝට් ක්රියා නොකරයි:
- Confirm that the front panel USB 3.0 cable is securely connected to the corresponding header on the motherboard.
- විවිධ USB උපාංග සමඟ පරීක්ෂා කරන්න.
- අධික ශබ්දය:
- Identify the source of the noise (e.g., case fans, CPU cooler fan, GPU fan).
- Ensure all fans are free from obstructions and properly secured.
- Clean any dust buildup on fans.
For more complex issues, consult your component manuals or seek professional assistance.
7. පිරිවිතර
| විශේෂාංගය | විස්තරය |
|---|---|
| වෙළඳ නාමය | මොඩෙකොම් |
| මාදිලියේ නම | Oberon Pro Glass |
| ආදර්ශ අංකය | AT-OBERON-PG-20-000000-0002 |
| නඩු වර්ගය | මැද කුළුණ |
| වර්ණය | සුදු |
| ද්රව්ය | පොලිකාබනේට් (PC) |
| අනුකූල මවු පුවරු | ATX, Micro ATX, ITX |
| ඉදිරිපස I / O වරාය | USB 3.0, Audio In/Out |
| බල සැපයුම | W/O PSU (Power Supply Unit not included) |
| අයිතමයේ බර | කිලෝ ග්රෑම් 2 යි |
| ජාත්යන්තර ලිපි සංග්රහය | 05901885248370 |
8. වගකීම් සහ සහාය
වගකීම් තොරතුරු:
Modecom provides a guarantee of spare parts availability for 2 years from the date of purchase. This ensures that essential components for repair or replacement will be accessible within this period.
පාරිභෝගික සහාය:
For technical assistance, warranty claims, or further inquiries, please refer to the official Modecom website or contact your local retailer where the product was purchased. Ensure you have your product model number and proof of purchase available when seeking support.


