1. හැඳින්වීම
This manual provides detailed instructions for the ipega PG-9162 Mini Wireless Game Controller. This controller is designed for use with the Nintendo Switch console, offering both wireless and wired connectivity options. It features a compact design, six-axis gyroscope, dual motor vibration, and a TURBO function to enhance your gaming experience.

රූපය 1.1: ඉදිරිපස view of the ipega PG-9162 Mini Wireless Game Controller.
2. නිෂ්පාදන ලක්ෂණ
- ගැළපුම: Designed for the Nintendo Switch host, supporting both wireless and wired connections to the Switch dock.
- Ergonomic Design: Small and exquisite handle for comfortable grip during extended gaming sessions.
- Six-axis Gyroscope: Built-in six-axis gyro chip for precise motion control and fine-tuning assistance in games.
- Dual Motor Vibration: Integrated dual motors provide immersive feedback based on in-game actions.
- ටර්බෝ කාර්යය: Supports continuous TURBO function for rapid button presses.
- දිගු බැටරි ආයු කාලය: Built-in 380mAh battery capacity provides over 8 hours of continuous play.

රූපය 2.1: ඉවරයිview of key features including vibration, gyroscope, and TURBO function.
3. පැකේජ අන්තර්ගතය
- ipega PG-9162 Mini Wireless Game Controller
- USB ආරෝපණ කේබලය (වර්ගය-C)
- පරිශීලක අත්පොත

Image 3.1: Retail packaging of the ipega PG-9162 controller.
4. නිෂ්පාදන අවසන්view
The ipega PG-9162 controller features standard gamepad buttons and joysticks, designed for intuitive control. Familiarize yourself with the layout:

රූපය 4.1: ඉහළට view of the controller highlighting its button layout.
- වම් ඇනලොග් සැරයටිය: චලනය සහ කැමරා පාලනය සඳහා.
- D-Pad: දිශානුගත ආදානය.
- මුල් පිටුව බොත්තම: Returns to the Switch home menu.
- තිර රුව බොත්තම: තිරපිටපත් ග්රහණය කරයි.
- දකුණු ඇනලොග් සැරයටිය: කැමරා පාලනය හෝ නිශ්චිත ක්රීඩාව-තුළ ක්රියා සඳහා.
- ක්රියා බොත්තම් (A, B, X, Y): ක්රීඩාව-තුළ ක්රියා සඳහා.
- Shoulder Buttons (L, R) & Triggers (ZL, ZR): විවිධ ක්රීඩාව-තුළ කාර්යයන් සඳහා.
- Plus (+) & Minus (-) Buttons: For menu navigation and options.
- LED දර්ශක: Display connection status and battery level.
5. පිහිටුවීම සහ සම්බන්ධ කිරීම
5.1 Wireless Connection to Nintendo Switch
- ඔබගේ Nintendo Switch කොන්සෝලය ක්රියාත්මක කර නවතම පද්ධති මෘදුකාංගයට යාවත්කාලීන කර ඇති බවට වග බලා ගන්න.
- From the HOME Menu, select "Controllers" > "Change Grip/Order".
- On the ipega PG-9162 controller, press and hold the මුල් පිටුව බොත්තම සහ Y බොත්තම simultaneously for a few seconds until the LED indicators start flashing rapidly. This indicates pairing mode.
- The Switch console will detect the controller. Once detected, the LED indicators on the controller will become solid, indicating a successful connection.
- You can now use the controller wirelessly with your Nintendo Switch.
5.2 Wired Connection to Nintendo Switch Dock
- Place your Nintendo Switch console into its dock.
- Connect one end of the USB charging cable to the ipega PG-9162 controller and the other end to an available USB port on the Nintendo Switch dock.
- The controller will automatically connect to the Switch console via the wired connection.
- Ensure that "Pro Controller Wired Communication" is enabled in the Switch System Settings (System Settings > Controllers and Sensors > Pro Controller Wired Communication).
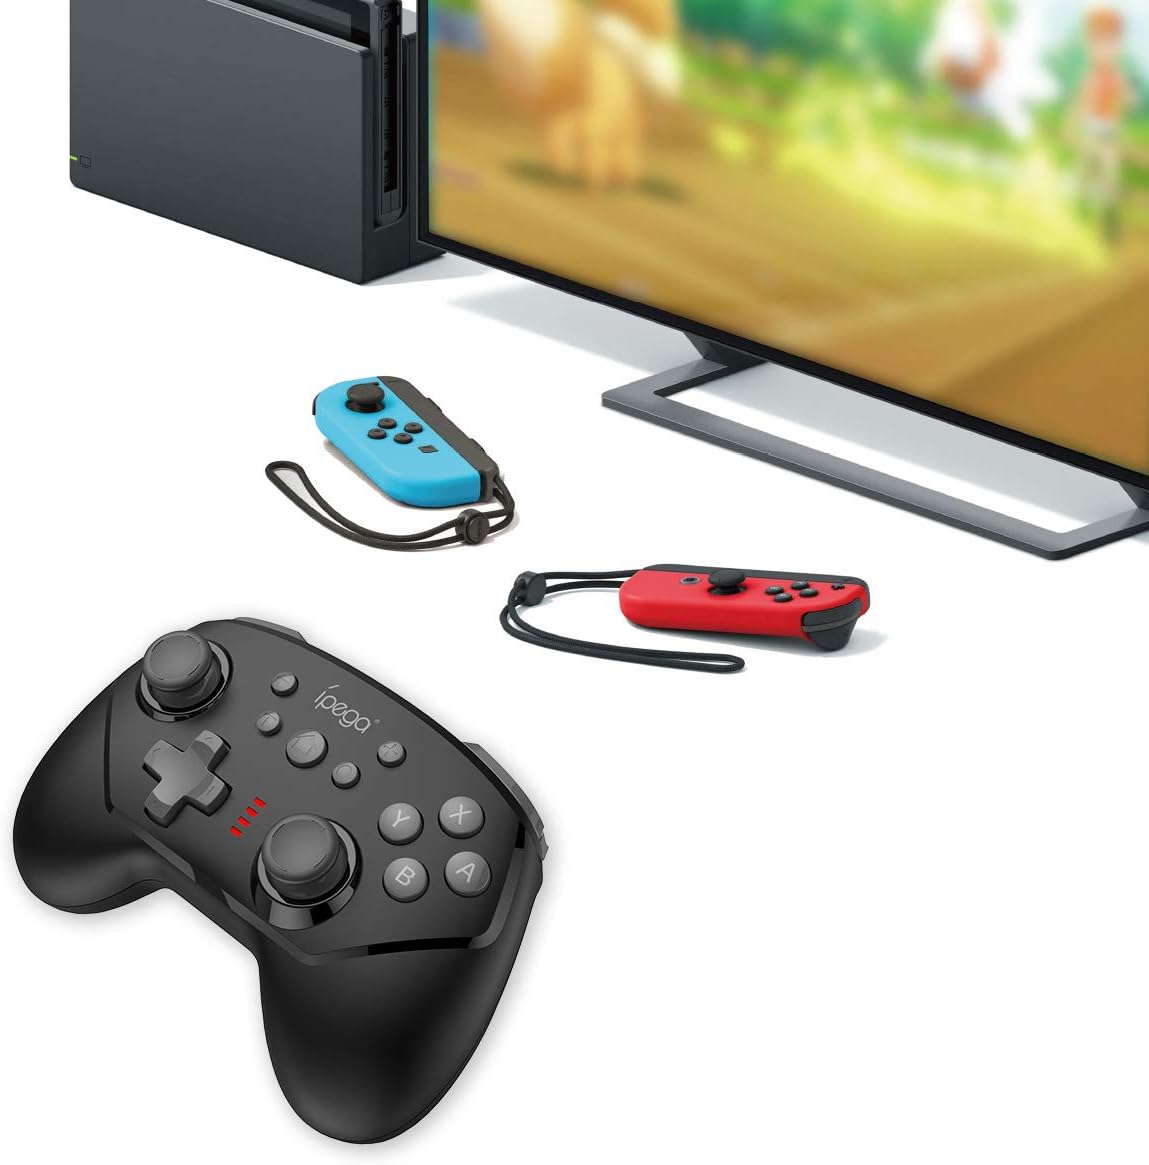
Image 5.1: The controller connected to a Nintendo Switch dock, demonstrating wired play.
6. මෙහෙයුම් උපදෙස්
6.1 TURBO කාර්යය
The TURBO function allows for rapid, continuous pressing of a button without repeatedly pressing it manually.
- To Set TURBO: Press and hold the desired action button (e.g., A, B, X, Y, L, R, ZL, ZR), then press the TURBO බොත්තම once. The button will now continuously register presses as long as you hold it down.
- To Clear TURBO: Repeat the process: press and hold the button with TURBO enabled, then press the TURBO බොත්තම again. The TURBO function for that specific button will be deactivated.
6.2 Six-axis Gyroscope
The built-in six-axis gyroscope provides motion control capabilities, allowing for precise aiming and in-game interactions by tilting and moving the controller.
- Ensure the game you are playing supports gyroscope controls.
- Calibrate the gyroscope if you experience drift or inaccurate motion sensing. Refer to your Nintendo Switch system settings for calibration options.

Image 6.1: Illustration of the six-axis gyroscope in action, enhancing aiming precision.
6.3 කම්පන ක්රියාකාරිත්වය
The dual motor vibration provides tactile feedback, immersing you further into the game by reacting to in-game events like collisions, explosions, or character actions.
- Vibration intensity is typically controlled by the game itself.
- If vibration is not working, check the in-game settings or Nintendo Switch system settings to ensure it is enabled.

Image 6.2: Visual representation of the built-in dual motor vibration feature.
7. පාලකය ආරෝපණය කිරීම
The ipega PG-9162 controller has a built-in rechargeable battery. When the battery is low, the LED indicators will flash slowly.
- Connect the provided USB charging cable to the Type-C port on the controller.
- Connect the other end of the USB cable to a USB power source (e.g., Nintendo Switch dock, computer USB port, or a USB wall adapter).
- The LED indicators will show charging status. Once fully charged, the indicators will typically turn off or show a solid light.
- A full charge provides over 8 hours of gameplay.
8. නඩත්තු කිරීම
- Keep the controller dry and away from moisture.
- Avoid exposing the controller to extreme temperatures.
- මෘදු වියළි රෙද්දකින් පාලකය පිරිසිදු කරන්න. රළු රසායනික ද්රව්ය හෝ උල්ෙල්ඛ පිරිසිදු කරන්නන් භාවිතා නොකරන්න.
- හානි වැළැක්වීම සඳහා භාවිතයේ නොමැති විට පාලකය ආරක්ෂිත ස්ථානයක ගබඩා කරන්න.
9. දෝශ නිරාකරණය
9.1 පාලකය සම්බන්ධ නොවේ
- පාලකය ප්රමාණවත් ලෙස ආරෝපණය කර ඇති බවට වග බලා ගන්න.
- Nintendo Switch කොන්සෝලය නවතම පද්ධති මෘදුකාංගයට යාවත්කාලීන කර ඇත්දැයි තහවුරු කර ගන්න.
- යුගල කිරීමේ ක්රියාවලිය නැවත කරන්න (වගන්තිය 5.1).
- If using wired connection, ensure "Pro Controller Wired Communication" is enabled in Switch settings.
- Try restarting both the controller and the Nintendo Switch console.
9.2 ආදාන ප්රමාදය හෝ විසන්ධි කිරීම්
- අසල ප්රබල විද්යුත් චුම්භක ඇඟිලි ගැසීම් නොමැති බවට වග බලා ගන්න.
- Move closer to the Nintendo Switch console.
- Disconnect other wireless devices that might be causing interference.
9.3 බොත්තම් ප්රතිචාර නොදක්වයි
- පාලකය නිවැරදිව සම්බන්ධ වී ඇත්දැයි පරීක්ෂා කරන්න.
- Test the buttons in the Switch's controller test menu (System Settings > Controllers and Sensors > Test Input Devices).
- කිසිදු සුන්බුන් ඒවාට බාධා නොවන බව සහතික කිරීම සඳහා බොත්තම් වටා පිරිසිදු කරන්න.
10. පිරිවිතර
| වෙළඳ නාමය | ipega |
| ආදර්ශ අංකය | PG-9162 |
| සම්බන්ධතාවය | රැහැන් රහිත (බ්ලූටූත්), රැහැන්ගත (USB) |
| බැටරි ධාරිතාව | 380mAh |
| බැටරි ආයු කාලය | >8 hours (approx.) |
| විශේෂ ලක්ෂණ | Six-axis Gyroscope, Dual Motor Vibration, TURBO Function |
| ගැළපුම | නින්ටෙන්ඩෝ ස්විචය |
| මානයන් | 17.53 x 13.72 x 6.6 සෙ.මී. (දළ වශයෙන්) |
| බර | 295 ග්රෑම් (දළ වශයෙන්) |
11. වගකීම් සහ සහාය
This product comes with a standard manufacturer's warranty. For specific warranty terms, please refer to the documentation included with your purchase or contact the retailer. For technical support or further assistance, please visit the official ipega webවෙබ් අඩවිය හෝ ඔවුන්ගේ පාරිභෝගික සේවා දෙපාර්තමේන්තුව අමතන්න.
නිෂ්පාදකයා: ipega
පළමු ලබා ගත හැකි දිනය: 2 අගෝස්තු 2019