1. හැඳින්වීම
This manual provides comprehensive instructions for the installation, operation, and maintenance of your Schlage 163604 Addison Lower Half Front Entry Handleset with Accent Lever. This handleset is designed to enhance both the security and aesthetic appeal of your front door. All Schlage front entry handlesets are precision-engineered for security and ease of installation.
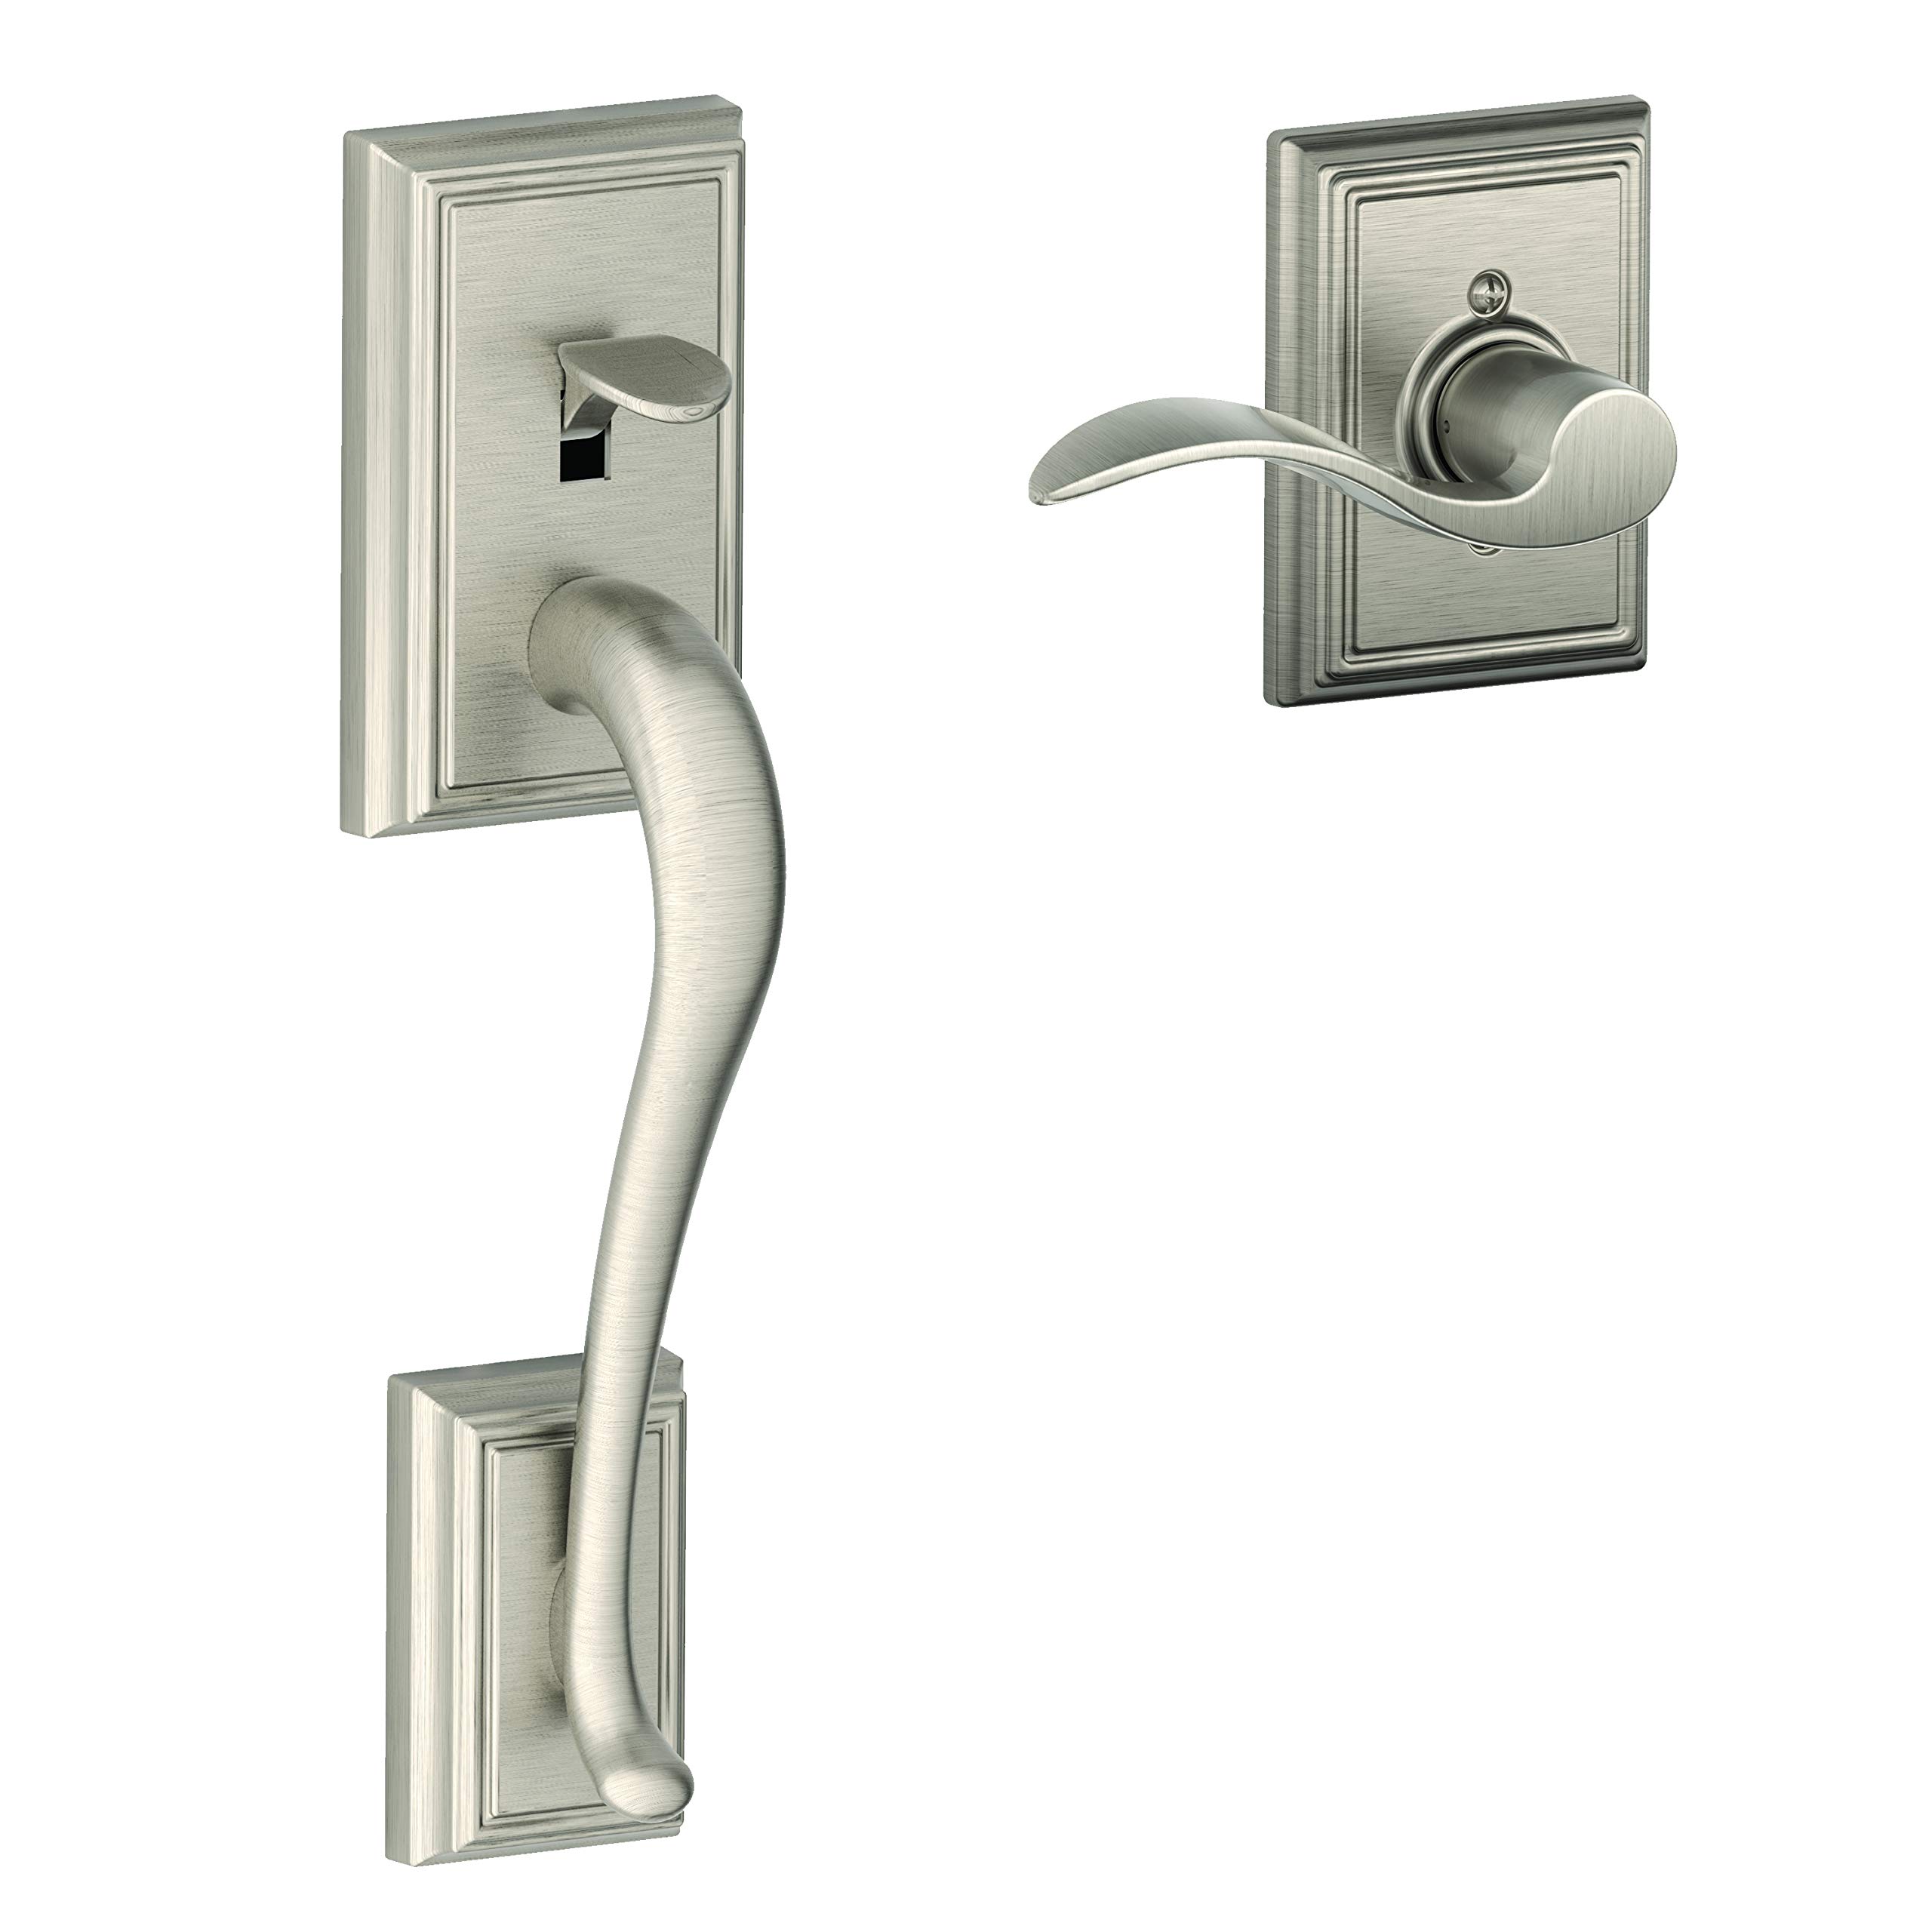
Image 1.1: Schlage 163604 Addison Handleset. This image displays the main components of the handleset, including the exterior handleset, interior lever, latch, and mounting hardware.
2 ආරක්ෂිත තොරතුරු
Please read all instructions carefully before installation and use. Failure to follow these instructions may result in damage to the product, property, or personal injury.
- ස්ථාපනය අතරතුර සෑම විටම ආරක්ෂිත කණ්නාඩි වැනි සුදුසු ආරක්ෂක ආම්පන්න පළඳින්න.
- Use only the tools specified in the installation guide.
- කුඩා කොටස් දරුවන්ගෙන් ඈත් කරන්න.
- Do not modify the product in any way, as this may compromise its security features and void the warranty.
3. පැකේජ අන්තර්ගතය
ස්ථාපනය ආරම්භ කිරීමට පෙර සියලුම සංරචක පවතින බව තහවුරු කර ගන්න:
- Exterior Handleset Assembly
- Interior Accent Lever Assembly
- අගුල් යාන්ත්රණය
- වැඩ වර්ජන තහඩුව
- Mounting Screws and Fasteners
- ස්ථාපන සැකිල්ල (ඇතුළත් කර ඇත්නම්)
- යතුරු (අදාළ නම්)
4. පිහිටුවීම සහ ස්ථාපනය
The Schlage 163604 handleset is designed for easy installation and can be fitted to both right-hand and left-hand door swings. Its patented adjustable bottom thru-bolt allows for vertical adjustment of 1-1/2 inches to accommodate various pre-existing door preparations.
4.1 දොර සකස් කිරීම
- Ensure your door has the correct bore holes and backset. Refer to the included template for precise measurements.
- If replacing an existing handleset, remove the old hardware.
4.2 Installing the Latch
- Insert the latch into the edge bore hole of the door.
- Secure the latch with the provided screws. Ensure the latch bolt faces the correct direction for your door swing.
4.3 බාහිර හැන්ඩ්ල්සෙට් එක ස්ථාපනය කිරීම
- Position the exterior handleset assembly on the outside of the door, aligning the spindle with the latch mechanism.
- Feed the thru-bolt through the lower hole in the door. Adjust its position as needed using the patented adjustable feature.
4.4 Installing the Interior Lever
- Place the interior lever assembly on the inside of the door, aligning it with the exterior handleset and latch.
- Secure the interior and exterior components together using the provided screws. Tighten all screws firmly but do not overtighten.
4.5 ස්ට්රයික් ප්ලේට් ස්ථාපනය කිරීම
- Align the strike plate with the latch bolt on the door frame.
- Mark and chisel out the necessary area for a flush fit, if required.
- සපයා ඇති ඉස්කුරුප්පු වලින් ස්ට්රයික් ප්ලේට් එක සුරක්ෂිත කරන්න.
5. මෙහෙයුම් උපදෙස්
To operate your Schlage Addison Handleset:
- අගූලු දැමිමට: From the interior, rotate the thumbturn to the locked position. From the exterior, insert the key and turn to lock.
- අගුළු ඇරීමට: From the interior, rotate the thumbturn to the unlocked position. From the exterior, insert the key and turn to unlock.
- විවෘත කිරීමට: Depress the thumbpiece on the exterior handleset or the lever on the interior to retract the latch bolt.
6. නඩත්තු කිරීම
Proper maintenance ensures the longevity and smooth operation of your handleset.
- පිරිසිදු කිරීම: හැන්ඩ්ල්සෙට් එක මෘදු, d එකකින් නිතිපතා පිරිසිදු කරන්න.amp රෙදි. උල්ෙල්ඛ පිරිසිදු කරන්නන්, ද්රාවක හෝ රළු රසායනික ද්රව්ය භාවිතා කිරීමෙන් වළකින්න, මන්ද මේවා නිමාවට හානි කළ හැකිය.
- ලිහිසි තෙල්: Periodically apply a small amount of graphite-based lubricant to the keyway and latch mechanism to ensure smooth operation. Do not use oil-based lubricants, as they can attract dirt.
- තද කිරීම: Check all mounting screws periodically and tighten if necessary. Do not overtighten.
7. දෝශ නිරාකරණය
| ගැටලුව | විය හැකි හේතුව | විසඳුම |
|---|---|---|
| Lever/Thumbpiece is stiff or sticky | Lack of lubrication, dirt buildup, misaligned components | Apply graphite lubricant to the latch mechanism. Clean the exterior. Check for proper alignment during installation. |
| Key does not turn smoothly | Dirt in keyway, worn key, lock mechanism needs lubrication | Apply graphite lubricant to the keyway. Try a spare key. |
| Door does not latch properly | Strike plate misalignment, latch bolt obstruction | Adjust the strike plate position. Ensure no debris is blocking the latch bolt. |
| Handleset feels loose | සවි කිරීමේ ඉස්කුරුප්පු ලිහිල්යි | පෙනෙන සියලුම සවි කිරීම් ඉස්කුරුප්පු තද කරන්න. |
8. පිරිවිතර
- ආදර්ශ අංකය: 163604
- වෙළඳ නාමය: පරිමාණය
- ද්රව්ය: ලෝහ
- වර්ණය: සැටින් නිකල්
- අවසන් කරන්න: සැටින්
- විලාසය: නවීන
- නිෂ්පාදන මානයන්: 16.51 x 20.32 x 52.07 cm (6.5 x 8 x 20.5 අඟල්)
- අයිතමයේ බර: 2.04 kg (රාත්තල් 4.5)
- හැසිරවීමේ වර්ගය: ලීවරය
- විශේෂ ලක්ෂණය: Easy to Install, Patented adjustable bottom thru-bolt
- නිෂ්පාදකයා: Allegion Canada Inc
- මුල් රට: මෙක්සිකෝව
9. වගකීම් සහ සහාය
Schlage products are manufactured to the highest standards and are backed by a limited lifetime mechanical and finish warranty, and a 3-year electronics warranty (where applicable). For specific warranty details, product support, or to contact customer service, please visit the official Schlage webවෙබ් අඩවියෙන් හෝ ඔබේ නිෂ්පාදනය සමඟ ඇතුළත් වගකීම් කාඩ්පත වෙත යොමු වන්න.
වැඩිදුර සහාය සඳහා, කරුණාකර පිවිසෙන්න SCHLAGE වෙළඳසැල.


