1. හැඳින්වීම
This manual provides essential instructions for the safe and effective operation of your AGFA Photo Realishot DC5200 compact digital camera. Please read this manual thoroughly before using the camera and retain it for future reference.

රූපය 1: ඉදිරිපස view of the AGFA Photo Realishot DC5200 compact camera.

Figure 2: AGFA Photo Realishot DC5200 highlighting 21MP photo resolution and HD video capability.
2. පැකේජ අන්තර්ගතය
පහත ලැයිස්තුගත කර ඇති සියලුම අයිතම ඔබගේ කැමරා පැකේජයට ඇතුළත් කර ඇති බව තහවුරු කරගන්න:
- AGFA Photo Realishot DC5200 Camera
- USB කේබලය
- පරිශීලක අත්පොත (මෙම ලේඛනය)
- නැවත ආරෝපණය කළ හැකි ලිතියම් බැටරි
3. කැමරා සංරචක
3.1 ඉදිරිපස View
The front of the camera features the lens, flash, and self-timer lamp.
3.2 පසුපස View (LCD තිරය)
The rear of the camera is dominated by the 2.4-inch TFT LCD screen, used for framing shots, reviewපින්තූර සහ සංචාලන මෙනු.

රූපය 3: පසුපස view of the camera displaying the 2.4-inch LCD screen.
3.3 ඉහළ සහ පැත්ත Views
The top and sides house the power button, shutter button, zoom controls, and ports for connectivity.
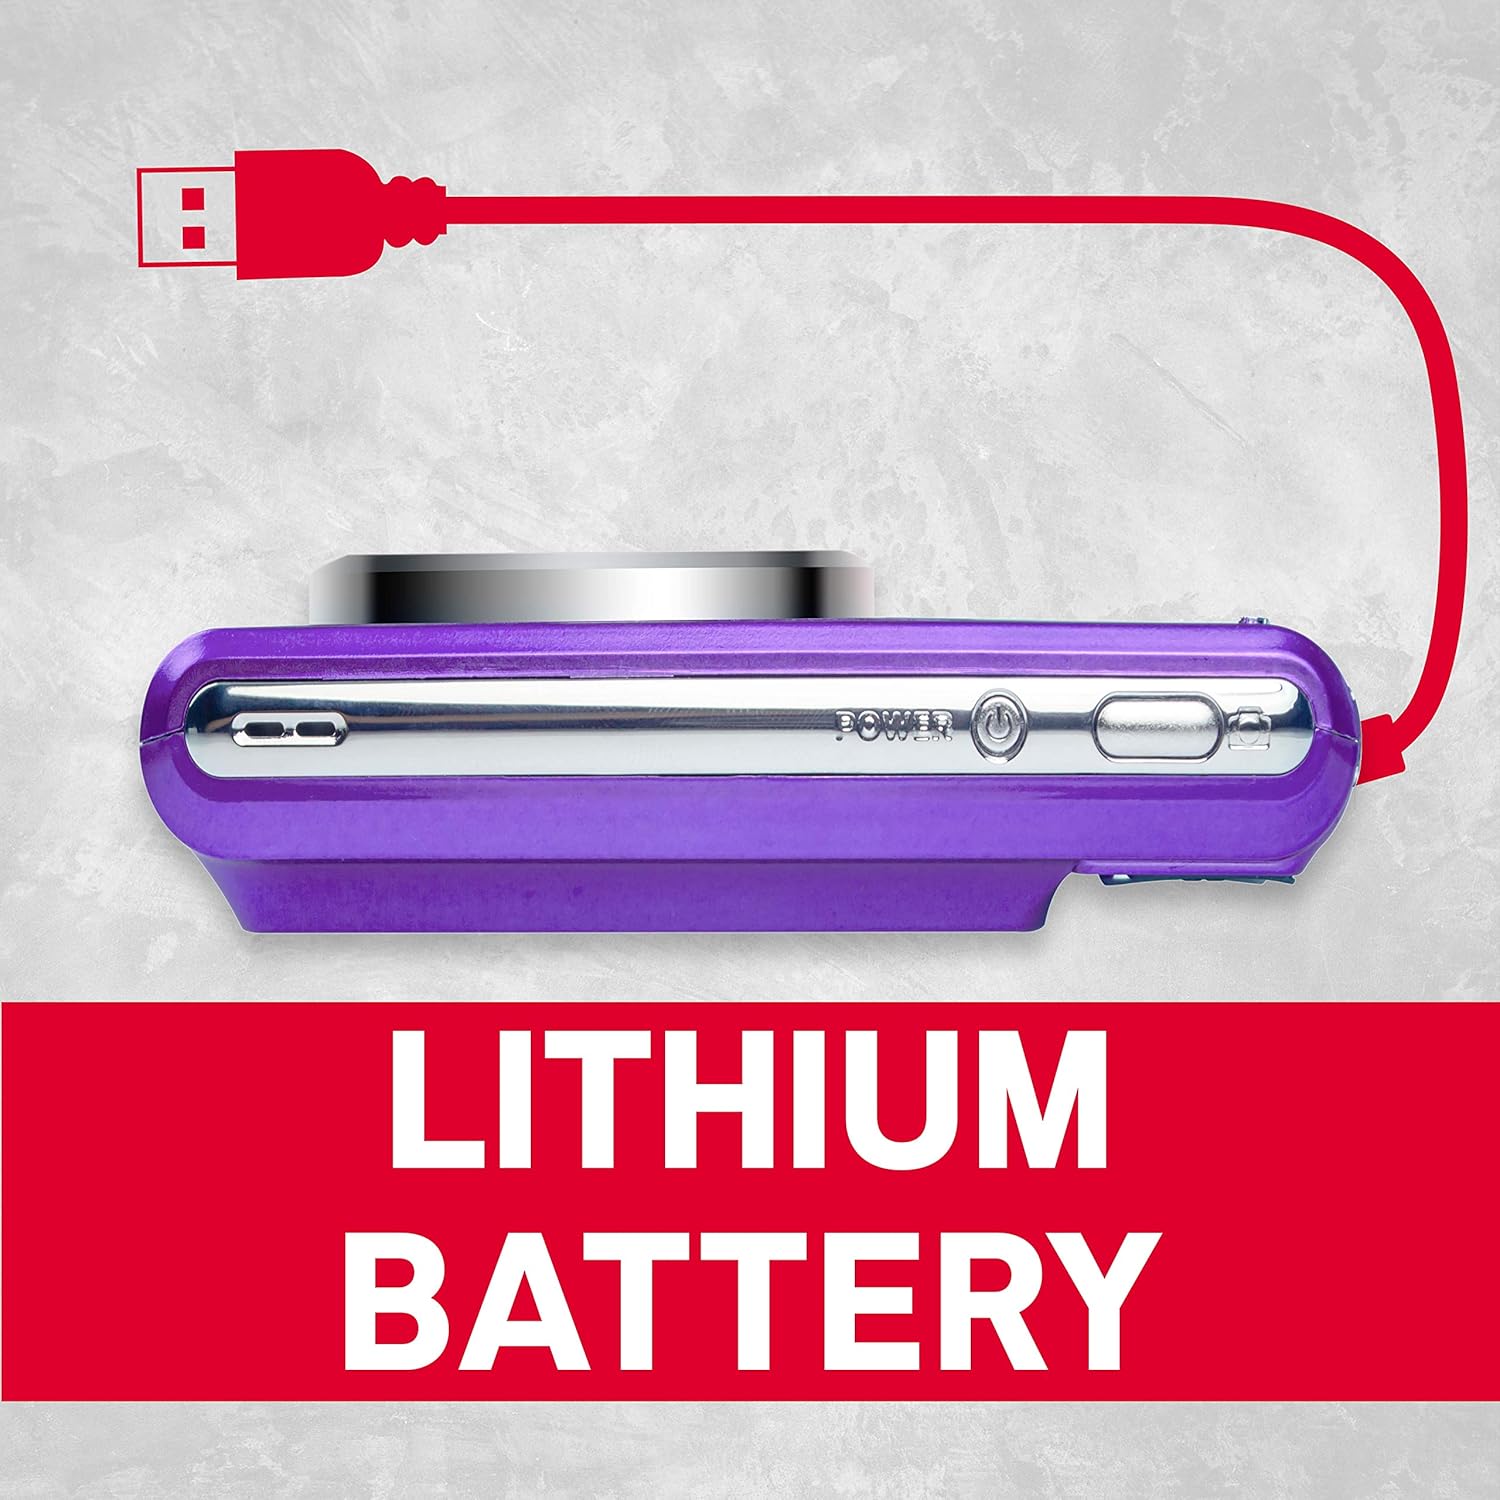
රූපය 4: පැත්ත view of the camera showing the USB port for charging and data transfer.
4. මූලික සැකසුම
4.1 බැටරිය ආරෝපණය කිරීම
- Insert the provided lithium battery into the battery compartment, ensuring correct polarity.
- Connect the camera to a power source using the supplied USB cable. The charging indicator will illuminate.
- දර්ශක ආලෝකය නිවා දැමූ විට ආරෝපණය සම්පූර්ණ වේ.
4.2 SD කාඩ්පතක් ඇතුළු කිරීම
The camera supports SD cards up to 32 GB (not included). A memory card is required to save photos and videos.
- SD කාඩ් පත සඳහා කවරය විවෘත කරන්න.
- Insert the SD card with the metal contacts facing the correct direction until it clicks into place.
- SD කාඩ් පතේ කවරය ආරක්ෂිතව වසා දමන්න.
5. මූලික මෙහෙයුම
5.1 බලය සක්රිය / අක්රිය
ඔබා අල්ලාගෙන සිටින්න බලය කැමරාව සක්රිය හෝ අක්රිය කිරීමට බොත්තම.
5.2 ඡායාරූප ගැනීම
- කැමරාව සක්රිය කරන්න.
- LCD තිරය භාවිතයෙන් ඔබේ ඡායාරූපය රාමු කරන්න.
- ඔබන්න ෂටරය button halfway to focus, then press fully to capture the image.
5.3 වීඩියෝ පටිගත කිරීම
- Switch to video mode (if applicable, refer to on-screen menu).
- ඔබන්න ෂටරය පටිගත කිරීම ආරම්භ කිරීමට බොත්තම.
- ඔබන්න ෂටරය පටිගත කිරීම නැවැත්වීමට නැවත බොත්තම.
5.4 ඩිජිටල් විශාලනය භාවිතා කිරීම
The camera features 8x digital zoom. Use the zoom controls (typically labeled W for Wide and T for Telephoto) to adjust the focal length.

රූපය 5: උදාample of 8x digital zoom capability.
5.5 දර්ශන මාදිලි
The camera offers various scene modes to optimize settings for different shooting conditions. Common modes include:
- ස්වයංක්රීය ප්රකාරය: පොදු අරමුණු වෙඩි තැබීම.
- රාත්රී ප්රකාරය: For low-light environments.
- වෙරළ මාදිලිය: For bright, reflective scenes.
Access scene modes through the camera's menu system.

Figure 6: Visual representation of different scene modes available on the camera.
6. උසස් විශේෂාංග
6.1 මුහුණු හඳුනාගැනීම
The camera can automatically detect faces in the frame and optimize focus and exposure for portraits.

Figure 7: Camera demonstrating face detection technology.
6.2 Digital Image Stabilization
This feature helps reduce blur caused by camera shake, resulting in clearer images, especially in challenging conditions.
6.3 ස්වයං-ටයිමර්
Set a delay of 2, 5, or 10 seconds before the shutter fires, useful for self-portraits or group photos.
6.4 Red-Eye Reduction Flash
When using the flash, this feature emits a pre-flash to minimize the red-eye effect in portraits.
7. Viewඡායාරූප සහ වීඩියෝ දර්ශන
නැවත කිරීමටview අල්ලා ගත් රූප සහ වීඩියෝ:
- ඔබන්න නැවත ධාවනය බොත්තම (බොහෝ විට ක්රීඩා නිරූපකයකින් දැක්වේ).
- Use the directional buttons to navigate through your files.
- ඔබන්න OK or ඇතුල් කරන්න බොත්තම view ඡායාරූපයක් හෝ වීඩියෝවක් වාදනය කරන්න.
8. මාරු කිරීම Fileපරිගණකයකට s
සපයන ලද USB කේබලය භාවිතයෙන් ඔබට ඡායාරූප සහ වීඩියෝ පරිගණකයකට මාරු කළ හැකිය.
- කැමරාව ක්රියා විරහිත කර ඇති බව සහතික කර ගන්න.
- USB කේබලය භාවිතයෙන් කැමරාව ඔබේ පරිගණකයට සම්බන්ධ කරන්න.
- Power on the camera. It should appear as a removable disk or device on your computer.
- අවශ්ය දේ පිටපත් කරන්න fileකැමරාවේ මතක කාඩ්පතෙන් ඔබේ පරිගණකයට.
- USB කේබලය විසන්ධි කිරීමට පෙර කැමරාව ආරක්ෂිතව පරිගණකයෙන් ඉවත් කරන්න.
9 රැකවරණය සහ නඩත්තුව
- Keep the camera clean. Use a soft, dry cloth to wipe the camera body.
- For the lens and LCD screen, use a specialized lens cleaning cloth. Avoid harsh chemicals.
- කැමරාව සෘජු හිරු එළියෙන් සහ අධික උෂ්ණත්වයන්ගෙන් ඈත්ව සිසිල් වියළි ස්ථානයක ගබඩා කරන්න.
- කැමරාව දිගු කාලයක් භාවිතා නොකරන්නේ නම් බැටරිය ඉවත් කරන්න.
10. දෝශ නිරාකරණය
| ගැටලුව | විය හැකි හේතුව | විසඳුම |
|---|---|---|
| කැමරාව ක්රියාත්මක නොවේ. | බැටරිය අවසන් වී හෝ වැරදි ලෙස ඇතුළත් කර ඇත. | බැටරිය සම්පූර්ණයෙන්ම ආරෝපණය කරන්න. නිවැරදි ධ්රැවීයතාවයකින් බැටරිය ඇතුළු කර ඇති බවට වග බලා ගන්න. |
| ඡායාරූප ගත නොහැක. | SD කාඩ්පත පිරී ඇත, අගුළු දමා ඇත, නැතහොත් ඇතුළු කර නොමැත. | Insert an SD card, unlock it, or delete unnecessary files. |
| පින්තූර බොඳයි. | කැමරා සෙලවීම, විෂය චලනය, හෝ වැරදි නාභිගත කිරීම. | Hold the camera steady. Ensure adequate lighting. Use digital image stabilization. |
| ෆ්ලෑෂ් එක පත්තු වෙන්නේ නැහැ. | ෆ්ලෑෂ් අක්රිය කර ඇත හෝ බැටරිය අඩුය. | Enable flash in settings. Recharge battery. |
11. තාක්ෂණික පිරිවිතර
- ඡායාරූප විභේදනය: 21 මෙගාපික්සල්
- වීඩියෝ විභේදනය: 720p HD (1280x720)
- LCD තිරය: අඟල් 2.4 TFT LCD
- ඩිජිටල් විශාලනය: 8x
- රූප ස්ථායීකරණය: ඩිජිටල්
- විශේෂ ලක්ෂණ: Face Detection, Self-Timer (2s/5s/10s), Red-Eye Reduction Flash
- බැටරි: නැවත ආරෝපණය කළ හැකි ලිතියම් බැටරි
- ගබඩා: Supports SD Card up to 32 GB (not included)
- සහාය දුන්නා File ආකෘති: JPEG (photos), AVI (videos)
- නිෂ්පාදන මානයන්: අඟල් 3.74 x 2.28 x 1.06
- අයිතමයේ බර: අවුන්ස 3.14 කි

රූපය 8: අවසන්view of key camera features and specifications.
12. වගකීම් සහ සහාය
For warranty information and customer support, please refer to the documentation provided with your purchase or visit the official AgfaPhoto webවෙබ් අඩවිය. වගකීම් හිමිකම් සඳහා ඔබේ මිලදී ගැනීමේ සාක්ෂි තබා ගන්න.


