1. හැඳින්වීම
Thank you for choosing the Crenova Laminator Machine FNL001. This device is designed to protect and preserve your documents, photos, and other materials with a clear, durable laminated finish. This manual provides essential information for the safe and efficient operation, maintenance, and troubleshooting of your laminator. Please read it thoroughly before first use and keep it for future reference.
2. ආරක්ෂිත උපදෙස්
To ensure safe operation and prevent damage to the laminator or injury, please observe the following safety precautions:
- යන්ත්රය ක්රියාත්මක කිරීමට පෙර සියලුම උපදෙස් කියවන්න.
- Keep the laminator away from water or other liquids. Do not operate with wet hands.
- Do not touch the hot parts of the machine during or immediately after use.
- Unplug the laminator from the power outlet when not in use or before cleaning.
- ක්රියාත්මක වන අතරතුර යන්ත්රය වටා නිසි වාතාශ්රය සහතික කරන්න.
- Keep out of reach of children and pets. Adult supervision is required if children are near the device.
- Do not insert objects other than laminating pouches into the machine.
- Use only laminating pouches recommended for this type of machine.
3. නිෂ්පාදන අවසන්view
The Crenova Laminator FNL001 features a compact design with essential controls for efficient lamination.
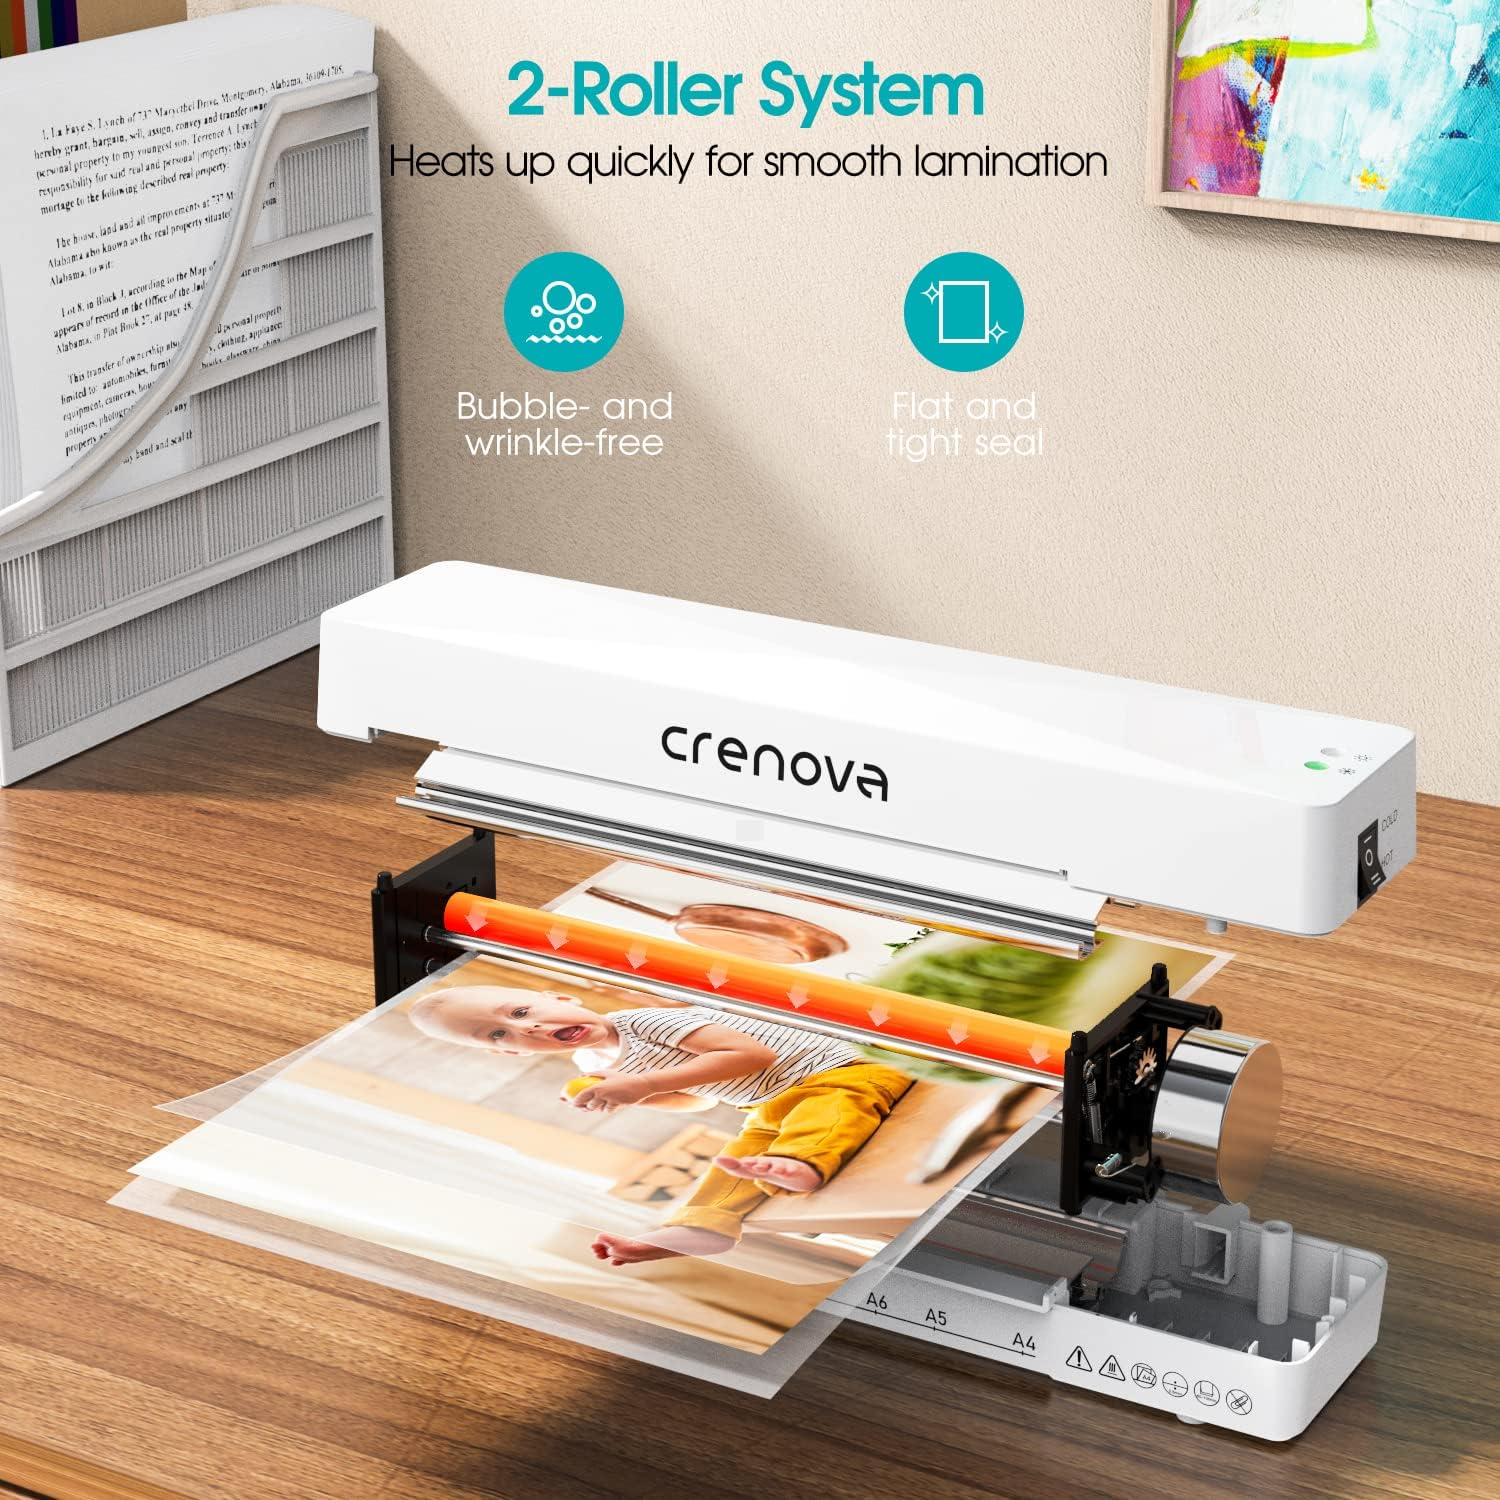
රූප විස්තරය: අභ්යන්තරයකි view of the Crenova laminator, highlighting its 2-roller system designed for smooth lamination. The image shows a document being fed through the rollers, illustrating the heating process.
- බල/ප්රකාර ස්විචය: Selects between OFF, COLD, and HOT lamination modes.
- දර්ශක ආලෝකය: Illuminates to show power status and readiness for lamination.
- Document Inlet: Where laminating pouches are inserted.
- Document Outlet: Where laminated documents exit.
- Jam Release Lever (ABS): Used to clear misfed or jammed pouches.
4. පිහිටුවීම
- Unpack the laminator and remove all packaging materials.
- Place the laminator on a flat, stable, and heat-resistant surface.
- Ensure there is enough space around the machine for proper ventilation and for documents to exit freely.
- විදුලි රැහැන සම්මත විදුලි වෙළඳසැලකට සම්බන්ධ කරන්න.
5. මෙහෙයුම් උපදෙස්
Follow these steps for successful lamination:

රූප විස්තරය: A four-panel image illustrating the simple operation of the Crenova laminator. Panel 1 shows switching to HOT or COLD. Panel 2 shows the mode indicator turning green. Panel 3 shows inserting the pouch straight into the inlet. Panel 4 shows the pouch auto-exiting the outlet.
- Step 1: Select Mode. Switch the power button to either උණුසුම් or සීතල mode, depending on your laminating pouch and document type. For most standard documents, use HOT mode. Cold lamination is suitable for heat-sensitive materials or self-adhesive pouches.
- Step 2: Wait for Readiness. If using HOT mode, allow the machine to preheat. The mode indicator light will turn කොළ පාටයි when the laminator is ready for use. This typically takes a few minutes.
- Step 3: Prepare Document. Place your document inside a laminating pouch, ensuring it is centered and there is an even border around the edges. Do not overload the pouch.
- Step 4: Insert Pouch. Insert the sealed edge of the laminating pouch straight into the document inlet. The machine will automatically feed the pouch through. Do not force the pouch or insert it at an angle.
- Step 5: Retrieve Laminated Document. The laminated document will exit from the rear outlet. Allow it to cool on a flat surface before handling to ensure a smooth, flat finish.
The Crenova Laminator supports various document sizes up to A4 (230mm / 9 inches wide).

රූප විස්තරය: The Crenova laminator positioned next to various paper sizes (A4, A5, A6, A7) with their dimensions, illustrating the machine's capability to laminate documents up to 230mm (9 inches) wide.

රූප විස්තරය: A visual representation of the Crenova A4 laminator's versatility, showing it can laminate various document types such as certificates, photos, and menus.
6. නඩත්තු කිරීම
- පිරිසිදු කිරීම: Always unplug the laminator and allow it to cool completely before cleaning. Wipe the exterior with a soft, dry cloth. Do not use abrasive cleaners or solvents.
- ගබඩා: Store the laminator in a clean, dry, and cool place when not in use.
- රෝලර් පිරිසිදු කිරීම: Periodically run a cleaning sheet (available separately) through the laminator to remove any adhesive residue from the rollers.
7. දෝශ නිරාකරණය
If you encounter issues with your laminator, refer to the following common problems and solutions:
Paper Jam Release

රූප විස්තරය: A three-panel image demonstrating the paper jam release process. Panel 1 shows switching the laminator off. Panel 2 shows pushing and holding the ABS lever. Panel 3 shows pulling the jammed pouch out.
- Step 1: Switch Off. Immediately turn off the laminator using the power switch.
- Step 2: Engage Release Lever. Locate the ABS (Anti-Blocking System) jam release lever, usually on the side or back of the machine. Push and hold this lever.
- Step 3: Remove Pouch. While holding the lever, carefully pull the misfed or jammed pouch straight out from the inlet or outlet.
- Release the lever and allow the machine to cool before attempting further lamination.
වෙනත් ගැටළු
- Poor Lamination Quality (Bubbles, Wrinkles):
- Ensure the laminator has fully preheated (green indicator light).
- Use appropriate pouch thickness for the machine and document.
- Insert the pouch straight and centered.
- Do not laminate multiple items in one pouch if they are too small or unevenly spaced.
- යන්ත්රය ක්රියාත්මක නොවේ:
- Check if the power cord is securely plugged into both the laminator and the wall outlet.
- බල සැපයුම ක්රියාකාරී දැයි තහවුරු කර ගන්න.
8. පිරිවිතර
| වෙළඳ නාමය | ක්රෙනෝවා |
| ආදර්ශ අංකය | FNL001 |
| අයිතමයේ බර | රාත්තල් 1.94 කි |
| පැකේජ මානයන් | අඟල් 13.54 x 6.3 x 3.11 |
| Max Lamination Width | 230මි.මී. (A4) |
| රෝලර් පද්ධතිය | 2-රෝලර් පද්ධතිය |
| ලැමිෙන්ෂන් මාදිලි | උණුසුම් හා සීතල |
| ASIN | B08QMMSNBF |
| පළමු දිනය තිබේ | 3 සැප්තැම්බර් 2025 |
9. වගකීම් සහ සහාය
For detailed warranty information, please refer to the warranty card included with your product packaging or visit the official Crenova webඅඩවිය.
If you require technical assistance or have questions not covered in this manual, please contact Crenova customer support. Contact details can typically be found on the manufacturer's webඅඩවිය හෝ නිෂ්පාදන ඇසුරුම්කරණය.


