1. හැඳින්වීම
Thank you for choosing the VANBAR DC209Pro Separated Mirror Dash Cam. This advanced driving recorder is designed to provide comprehensive road surveillance and enhanced driving safety with its high-resolution cameras and intelligent assistance features. This manual will guide you through the installation, operation, and maintenance of your new device, ensuring optimal performance and a safe driving experience.
2. නිෂ්පාදන අවසන්view
The VANBAR DC209Pro features a separated design for flexible installation, offering a 4K front camera and a 2.5K rear camera for crystal-clear recording. It comes equipped with an IMX415 sensor for superior image quality, especially in low-light conditions, and includes a 128GB Micro SD card for ample ගබඩා.
2.1 ප්රධාන ලක්ෂණ
- Ultra HD Recording: Front 4K (3840*2160P) and Rear 2.5K (2560*1440P) simultaneous recording.
- Advanced Driver Assistance: Blind Spot Detection (BSD) and Lane Change Assist (LCA) systems.
- සුපිරි රාත්රී දර්ශනය: Equipped with IMX415 sensor and HDR technology for clear recordings in low light.
- හඬ පාලනය: Hands-free operation for various functions.
- GPS ක්රියාකාරීත්වය: Records driving speed and trajectory, viewable on PC.
- පැය 24 පුරා වාහන නැවැත්වීමේ නිරීක්ෂණය: G-sensor activated recording for impact detection while parked.
- Loop Recording & G-Sensor: Ensures continuous recording and protects critical footage.
- Backup Assist: Automatic display of rear camera view with adjustable guidelines when reversing.
- Type-C Power Cable: Enhanced charging speed, stability, and durability.
- TS Format Recording: Improved data integrity and long-term storage reliability.
2.2 පැකේජයේ අන්තර්ගතය
- VANBAR DC209Pro Main Unit (Mirror Dash Cam)
- Front Camera (separated)
- Rear Camera (waterproof)
- GPS මොඩියුලය
- සිගරට් සැහැල්ලු බල කේබලය
- Hardwire Kit (for 24-hour parking monitoring)
- 128GB Micro SD කාඩ්පත
- Mounting Straps (2 sizes)
- Anti-reflection Film
- රෙදි පිරිසිදු කිරීම
- පරිශීලක අත්පොත (මෙම ලේඛනය)
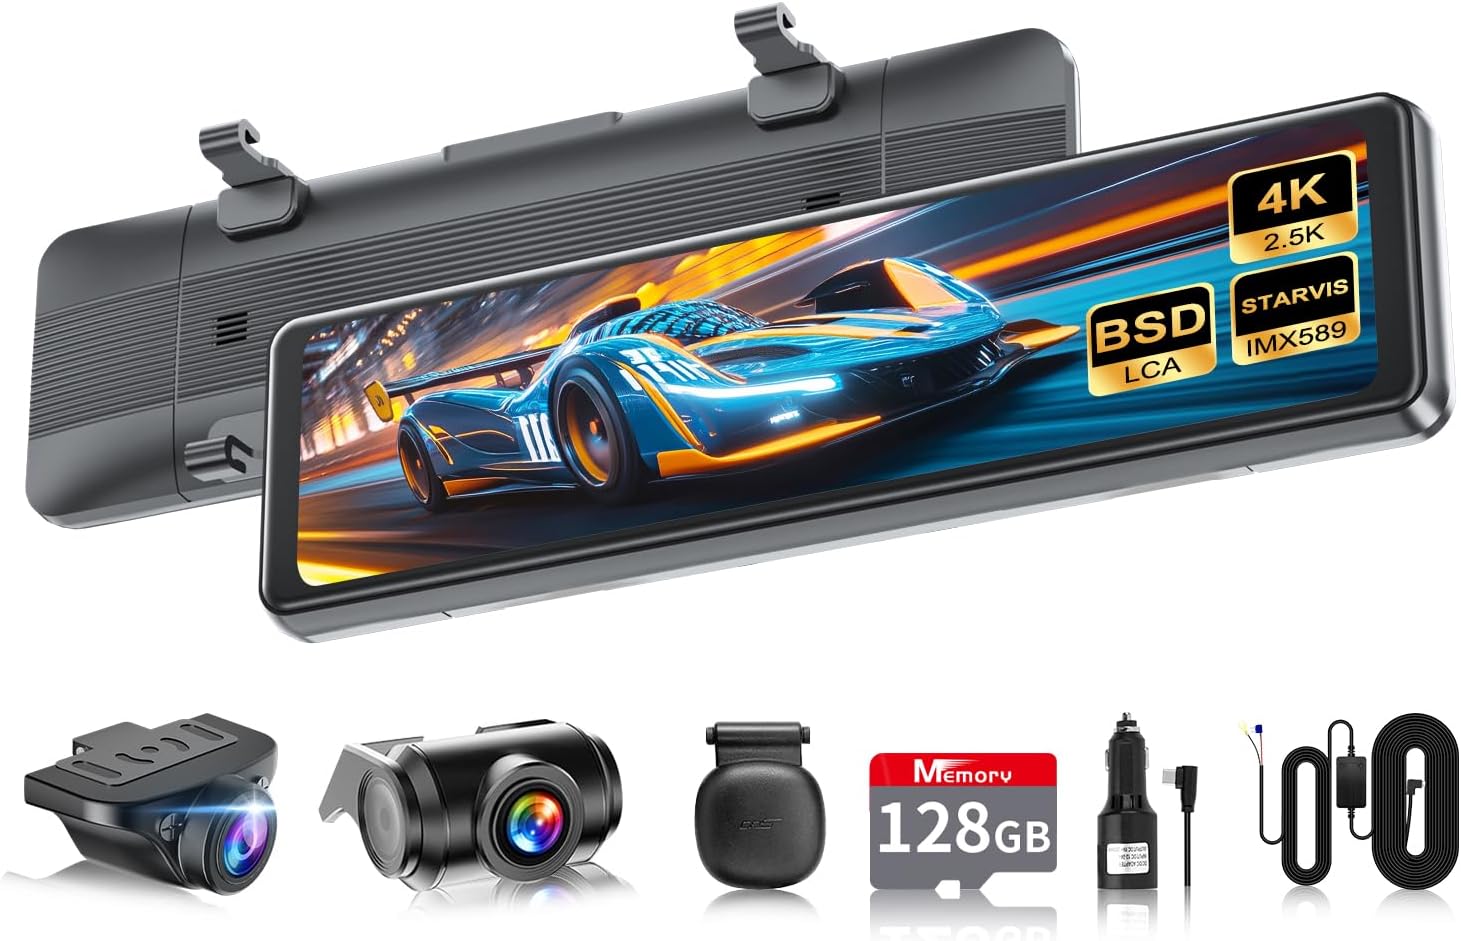
Image: VANBAR DC209Pro main unit and all included accessories.

Image: Visual representation of the dash cam's core features including 4K, IPS, BSD, LCA, Voice Control, GPS, Night Vision, G-sensor, Loop Recording, and Backup Guide.
3. පිහිටුවීම සහ ස්ථාපනය
Before permanent installation, it is recommended to connect the device to power and test its basic functions. Use the included cigarette lighter power cable for initial testing.
3.1 ප්රධාන ඒකකය සවි කිරීම
- Attach the main unit (mirror dash cam) to your vehicle's existing rearview mirror using the provided rubber straps. Ensure it is securely fastened and does not obstruct your view.
- Adjust the angle of the main unit to ensure the screen provides a clear view පිටුපස පාරේ.
3.2 Installing the Front Camera
The front camera is separated from the main unit for optimal placement.
- Choose a suitable location on your windshield, ideally near the top center, where it has an unobstructed view of the road ahead and does not interfere with the driver's line of sight or airbags.
- Clean the chosen area thoroughly. Peel off the adhesive backing and firmly press the front camera onto the windshield.
- Route the front camera cable neatly along the windshield trim and connect it to the main unit.

Image: Demonstrates the flexible installation options for the separated front camera, allowing for a wider and clearer front view without obstruction.
3.3 පසුපස කැමරාව ස්ථාපනය කිරීම
The rear camera is waterproof and can be installed inside or outside the vehicle.
- For external installation, mount the rear camera above your license plate or near the trunk handle. For internal installation, mount it on the rear windshield. Ensure a clear view.
- Route the rear camera cable to the main unit. The cable length is approximately 8 meters. If a longer cable is needed, please contact customer support.
- Connect the red wire of the rear camera cable to your vehicle's reverse light positive wire for automatic backup display.
3.4 Connecting Power and GPS
- Insert the included 128GB Micro SD card into the dash cam's SD card slot.
- Connect the Type-C power cable to the main unit.
- For standard operation, plug the cigarette lighter power adapter into your vehicle's 12V power outlet.
- For 24-hour parking monitoring, use the included hardwire kit. Connect the hardwire kit to your vehicle's fuse box according to the instructions provided with the kit.
- Connect the GPS module to the designated port on the main unit. Place the GPS module on the dashboard with a clear view ප්රශස්ත සංඥා පිළිගැනීම සඳහා අහසේ.

Image: Illustrates the two power connection methods: via cigarette lighter socket for basic operation, and via hardwire kit for continuous 24-hour parking monitoring.
4. මෙහෙයුම් උපදෙස්
The VANBAR DC209Pro is designed for intuitive operation via its IPS full-touch 2.5D screen and voice control.
4.1 මූලික මෙහෙයුම
- බලය සක්රිය / අක්රිය: The device will automatically power on and start recording when the vehicle engine starts. It will power off automatically when the engine is turned off. You can also manually power on/off by pressing and holding the power button.
- පටිගත කිරීම: Recording starts automatically upon power-on. The screen will display the live view from the front and rear cameras.
- තිරය සක්රිය / අක්රිය: Tap the screen to turn it on/off. Recording continues even when the screen is off.
4.2 හඬ පාලනය
The dash cam supports Japanese voice commands for hands-free operation. Simply speak the command clearly.
- "Screen On/Off"
- "Front/Rear Camera" (switches display between front, rear, or split view)
- "Video Start"
- "Voice On/Off"
- "Take Photo"
- "Video Lock" (locks current recording to prevent overwriting)

Image: Diagram illustrating the various voice commands available for hands-free control of the dash cam.
4.3 Driver Assistance Systems (BSD & LCA)
The DC209Pro integrates Blind Spot Detection (BSD) and Lane Change Assist (LCA) to enhance driving safety.
- BSD (Blind Spot Detection): Detects obstacles (vehicles, pedestrians) in your blind spots. The system will display a frame (blue for safe distance, yellow for dangerous distance) on the screen and emit an audible warning to alert the driver.
- LCA (Lane Change Assist): Detects vehicles rapidly approaching from behind in adjacent lanes. The monitor will display an orange indicator on the left or right side (depending on the direction of the approaching vehicle) and provide an audible warning.
Note: Both BSD and LCA functions can be adjusted for speed and detection range based on driving habits.

Image: Detailed explanation of how the Blind Spot Detection (BSD) and Lane Change Assist (LCA) systems work, showing visual alerts on the screen.
4.4 වාහන නැවැත්වීම අධීක්ෂණය
When connected via the hardwire kit, the dash cam provides 24-hour parking surveillance. The built-in G-sensor detects impacts and automatically starts recording, saving the footage to a dedicated folder to prevent overwriting. This feature is crucial for recording hit-and-runs or vandalism while your vehicle is parked.
4.5 GPS ක්රියාකාරීත්වය
The GPS module records your vehicle's driving speed and direction along with the video footage. This data can be reviewed on a computer using compatible playback software, allowing you to trace your driving route.
4.6 Backup Assist
When you shift your vehicle into reverse, the dash cam automatically displays the rear camera view on the screen. The backup guidelines can be adjusted in length and angle to suit your vehicle and preferences. The adjusted settings will be saved for future use.

Image: Demonstrates the adjustable backup guidelines on the rear camera display, allowing users to customize the length and angle for precise parking assistance.
4.7 UI Navigation and File කළමනාකරණය
The intuitive UI allows easy access to various functions and settings. Recorded files are categorized into Front Camera, Rear Camera, Emergency Recording, and Photos for quick retrieval. The TS video format ensures data integrity and prevents loss even if power is interrupted.

Image: Shows the user interface design with various icons for functions and the file management screen, allowing easy access to recorded videos and photos.
5. නඩත්තු කිරීම
නිසි නඩත්තුව ඔබේ ඩෑෂ් කැමරාවේ ආයු කාලය සහ ප්රශස්ත ක්රියාකාරිත්වය සහතික කරයි.
5.1 පිරිසිදු කිරීම
- Regularly clean the camera lenses with a soft, lint-free cloth to ensure clear recordings. Avoid abrasive materials or chemical cleaners.
- Wipe the screen with a microfiber cloth to remove fingerprints and dust.
5.2 SD කාඩ් කළමනාකරණය
- It is recommended to format the Micro SD card once a month to prevent data corruption and ensure smooth recording. This can be done through the device settings.
- Use only high-endurance Micro SD cards (Class 10 or higher, U3 recommended) designed for dash cam use to withstand frequent read/write cycles.
- If the card becomes full, the loop recording function will automatically overwrite the oldest non-locked files.
6. දෝශ නිරාකරණය
If you encounter any issues with your VANBAR DC209Pro, please refer to the following common problems and solutions:
| ගැටලුව | විය හැකි හේතුව | විසඳුම |
|---|---|---|
| උපාංගය බලගන්වන්නේ නැත. | Loose power connection, faulty cable, vehicle power issue. | Check all power connections. Ensure the cigarette lighter socket or hardwire kit is receiving power. Try a different power source if possible. |
| පටිගත කිරීම නතර වේ හෝ කැටි වේ. | SD card issue (full, corrupted, low quality), firmware issue. | Format the SD card via the device settings. Use a high-endurance Class 10 U3 Micro SD card. Update firmware if available. |
| Poor image quality (blurry, dark). | Dirty lens, protective film still on, low light conditions, incorrect settings. | Clean the camera lenses. Remove any protective films. Adjust exposure/WDR settings in the menu. Ensure sufficient lighting. |
| GPS signal not found or inaccurate. | GPS module not connected, obstructed view of sky, faulty module. | Ensure GPS module is securely connected and placed on the dashboard with a clear view of the sky. Test in an open area. If issue persists, contact support. |
| හඬ පාලනය ප්රතිචාර නොදක්වයි. | Microphone off, noisy environment, unclear commands. | Ensure voice control is enabled in settings. Speak clearly and directly to the device. Reduce background noise. |
| Rear camera image is flipped/mirrored incorrectly. | Incorrect setting for rear camera orientation. | Adjust the image flip/mirror setting for the rear camera in the device menu. |
If the problem persists after trying these solutions, please contact VANBAR customer support for further assistance.
7. පිරිවිතර
| විශේෂාංගය | පිරිවිතර |
|---|---|
| තිර ප්රමාණය | අඟල් 11 (සෙ.මී. 28) |
| සංදර්ශක වර්ගය | LCD |
| ඉදිරිපස කැමරා විභේදනය | 4K (3840x2160p) |
| පසුපස කැමරා විභේදනය | 2.5K (2560x1440p) |
| සංවේදකය | IMX415 CMOS Sensor |
| ක්ෂේත්රයේ View | අංශක 150 යි |
| ගබඩා කිරීම | මයික්රෝ SD කාඩ්පතට සහය දක්වයි (128GB ඇතුළත්) |
| බල සම්බන්ධතාවය | Type-C (Cigarette Lighter / Hardwire Kit) |
| සවිකිරීමේ වර්ගය | Adhesive / Strap-on |
| නිෂ්පාදන මානයන් | 26 x 7.6 x 2.3 සෙ.මී |
| නිෂ්පාදන බර | කිලෝ ග්රෑම් 1.07 කි |
| ආදර්ශ අංකය | SJ209-202201020 |
8. වගකීම් සහ සහාය
VANBAR is committed to providing high-quality products and excellent customer service.
8.1 දිගු වගකීම්
While most dash cams offer a 1-year warranty, VANBAR provides an extended 3-year warranty for customers who purchase directly from Amazon. To register for the 3-year warranty extension, please send your order number and a request for "3-year warranty extension registration" to our customer service center. This offer is valid only for products purchased on Amazon and is not applicable to resales.
8.2 පාරිභෝගික සහාය
We continuously strive to improve our products based on customer feedback. If you have any questions, need assistance, or require firmware updates, please do not hesitate to contact us. Our customer support team is available via phone, email, and LINE.
LINE Official Account: @645cthlb
We are dedicated to resolving any issues you may encounter with 100% enthusiasm, before, during, and after your purchase.


