හැඳින්වීම
This instruction manual provides essential information for the proper installation, operation, and maintenance of your Remco 6T70 6T75E (13-15) Gen 3 Transmission Banner Kit. This kit is designed for automatic transmissions and includes an overhaul kit and clutches, providing the necessary components for a comprehensive transmission rebuild. Please read this manual thoroughly before beginning any work to ensure safe and correct procedures.
පෙට්ටියේ ඇති දේ
Your Remco Transmission Banner Kit includes the following components:
- QTY= 1 PART NO.= ARK-KP5200KXW/O
- DESCRIPTION= 6t70 6t75e(13-15) gen 3 transmission banner kit with overhault kit and clutches Automatic transmission
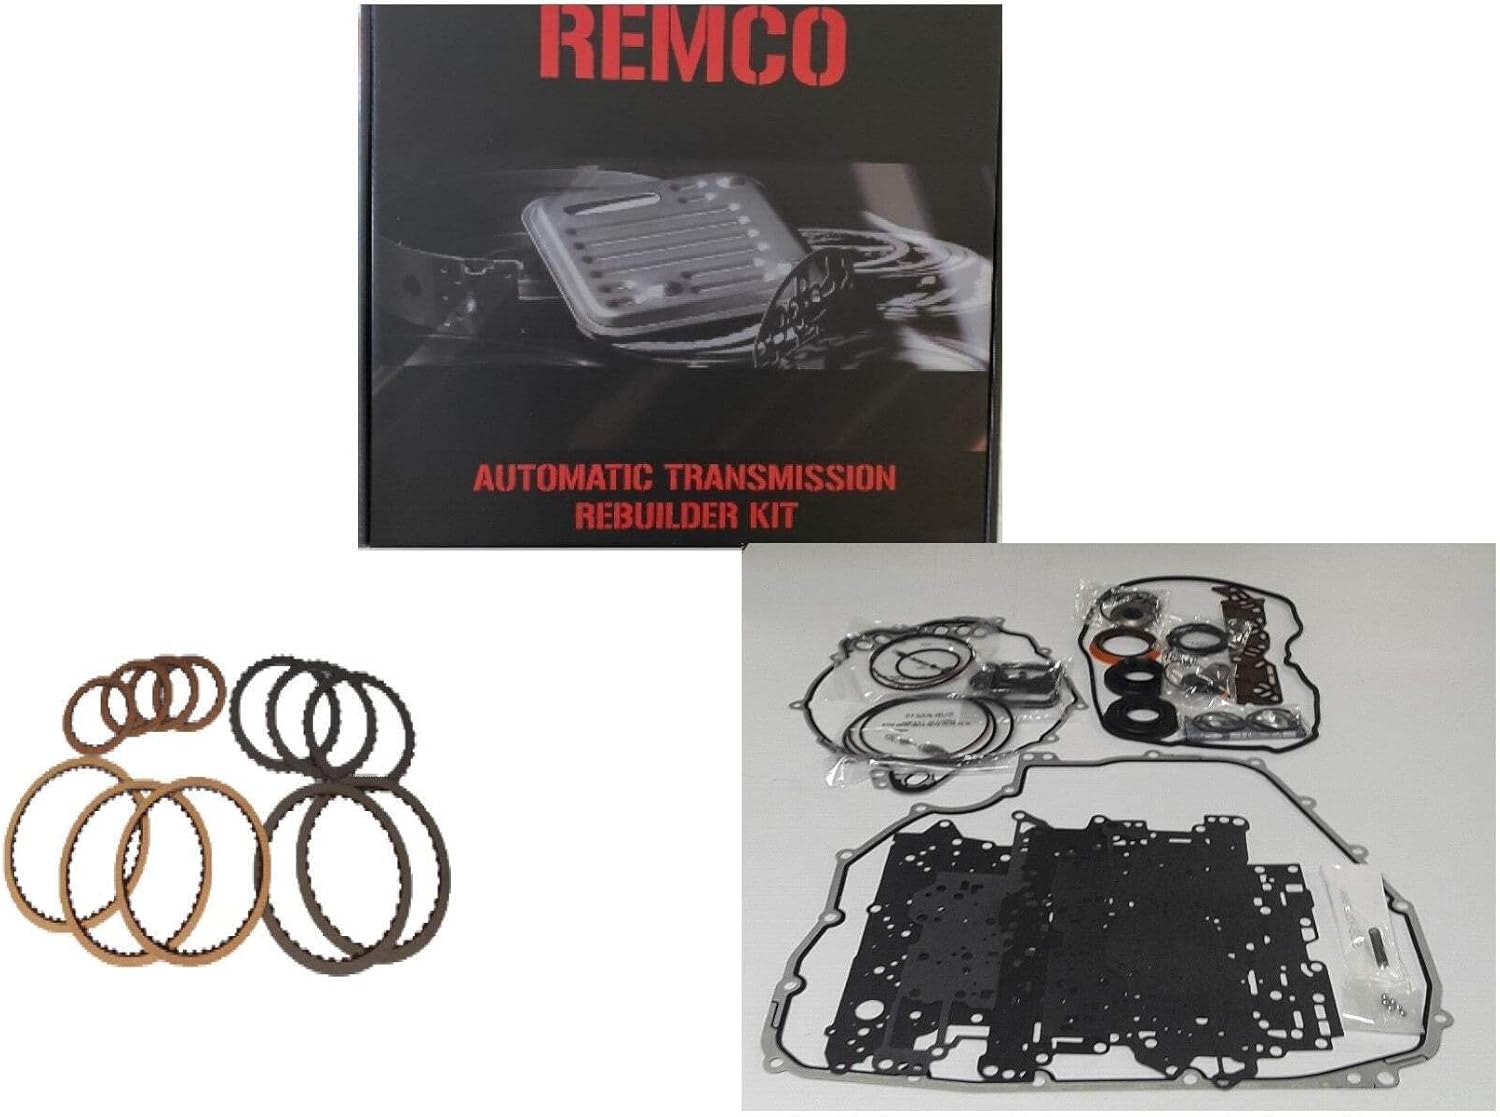
Image: Contents of the Remco 6T70 6T75E Gen 3 Transmission Banner Kit. The image displays the product packaging box, along with various components laid out, including a full set of gaskets, seals, and a collection of clutch and steel plates, essential for a complete transmission overhaul.
නිෂ්පාදන විශේෂාංග
- Our REMCO Rebuild Kits Only Contain OEM Components from Industry-Leading Suppliers.
- BEST BRANDS IN ONE BOX.
ගැළපුම
This transmission banner kit is compatible with the following vehicle models and years. Please verify your vehicle's specifications before installation.
| වාහන ආකෘතිය | අවුරුදු | එන්ජිම |
|---|---|---|
| ඇකේඩියා | 2007 - 2017 | 3.6 /V6 |
| ඇකේඩියා | 2013 - 2015 | 3.6 /V6 |
| Aura | 2007 - 2010 | 3.6 /V6 |
| කැප්ටිවා | 2013 - 2015 | 3.6 /V6 |
| එන්ක්ලේව් | 2008 - 2011 | 3.6 /V6 |
| එන්ක්ලේව් | 2013 - 2017 | 3.6 /V6 |
| විෂුවය | 2013 - 2015 | 3.6 /V6 |
| Equinox Sport | 2008 - 2013 | 3.0, 3.6 /V6 |
| G6 | 2007 - 2010 | 3.6 /V6 |
| ඉම්පාලා | 2013 - 2017 | 2.5, 3.6 /L4, V6 |
| LaCrosse | 2011 - 2011 | 3.6 /V6 |
| LaCrosse | 2013 - 2015 | 3.6 /V6 |
| මැලිබු | 2008 - 2011 | 3.5, 3.6 /V6 |
| Malibu Classic | 2008 - 2008 | 3.5 /V6 |
| ඉදිරි දැක්ම | 2007 - 2010 | 3.6 /V6 |
| SRX | 2010 - 2013 | 3.0, 3.6 /V6 |
| SRX | 2013 - 2016 | 3.0, 3.6 /V6 |
| භූමිය | 2010 - 2013 | 3.0, 3.6 /V6 |
| භූමිය | 2013 - 2015 | 3.6 /V6 |
| ටොරන්ට් | 2008 - 2010 | 3.6 /V6 |
| ගමන් කරන්න | 2009 - 2010 | 3.6 /V6 |
| ගමන් කරන්න | 2013 - 2017 | 3.6 /V6 |
| VUE | 2008 - 2009 | 3.6 /V6 |
| XL-7 | 2009 - 2009 | 3.6 /V6 |
| XTS | 2013 - 2017 | 3.6 /V6 |
සැකසුම සහ ස්ථාපනය
Installing a transmission rebuild kit requires specialized knowledge and tools. It is highly recommended that installation be performed by a certified automotive technician. Improper installation can lead to severe damage to the transmission and vehicle.
සාමාන්ය පියවර (වෘත්තීය ස්ථාපනය නිර්දේශ කෙරේ):
- සකස් කිරීම: Ensure the vehicle is safely lifted and secured. Drain transmission fluid and remove the transmission from the vehicle.
- විසුරුවා හැරීම: Carefully disassemble the transmission, noting the order and orientation of all components. Refer to a specific service manual for your vehicle's transmission model.
- පරීක්ෂාව: Inspect all hard parts for wear, damage, or scoring. Replace any worn components not included in this kit as necessary.
- සංරචක ප්රතිස්ථාපනය: Replace all seals, gaskets, O-rings, clutch plates, and steel plates with the new components from the Remco kit. Ensure all new parts are properly lubricated with clean transmission fluid before installation.
- නැවත එකලස් කිරීම: Reassemble the transmission following the reverse order of disassembly. Pay close attention to torque specifications for all bolts.
- ස්ථාපනය: Reinstall the rebuilt transmission into the vehicle. Connect all lines, sensors, and electrical connectors.
- දියර පිරවීම: Fill the transmission with the manufacturer-specified type and amount of new transmission fluid.
- මූලික පරීක්ෂාව: Perform initial checks for leaks and proper fluid levels.
සටහන: This kit provides the necessary components for a rebuild. Detailed step-by-step instructions for transmission disassembly and reassembly are specific to each transmission model and are typically found in a dedicated factory service manual for your vehicle.
මෙහෙයුම් මාර්ගෝපදේශ
After a transmission rebuild, proper break-in and careful operation are crucial for longevity.
- ආරම්භක ආරම්භය: After installation, start the engine and allow it to idle. Cycle the transmission through all gear ranges (P, R, N, D, L) several times, pausing in each gear for a few seconds.
- තරල මට්ටම පරීක්ෂා කිරීම: Recheck the transmission fluid level after cycling through gears and top off if necessary. Repeat this check after the first drive.
- විවේක කාලය: For the first 500-1000 miles, avoid heavy towing, aggressive acceleration, and prolonged high-speed driving. Allow the new components to seat properly.
- අසාමාන්යතා සඳහා සවන් දෙන්න: Pay attention to any unusual noises, shifting issues, or warning lights. Address them immediately.
නඩත්තු කිරීම
Regular maintenance is key to extending the life of your rebuilt transmission.
- තරල පරීක්ෂාවන්: Regularly check transmission fluid levels and condition according to your vehicle manufacturer's recommendations.
- තරල වෙනස්කම්: Adhere to the vehicle manufacturer's recommended transmission fluid change intervals. Use only the specified type of fluid.
- පෙරහන් ආදේශනය: Replace the transmission filter during fluid changes or as recommended by the vehicle manufacturer.
- Address Leaks: Promptly address any signs of fluid leaks.
දෝෂගවේෂණය
This section provides general troubleshooting tips. For complex issues, consult a qualified technician.
| ගැටලුව | විය හැකි හේතුව | විසඳුම |
|---|---|---|
| Transmission slipping | Low fluid level, worn clutches (unlikely with new kit), internal pressure issues. | Check fluid level and add if low. If problem persists, professional diagnosis is required. |
| Harsh shifting | Incorrect fluid level, faulty sensor, valve body issue. | Verify fluid level. Consult a technician for diagnostic scan and repair. |
| දියර කාන්දු වීම | Improperly seated gasket/seal, damaged pan, loose bolts. | Inspect for source of leak. Tighten bolts to spec, replace gasket/seal if damaged. |
| ගියර් වල නියැලීමක් නැත | Severely low fluid, internal mechanical failure. | Check fluid level. If fluid is adequate, immediate professional inspection is needed. |
පිරිවිතර
| ගුණාංගය | විස්තර |
|---|---|
| නිෂ්පාදකයා | Remco |
| වෙළඳ නාමය | Remco |
| අයිතමයේ බර | රාත්තල් 2722 කි |
| නිෂ්පාදන මානයන් | අඟල් 18 x 5 x 16 |
| නිෂ්පාදකයාගේ කොටස අංකය | KP5200KXW/O |
| ASIN | B0BVL747JG |
| පළමු දිනය තිබේ | 12 පෙබරවාරි 2023 |
වගකීම් සහ සහාය
වගකීම් තොරතුරු සහ පාරිභෝගික සහාය සඳහා, කරුණාකර පහත සඳහන් දේ බලන්න:
- ප්රතිලාභ: RETURNS ARE ACCEPTED ONLY IN THEIR ORIGINAL PACKAGING UNOPENED PACKAGING.
- ජාත්යන්තර ඇණවුම්: Note: International orders "Buyer pays for import tax duties and expenses".
- පාරිභෝගික සහාය: For further assistance, please contact Remco Transmission Parts directly or visit their official store page on Amazon: Remco Transmission Parts Store.


