1. හැඳින්වීම
Thank you for choosing the Walimex Pro Campaigner 600 HS Studio Flash. This high-performance studio flash is designed for semi-professional photographers requiring advanced features and reliable operation. This manual provides essential information for safe and effective use, including setup, operation, maintenance, and troubleshooting.
2. ආරක්ෂිත උපදෙස්
- භාවිතයට පෙර සියලුම උපදෙස් කියවන්න.
- ඒකකය වැසි හෝ තෙතමනය නිරාවරණය නොකරන්න.
- බල සැපයුම ඒකකයේ අවශ්යතාවලට ගැලපෙන බවට වග බලා ගන්න.
- ඒකකය ඔබම විසුරුවා හැරීමට හෝ අලුත්වැඩියා කිරීමට උත්සාහ නොකරන්න. සුදුසුකම් ලත් සේවා නිලධාරීන් වෙත යොමු වන්න.
- දරුවන්ට ළඟා විය නොහැකි ලෙස තබා ගන්න.
- Avoid direct eye exposure to the flash light.
- අධික උනුසුම් වීම වැළැක්වීම සඳහා නිසි වාතාශ්රය සහතික කරන්න.
3. පැකේජ අන්තර්ගතය
පහත ලැයිස්තුගත කර ඇති සියලුම අයිතම ඔබේ පැකේජයට ඇතුළත් කර ඇති බව තහවුරු කරගන්න:
- 1x Walimex Pro Campaigner 600 HS Studio Flash
- 1x සම්මත පරාවර්තකය
- 1x බල කේබලය
- 1x Sync Cable
- 1x ආරක්ෂිත තොප්පිය
- 1x උපදෙස් අත්පොත

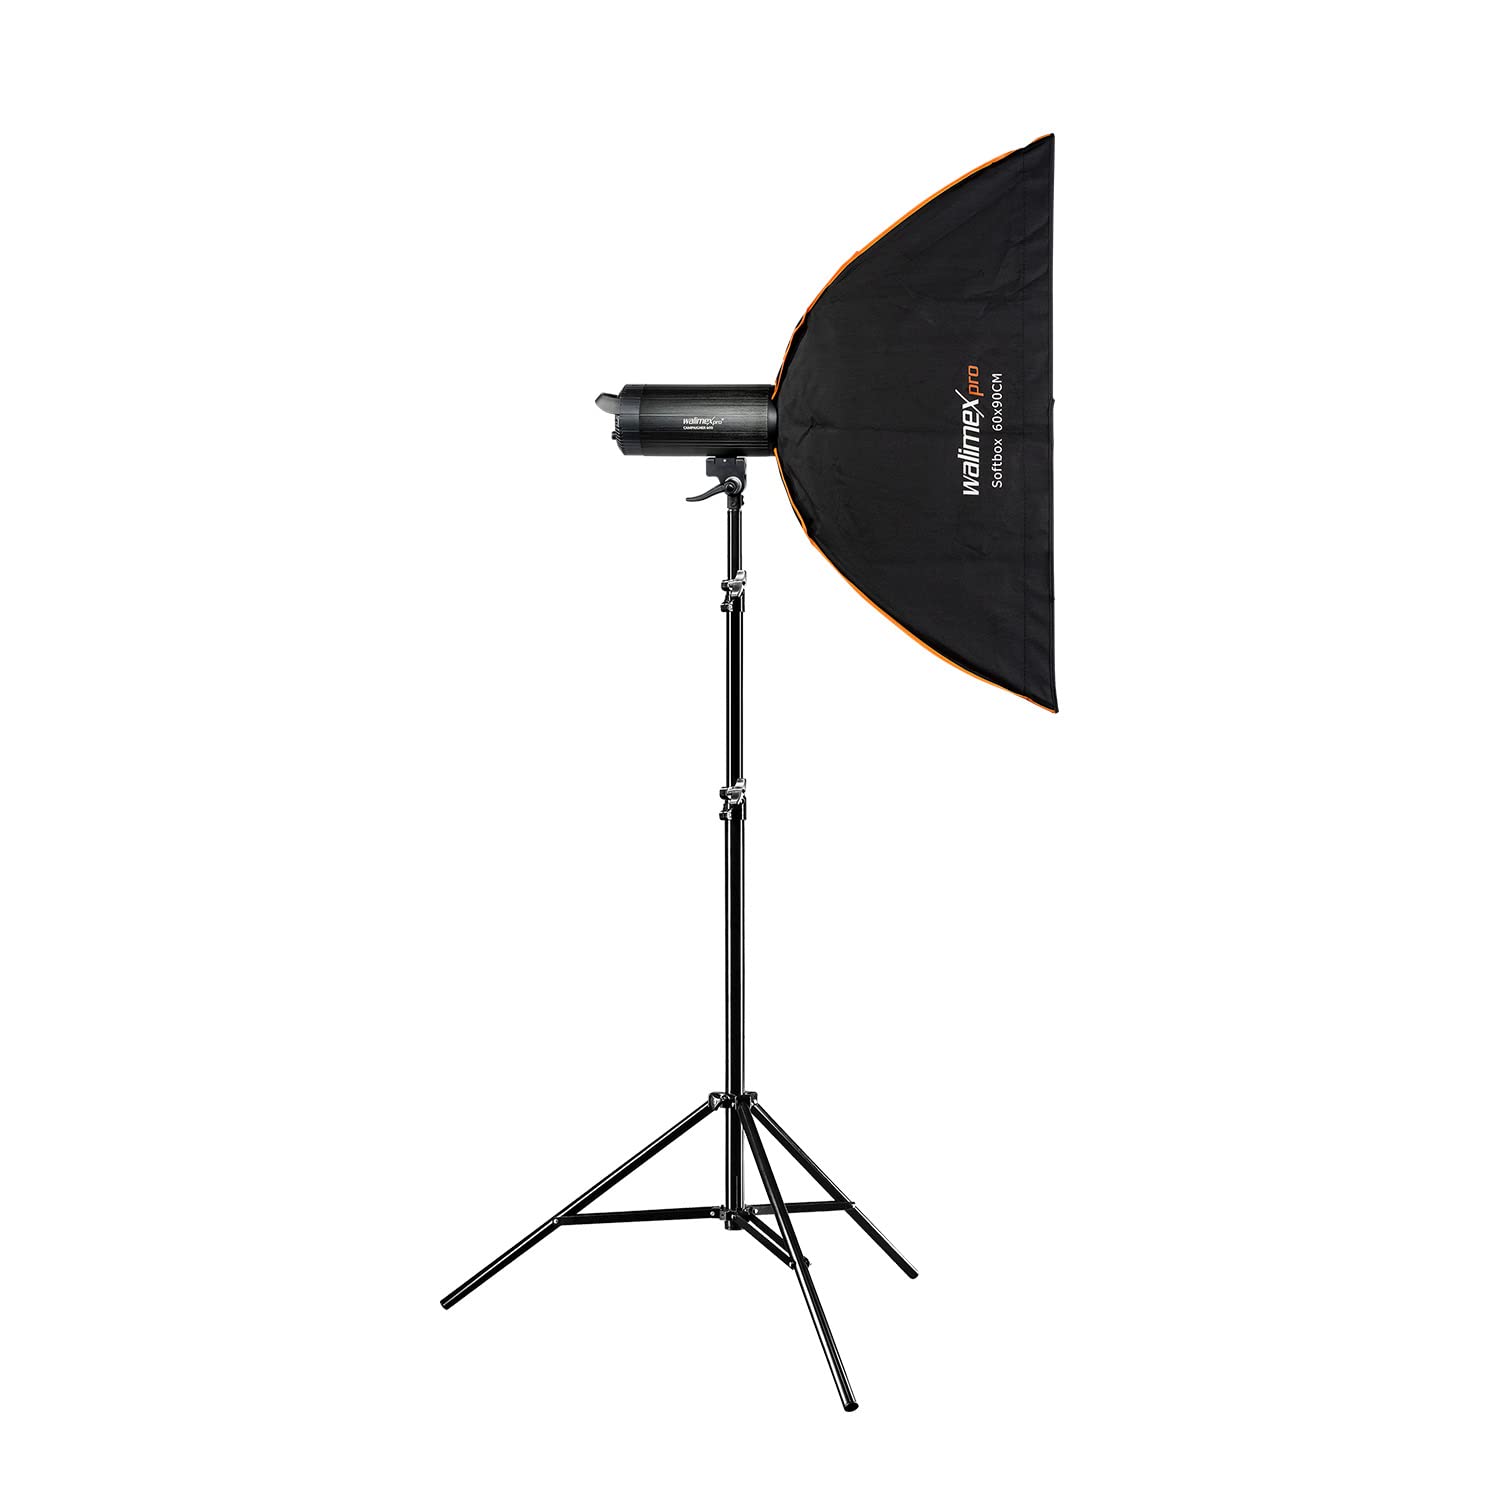
Figure 3.1: Included components in the Walimex Pro Campaigner 600 HS Studio Flash package. This image shows the flash unit, a standard reflector, a softbox, a light stand, and a wireless trigger.
4. නිෂ්පාදන අවසන්view
The Walimex Pro Campaigner 600 HS is a powerful studio flash unit featuring a robust aluminum finish and advanced functionalities.
රූපය 4.1: ඉදිරිපස view of the Walimex Pro Campaigner 600 HS Studio Flash with reflector attached.

රූපය 4.2: පසුපස view showing the control panel, power input, and fan vents of the Walimex Pro Campaigner 600 HS Studio Flash.
ප්රධාන ලක්ෂණ:
- High-Speed Sync (HS) Mode: Allows freezing fast motion and shooting with wide apertures in bright conditions.
- Integrated 2.4 GHz Receiver: Supports 16 channels and 5 groups for wireless control with an optional radio trigger.
- 600Ws Flash Output: Continuously adjustable from 1/1 to 1/32.
- වේගවත් ප්රතිචක්රීකරණ කාලය: තත්පර 0.3 ට අඩු.
- 25W LED Modeling Light: Provides continuous illumination for previewආලෝකකරණ බලපෑම් භාවිතා කිරීම.
- බෝවන්ස් කන්ද: පුළුල් පරාසයක ආලෝක විකරණකාරක සමඟ අනුකූල වේ.
- Quiet Fan Cooling: Ensures stable operation and extends unit lifespan.
5. පිහිටුවීම
5.1 Attaching the Reflector/Light Modifier
- Align the Bowens mount of the reflector or light modifier with the flash unit's mount.
- Insert the modifier and rotate it clockwise until it locks securely into place.
- To remove, press the release button on the flash unit and rotate the modifier counter-clockwise.
5.2 ලයිට් ස්ටෑන්ඩ් එකක් මත සවි කිරීම
- Loosen the locking knob on the flash unit's mounting bracket.
- Place the flash unit onto the light stand spigot.
- ෆ්ලෑෂ් ඒකකය සුරක්ෂිත කිරීම සඳහා අගුළු දැමීමේ බොත්තම තද කරන්න.
- Adjust the tilt angle of the flash unit as needed and tighten the tilt locking knob.
5.3 බල සම්බන්ධතාවය
- Ensure the flash unit is switched OFF.
- Connect the power cable to the power input on the rear of the flash unit.
- විදුලි රැහැනේ අනෙක් කෙළවර සුදුසු විදුලිබලාගාරයකට සම්බන්ධ කරන්න.
6. මෙහෙයුම් උපදෙස්
6.1 බලය සක්රිය / අක්රිය
ඔබන්න බලය switch on the rear panel to turn the unit ON or OFF. The display will illuminate upon power-on.
6.2 ෆ්ලෑෂ් ප්රතිදානය සකස් කිරීම
කරකවන්න POWER ADJUSTMENT DIAL to set the desired flash output. The output can be adjusted continuously from 1/1 (full power) to 1/32. The current setting is displayed on the LCD screen.
6.3 High-Speed Sync (HS) Mode
The HS mode allows for shutter speeds faster than your camera's native flash sync speed, enabling you to freeze fast-moving subjects or use wider apertures in bright ambient light. To activate HS mode, press the HS button on the control panel. Ensure your camera and wireless trigger (if used) also support High-Speed Sync.
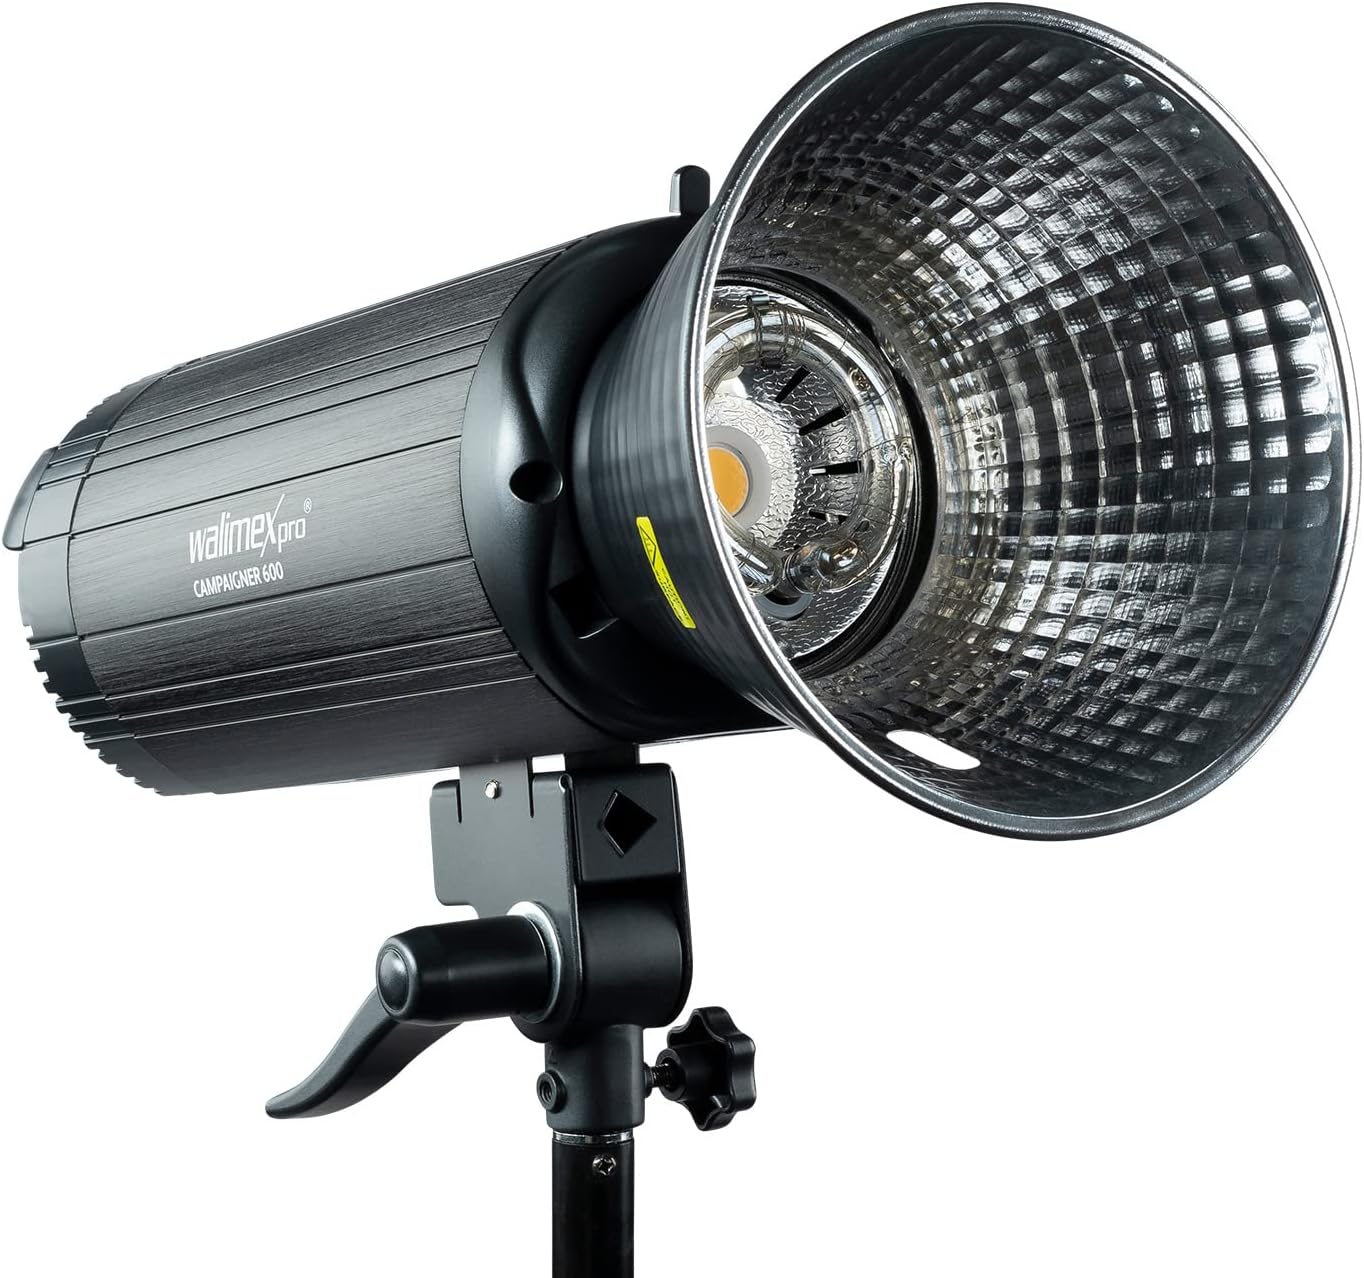
Figure 6.1: Visual demonstration of the High-Speed Sync (HS) mode's ability to freeze motion compared to standard flash synchronization.
6.4 Wireless Control (2.4 GHz Receiver)
The integrated 2.4 GHz receiver allows for wireless control of the flash unit using a compatible Walimex Pro radio trigger (sold separately).
- Ensure the flash unit's wireless function is enabled (refer to the display for the wireless icon).
- Set the desired channel and group on both the flash unit and the radio trigger. The flash supports 16 channels and 5 groups.
- Test the connection by pressing the test button on the trigger.
6.5 ආකෘතිකරණ ආලෝකය
The 25W LED modeling light can be turned ON or OFF using the ආකෘතිය button on the control panel. This light helps in previewing the lighting effect before firing the flash.
7. නඩත්තු කිරීම
- පිරිසිදු කිරීම: Use a soft, dry cloth to clean the exterior of the flash unit. Do not use liquid cleaners or solvents.
- ගබඩා: සෘජු හිරු එළියෙන් සහ අධික උෂ්ණත්වයන්ගෙන් ඈත්ව සිසිල් වියළි ස්ථානයක ඒකකය ගබඩා කරන්න.
- බල්බ ආදේශනය: ෆ්ලෑෂ් ටියුබ් සහ ආකෘති නිර්මාණය එල්amp are user-replaceable components. Consult a qualified technician or the manufacturer's support for replacement procedures if needed.
- වාතාශ්රය: Ensure the cooling fan vents are clear of obstructions to maintain proper airflow.
8. දෝශ නිරාකරණය
| ගැටලුව | විය හැකි හේතුව | විසඳුම |
|---|---|---|
| ෆ්ලෑෂ් එක පත්තු වෙන්නේ නැහැ. | No power, trigger not connected/paired, flash in sleep mode, camera settings incorrect. | Check power connection. Ensure trigger is correctly paired and functional. Wake flash by pressing test button. Verify camera flash settings. |
| ෆ්ලෑෂ් ප්රතිදානය නොගැලපේ. | Low power setting, overheating, faulty flash tube. | Increase flash output. Allow unit to cool down. Contact service for flash tube replacement. |
| රැහැන් රහිත ප්රේරකය ක්රියා නොකරයි. | Incorrect channel/group, trigger battery low, interference. | Verify channel and group settings. Replace trigger battery. Move away from sources of interference. |
| ආකෘතිකරණ ආලෝකය ක්රියා නොකරයි. | Modeling light switched off, faulty LED. | Press the MODEL button to turn it on. Contact service if LED is faulty. |
9. පිරිවිතර
| විශේෂාංගය | විස්තර |
|---|---|
| ආදර්ශ අංකය | 23383 |
| ෆ්ලෑෂ් ප්රතිදානය | 600 ඩබ්ලිව් |
| Flash Output Adjustment | 1/1 to 1/32 (continuous) |
| ප්රතිචක්රීකරණ කාලය | < තත්පර 0.3 |
| ආකෘති නිර්මාණය ආලෝකය | 25W LED |
| රැහැන් රහිත ග්රාහකයා | Integrated 2.4 GHz (16 channels, 5 groups) |
| මවුන්ට් වර්ගය | Bowens Assembly |
| වර්ණය | කළු |
| මානයන් (නැව්ගත කිරීම) | 118 x 48.6 x 44.05 සෙ.මී |
| බර (නැව්ගත කිරීම) | කිලෝ ග්රෑම් 11.43 කි |
| නිෂ්පාදකයා | වෝල්සර් ජීඑම්බීඑච් |
Figure 9.1: Physical dimensions of the Walimex Pro Campaigner 600 HS Studio Flash.
10. වගකීම් සහ සහාය
This product comes with a standard manufacturer's warranty. For detailed warranty information, technical support, or service inquiries, please contact Walser GmbH directly or refer to their official webවෙබ් අඩවිය. වගකීම් හිමිකම් සඳහා ඔබේ මිලදී ගැනීමේ සාක්ෂි තබා ගන්න.
Manufacturer: Walser GmbH


