1. නිෂ්පාදන අවසන්view
The FITNATE Smart Door Knob offers convenient keyless entry with biometric fingerprint recognition and remote app control. Designed for enhanced security and ease of use, it is suitable for various indoor applications such as bedrooms, apartments, hotels, and offices. This smart lock combines modern design with advanced security features, including unlock records and automatic locking.

Figure 1: FITNATE Smart Door Knob with app interface and traditional keys.
2. පැකේජ අන්තර්ගතය
- FITNATE Smart Door Knob (Exterior and Interior Knobs)
- අගුල් යාන්ත්රණය
- සවිකරන ඉස්කුරුප්පු
- යාන්ත්රික යතුරු (2)
- ස්ථාපන ආකෘතිය
- පරිශීලක අත්පොත (මෙම ලේඛනය)
3. පිරිවිතර
| විශේෂාංගය | විස්තර |
|---|---|
| වෙළඳ නාමය | ෆිට්නේට් කරන්න |
| මාදිලියේ නම | Door Knob (HS0396K-BDFBA) |
| අගුළු වර්ගය | ජෛවමිතික |
| විශේෂ ලක්ෂණය | ඇඟිලි සලකුණ |
| ද්රව්ය | ලෝහ |
| වර්ණය | මැට් කළු |
| අයිතම මානයන් (L x W x H) | අඟල් 7.95 x 3.23 x 3.23 |
| අයිතමයේ බර | පවුම් 2ක් |
| පාලන ක්රමය | යෙදුම, ස්පර්ශය |
| සම්බන්ධතා ප්රොටෝකෝලය | බ්ලූටූත් |
| බලශක්ති ප්රභවය | 4 x AA බැටරි (ඇතුළත් කර නැත) |
4. ස්ථාපන මාර්ගෝපදේශය
Before installation, ensure your door meets the required dimensions:
- Door Hole Diameter: 2-1/8" (54mm)
- Door Thickness: 1-3/8" to 2-1/8" (35-54mm)
- Backset: Adjustable for 2-3/8" or 2-3/4" (60 or 70mm)

Figure 2: Door dimension requirements for installation.
4.1 පියවරෙන් පියවර ස්ථාපනය
- දොර සකස් කරන්න: If replacing an existing knob, remove it. Use the provided template to mark and drill holes if installing on a new door.
- අගුල ස්ථාපනය කරන්න: Insert the latch into the door edge hole. Ensure the latch bolt faces the correct direction for your door swing. Secure it with screws.
- Install Exterior Knob: Pass the spindle and power cable from the exterior knob through the latch and door hole.
- Install Interior Knob: Connect the power cable from the exterior knob to the interior knob. Align the interior knob with the exterior knob and secure it with the long screws. Ensure the power cable is not pinched.
- බැටරි ඇතුළු කරන්න: Open the battery cover on the interior knob. Insert 4 AA alkaline batteries, ensuring correct polarity (+/-).
- Attach Battery Cover: බැටරි කවරය ආරක්ෂිතව සවි කරන්න.

Figure 3: Visual guide for easy installation, showing components and suitable door types.
4.2 ස්ථාපන වීඩියෝ මාර්ගෝපදේශය
For a detailed visual guide on installation, please refer to the official video below:
Video 1: "How to Install - FITNATE Door Knob HS0396". This video provides a comprehensive step-by-step guide for installing the smart door knob.
5. මෙහෙයුම් උපදෙස්
5.1 යෙදුම් බාගත කිරීම සහ සැකසීම
To utilize the smart features of your FITNATE door knob, download the "TUYA SMART" or "SMART LIFE" app from your device's app store (iOS App Store or Google Play Store).

Figure 4: The smart lock integrates with the app for user management and tracking unlock history.
- ගිණුම තනන්න: යෙදුම විවෘත කර නව පරිශීලක ගිණුමක් සාදන්න හෝ ඔබට දැනටමත් එකක් තිබේ නම් ලොග් වන්න.
- උපාංගය එක් කරන්න: Click the "+" icon in the upper right corner of the app. Ensure Bluetooth is enabled on your phone. Touch the fingerprint screen of the lock to enable Bluetooth for easier connection.
- Discover & Add: The app will discover the "JB-ZAM" device. Click "Add" to pair.
- Rename Lock: Once successfully connected, you can click the device icon (e.g., "KNOB LOCK") to rename your lock for easy identification.
For a visual guide on app setup and usage, refer to the videos below:
Video 2: "FITNATE Fingerprint Door Knob with App Control". This video demonstrates the app control features of the smart door knob.
Video 3: "FITNATE HS0396 Door Knob - How to Use the APP". This video provides instructions on how to effectively use the app with your smart door knob.
5.2 ඇඟිලි සලකුණු කළමනාකරණය
The lock supports storing up to 20 fingerprints for various users.

Figure 5: The smart door knob supports multiple user fingerprints for access.
- ඇඟිලි සලකුණ එක් කරන්න: In the app, navigate to "Member Management". Choose "Admin" or another user, then click "Fingerprint" and "Add".
- Enroll Fingerprint: Follow the on-screen prompts to place your finger on the sensor multiple times, adjusting the angle slightly for comprehensive enrollment. Ensure your finger is clean and dry.
- Rename Fingerprint: After successful enrollment, you can name the fingerprint for easy identification.
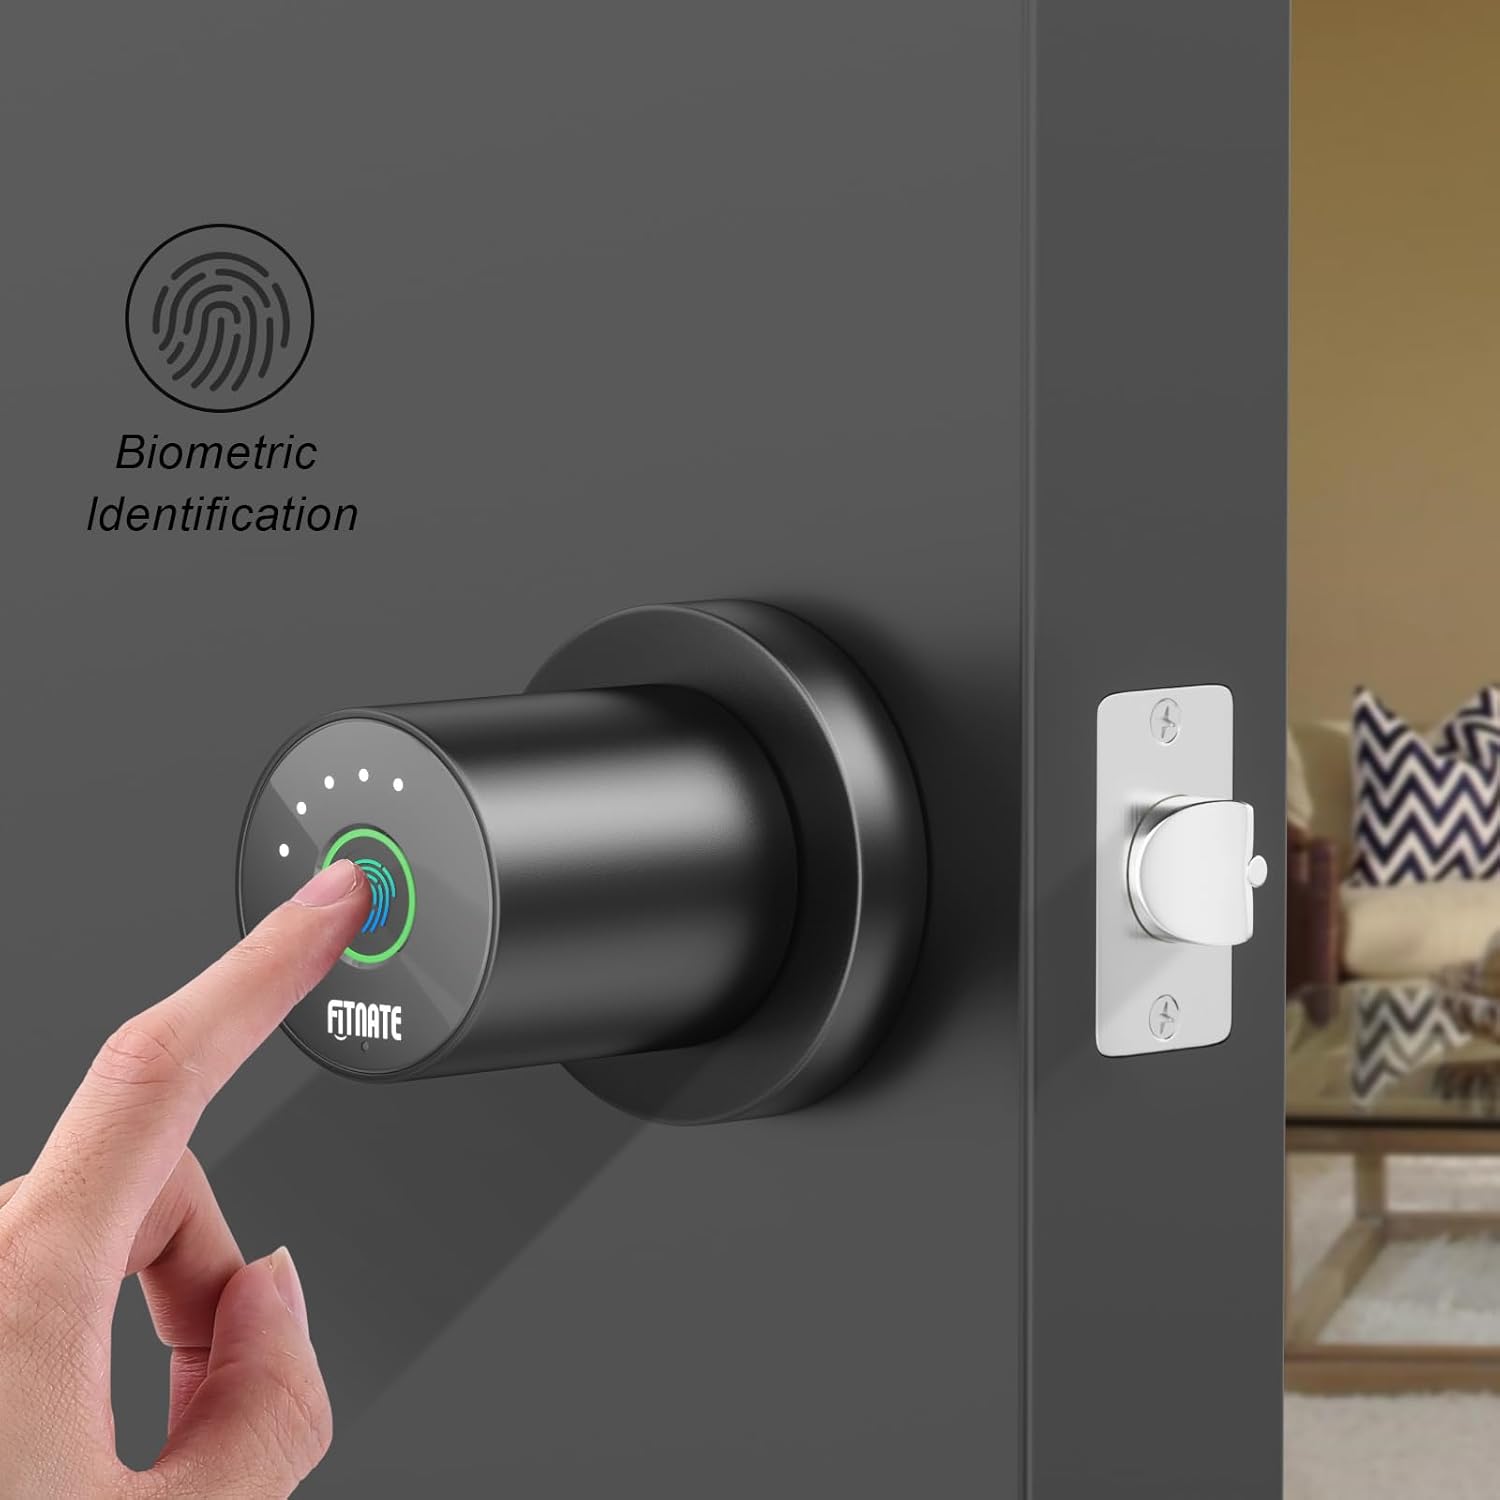
Figure 6: Biometric identification in action on the smart door knob.
5.3 අගුළු හැරීමේ ක්රම
- ඇඟිලි සලකුණු අගුලු හැරීම: Place your enrolled finger on the sensor. The light will turn green, and the lock will unlock.
- යෙදුම් අගුලු හැරීම: Open the app, and on the main lock page, hold and drag the key icon to the unlocked padlock icon to unlock the door remotely.
- යාන්ත්රික යතුරු අගුළු හැරීම: In case of battery depletion or electronic malfunction, use the provided mechanical keys to unlock the door. The keyhole is located at the bottom of the knob.

Figure 7: The smart door knob offers convenient one-touch fingerprint unlocking.

Figure 8: The lock features a low battery alarm and a mechanical key for backup access.
5.4 උසස් යෙදුම් විශේෂාංග
- Unlock History: View a record of when the lock was opened and by which user. Access this by entering the lock page and clicking "Unlock Record" at the bottom.
- ගමන් ප්රකාරය: Enable this mode in the app (under "More") to keep the lock in a normally open state, allowing free passage without requiring a fingerprint or app unlock.
- Mute Lock Volume: Adjust or mute the lock's sound volume through the app settings (under "More" > "Lock Volume").
- දුරස්ථ අගුලු හැරීම: The app allows for remote unlocking, enabling you to grant access from anywhere.
- ස්වයංක්රීය අගුල: Configure automatic locking settings to ensure the door is secured after a set period.
6. නඩත්තු කිරීම
- බැටරි ආදේශනය: The door lock requires four LR6/AA/1.5V alkaline batteries. When a low battery reminder occurs (battery icon red with continuous beeping), replace the batteries within a week to ensure proper functionality.
- පිරිසිදු කිරීම: Wipe the lock surface with a soft, dry cloth. Avoid using abrasive cleaners or solvents that could damage the finish or electronic components.
- ඇඟිලි සලකුණු සංවේදක සත්කාරය: ප්රශස්ත ක්රියාකාරිත්වය සඳහා ඇඟිලි සලකුණු සංවේදකය පිරිසිදුව හා වියලිව තබා ගන්න.
7. දෝශ නිරාකරණය
- අගුල ප්රතිචාර නොදක්වයි:
- බැටරි මට්ටම පරීක්ෂා කර අඩු නම් ප්රතිස්ථාපනය කරන්න.
- Ensure the power cable connection inside the interior knob is secure.
- ඇඟිලි සලකුණ හඳුනා නොගත්:
- ඔබේ ඇඟිල්ල පිරිසිදු හා වියලි බව සහතික කර ගන්න.
- Try re-enrolling your fingerprint, adjusting the angle during the process.
- ඇඟිලි සලකුණු සංවේදකය පිරිසිදු බව සහතික කර ගන්න.
- යෙදුම් සම්බන්ධතා ගැටළු:
- ඔබගේ දුරකථනයේ බ්ලූටූත් සබල කර ඇති බව සහතික කර ගන්න.
- යෙදුම නැවත ආරම්භ කර නැවත සම්බන්ධ කිරීමට උත්සාහ කරන්න.
- Touch the fingerprint sensor on the lock to activate Bluetooth pairing mode.
- Door does not lock/unlock properly:
- Check for any obstructions in the door frame or latch.
- Verify that the latch mechanism is installed correctly and moves freely.
- Ensure the interior and exterior knobs are properly aligned and secured.
- Red light on fingerprint sensor: Indicates an unlock failed. Re-attempt with an enrolled fingerprint.
8. වගකීම් සහ සහාය
FITNATE products are designed for durability and performance. For warranty information, technical support, or assistance with your Smart Door Knob (Model: HS0396K-BDFBA), please refer to the contact information provided on the product packaging or the official FITNATE webඅඩවිය.
ඔබට අමතර සහාය සහ නිතර අසන ප්රශ්න ද සොයාගත හැකිය FITNATE Store on Amazon.


