1. හැඳින්වීම
This manual provides instructions for the installation, operation, and maintenance of the Poly Studio V52 USB Video Bar. The Poly Studio V52 is designed for medium-sized meeting rooms, offering 4K UHD video conferencing capabilities with advanced AI features for an enhanced collaborative experience.
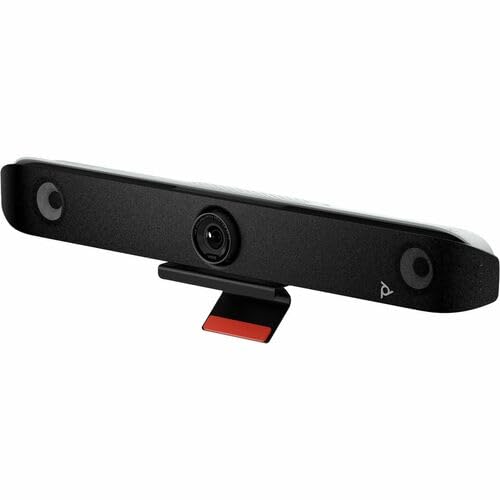
රූපය 1.1: ඉදිරිපස view of the Poly Studio V52 USB Video Bar, showcasing the central camera and integrated speakers.
2. පැකේජ අන්තර්ගතය
ස්ථාපනය සමඟ ඉදිරියට යාමට පෙර සියලුම අයිතම පැකේජයේ ඇති බව තහවුරු කර ගන්න:
- Poly Studio V52 USB Video Bar
- බල ඇඩැප්ටරය සහ කේබල්
- USB Cable (Type-A to Type-C or Type-C to Type-C, depending on model)
- HDMI කේබලය
- බිත්ති සවිකිරීමේ කට්ටලය (ඇතුළත් කර ඇත්නම්)
- ඉක්මන් ආරම්භක මාර්ගෝපදේශය
- ආරක්ෂාව සහ නියාමන තොරතුරු
3. නිෂ්පාදන අවසන්view
The Poly Studio V52 integrates a 4K camera, powerful speakers, and advanced microphones into a single device. Key features include:
- 4K UHD කැමරාව: 20 Megapixel sensor with a 95° Field of View (FOV) and 5x digital zoom for clear visuals.
- ඒකාබද්ධ ශ්රව්ය: 4-way speakers deliver room-filling sound, complemented by advanced microphone arrays.
- පොලි අධ්යක්ෂක AI: Intelligent camera framing to keep participants in view.
- NoiseBlockAI & Acoustic Fence: Technologies for noise reduction and clear voice pickup.
- නම්යශීලී සම්බන්ධතාවය: USB for host connection, HDMI for display output, and RJ-45 for network.

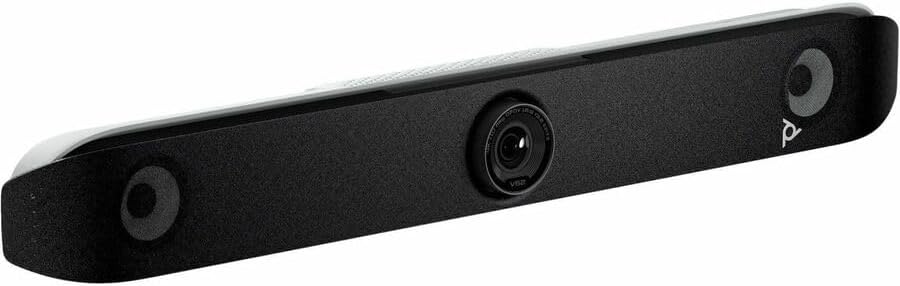
රූපය 3.1: කෝණික view of the Poly Studio V52, highlighting its sleek design and integrated components.
රූපය 3.2: පසුපස view of the Poly Studio V52, illustrating the various connectivity ports including USB, HDMI, and Ethernet.
4. පිහිටුවීම
4.1 භෞතික ස්ථානගත කිරීම
Position the Poly Studio V52 either above or below your display in the meeting room. Ensure it has a clear line of sight to all participants. If using a wall mount, follow the instructions provided with the wall mount kit.
4.2 සම්බන්ධක කේබල්
- සම්බන්ධක බලය: Plug the power adapter into the Poly Studio V52 and then into a power outlet.
- USB සම්බන්ධ කරන්න: Connect one end of the USB cable to the USB port on the Poly Studio V52 and the other end to a USB port on your meeting room PC or laptop. This connection enables video, audio, and device control.
- Connect HDMI Out: Connect an HDMI cable from one of the HDMI Out ports on the Poly Studio V52 to an HDMI input on your display(s). The Poly Studio V52 has two HDMI Out ports for dual display support.
- Connect HDMI In (Optional): If you need to share content from another device (e.g., a laptop) directly through the video bar, connect an HDMI cable from that device to the HDMI In port on the Poly Studio V52.
- ජාලය සම්බන්ධ කරන්න (විකල්ප): For network management or specific conferencing platforms, connect an Ethernet cable from the RJ-45 port on the Poly Studio V52 to your network switch or router.
Once connected, the device will power on automatically or can be powered on via its power button (if present).
5. මෙහෙයුම් උපදෙස්
5.1 ආරම්භක බලය සක්රීය කිරීම
After connecting power, the Poly Studio V52 will typically power on and perform a self-check. Indicators on the device will show its status.
5.2 Using with Conferencing Software
The Poly Studio V52 functions as a standard USB video and audio device. To use it with your preferred video conferencing application (e.g., Zoom, Microsoft Teams, Google Meet):
- Launch your video conferencing application on the connected PC.
- Navigate to the application's audio and video settings.
- Select "Poly Studio V52" as the camera, microphone, and speaker device.
- Adjust volume and other settings as needed within the application.
5.3 Camera Control and AI Features
The Poly Studio V52 features Poly DirectorAI for automatic camera framing. This technology automatically adjusts the camera to keep all participants in view or to focus on the active speaker. Manual camera controls (pan, tilt, zoom) may be available through the conferencing application or a dedicated Poly management application, if installed.
6. නඩත්තු කිරීම
6.1 උපාංගය පිරිසිදු කිරීම
ප්රශස්ත කාර්ය සාධනය සහ පෙනුම පවත්වා ගැනීම සඳහා:
- පිරිසිදු කිරීමට පෙර උපාංගය ක්රියා විරහිත කර විසන්ධි කර ඇති බව සහතික කර ගන්න.
- බාහිර පෘෂ්ඨයන් පිස දැමීමට මෘදු, වියලි, ලින්ට් රහිත රෙද්දක් භාවිතා කරන්න.
- මුරණ්ඩු සලකුණු සඳහා, සැහැල්ලුවෙන් dampරෙදි කැබැල්ල වතුරෙන් පුරවන්න. සැර රසායනික ද්රව්ය, උල්ෙල්ඛ පිරිසිදු කරන්නන් හෝ ද්රාවක භාවිතා කිරීමෙන් වළකින්න.
- Gently clean the camera lens with a lens cleaning cloth, if necessary.
6.2 ස්ථිරාංග යාවත්කාලීන කිරීම්
Periodically check for firmware updates from the manufacturer's website. Firmware updates can provide new features, performance improvements, and bug fixes. Follow the manufacturer's instructions for applying updates.
7. දෝශ නිරාකරණය
| ගැටලුව | විය හැකි හේතුව | විසඳුම |
|---|---|---|
| දර්ශනයේ වීඩියෝ ප්රතිදානයක් නොමැත. | HDMI cable loose or faulty; incorrect display input selected; device not powered on. | Check HDMI cable connections. Ensure display is on correct input. Verify Poly Studio V52 is powered on. |
| ස්පීකර්වලින් ශ්රව්ය නැත. | Volume muted on device or PC; incorrect audio output selected in conferencing software. | Increase volume. Select "Poly Studio V52" as the speaker in your conferencing application settings. |
| මයික්රෆෝනය ශබ්දය ලබා නොගනී. | Microphone muted; incorrect audio input selected in conferencing software. | Unmute microphone. Select "Poly Studio V52" as the microphone in your conferencing application settings. |
| Camera not detected by PC. | USB cable loose or faulty; USB port issue; driver issue. | Ensure USB cable is securely connected. Try a different USB port on the PC. Restart PC. Check device manager for driver status. |
| ජාල සම්බන්ධතා ගැටළු. | Ethernet cable loose; network configuration issue. | Check Ethernet cable connection. Verify network settings on the device (if accessible) or consult network administrator. |
8. පිරිවිතර
| නිෂ්පාදන නම | Poly Studio V52 USB Video Bar |
| වෙළඳ නාමය | HP (Poly) |
| ආදර්ශ අංකය | V52 (A09D4AA#ABA) |
| කැමරා විභේදනය | 20 මෙගාපික්සල් |
| ක්ෂේත්ර View (FOV) | 95° |
| උපරිම වීඩියෝ විභේදනය | 3840 x 2160 (4K UHD) |
| උපරිම රාමු අනුපාතය | 60 fps |
| ශ්රව්ය විශේෂාංග | Noise Reduction (NoiseBlockAI), Acoustic Fence, 4-way speakers |
| ජාල තාක්ෂණය | 10/100/1000Base-T Gigabit Ethernet, Wireless LAN |
| අතුරුමුහුණත්/වරාය | 1x Network (RJ-45), 1x HDMI In, 2x HDMI Out, USB |
| නිෂ්පාදන මානයන් (L x W x H) | අඟල් 33.3 x 8.3 x 5.8 |
| අයිතමයේ බර | රාත්තල් 11.45 කි |
| UPC | 198122618262 |
9. වගකීම් සහ සහාය
The Poly Studio V52 USB Video Bar is covered by a manufacturer's warranty. For specific warranty terms, duration, and conditions, please refer to the warranty documentation included with your product or visit the official HP/Poly support webඅඩවිය.
For technical support, driver downloads, firmware updates, and additional resources, please visit the official Poly support portal or contact HP customer service. Keep your product model number (V52) and serial number ready when contacting support.
මාර්ගගත සහාය: https://www.poly.com/us/en/support