1. හැඳින්වීම
Thank you for choosing the X9 Performance Ergonomic Wireless Keyboard with Trackball. This keyboard is designed to enhance your typing comfort and efficiency with its split ergonomic layout, integrated trackball, and convenient features. This manual provides detailed instructions to help you set up, operate, and maintain your new keyboard.

Image: The X9 Performance Ergonomic Wireless Keyboard with Trackball, showcasing its split design and integrated trackball.
2. පිහිටුවීම
2.1. පෙට්ටියේ ඇති දේ
- X9 Performance Ergonomic Wireless Keyboard
- USB-A 2.4GHz Wireless Adapter
- USB-C ආරෝපණ කේබලය
- පරිශීලක අත්පොත (මෙම ලේඛනය)
2.2. ඔබගේ යතුරු පුවරුව සම්බන්ධ කිරීම
The X9 Performance keyboard uses a 2.4GHz wireless connection via a USB-A adapter. No software installation is required for basic functionality.
- Locate the USB-A wireless adapter. It is typically stored in a compartment on the underside of the keyboard for safekeeping.
- Plug the USB-A wireless adapter into an available USB-A port on your computer (PC or Chrome device).
- Turn on the keyboard using the power switch, usually located on the underside or side of the keyboard. The keyboard should automatically connect to your computer.

Image: The keyboard's underside showing the USB-A dongle storage and the USB-C charging port, highlighting its wireless and rechargeable capabilities.
2.3. යතුරු පුවරුව ආරෝපණය කිරීම
The keyboard features a built-in 2000mAh rechargeable battery. To charge:
- Connect the provided USB-C charging cable to the USB-C port on the keyboard.
- Connect the other end of the USB-C cable to a USB power source (e.g., computer USB port, USB wall adapter).
- The charging indicator light on the keyboard will illuminate during charging and turn off when fully charged. A full charge can provide up to 12 months of use.
3. මෙහෙයුම් උපදෙස්
3.1. කාර්යක්ෂමතා නිර්මාණය සහ සුවපහසුව
The keyboard's split and sloped structure, combined with an integrated wrist rest, is designed to promote a natural hand and wrist posture, reducing strain during extended typing sessions.

Image: The keyboard's ergonomic split design and integrated wrist rest, illustrating how it promotes comfortable typing posture.
3.2. Integrated Trackball and Mouse Controls
The keyboard features a centralized trackball for thumb-controlled navigation, eliminating the need for a separate mouse. It includes dedicated mouse buttons and a scroll wheel.
- ධාවන පථය: Use your thumb to control the cursor movement.
- වම් ක්ලික් බොත්තම: Located to the left of the trackball.
- දකුණු ක්ලික් බොත්තම: Located to the right of the trackball.
- අනුචලන රෝදය: Positioned above the trackball for vertical scrolling.

Image: Close-up of the keyboard's central area, highlighting the thumb-controlled trackball for precise navigation.

Image: Diagram showing the scroll wheel, right click, left click, and trackball components on the keyboard.
3.3. Adjusting Trackball Sensitivity
You can fine-tune the trackball's cursor speed through your computer's operating system settings.
- Windows PC සඳහා:
- විවෘත කරන්න සැකසීම්.
- වෙත සංචාලනය කරන්න බ්ලූටූත් සහ උපාංග.
- තෝරන්න මූසිකය.
- සකස් කරන්න Mouse pointer speed slider to your preferred sensitivity.

Image: Step-by-step visual guide on how to adjust trackball sensitivity within Windows settings.
3.4. පසුතල ගැලපීම
The keyboard features white backlighting with 3 adjustable brightness levels for optimal visibility in various lighting conditions.
- To cycle through brightness levels (Off, Low, Medium, High), press the dedicated backlight control key (often indicated by a light bulb icon or similar).
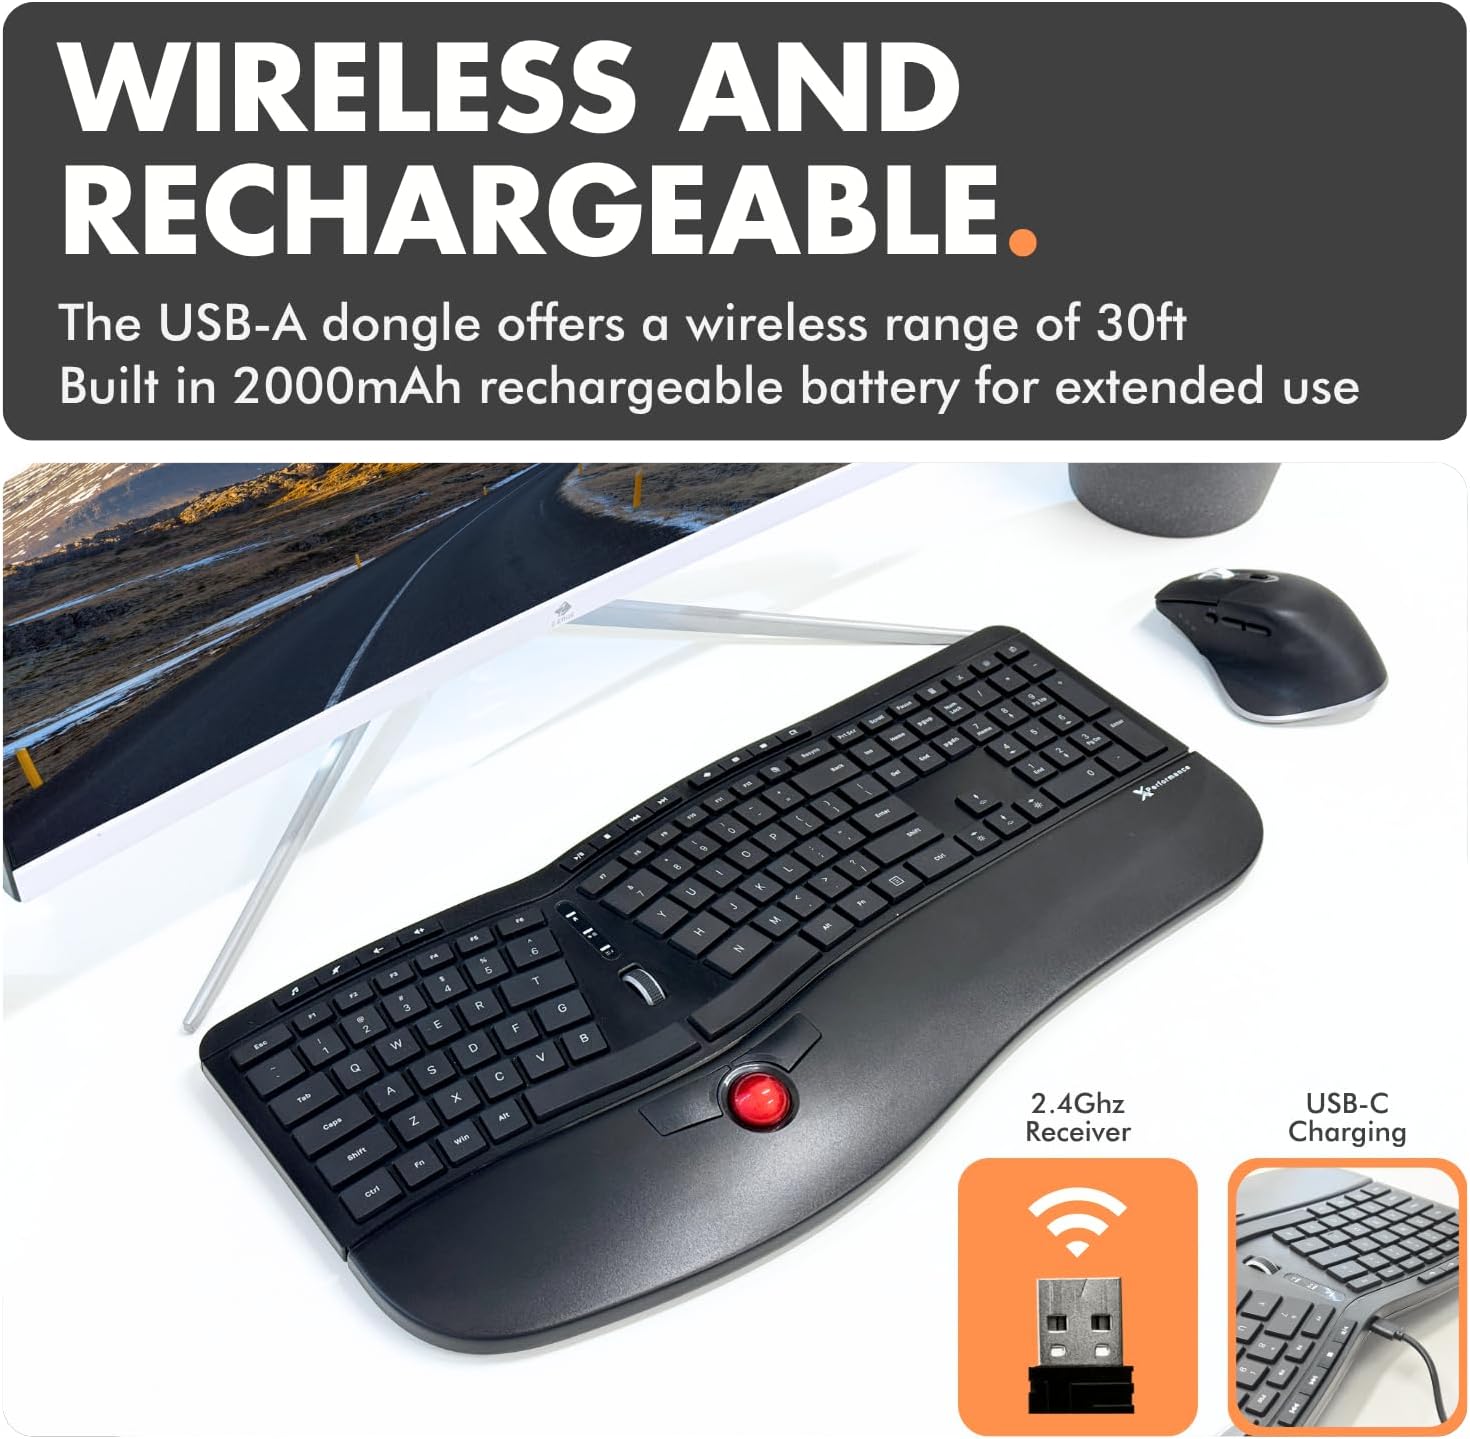
Image: The keyboard with its white backlit keys illuminated, demonstrating visibility in a dim setting.
3.5. කෙටිමං යතුරු
The keyboard includes 19 dedicated shortcut keys for quick access to various functions, such as volume control, media playback, and application management. Refer to the key legends for specific functions.

රූපය: උඩින් ඇති දෙයක් view of the keyboard, pointing out the split 128-key layout, media keys, and 19 shortcut keys.
3.6. නිෂ්පාදන අවසන්view වීඩියෝ
දෘශ්ය විවරණයක් සඳහා මෙම නිල නිෂ්පාදන වීඩියෝව නරඹන්නview of the X9 Performance Ergonomic Wireless Keyboard with Trackball, demonstrating its key features and benefits.
වීඩියෝ: ඉවරයිview of the X9 Split Wireless Keyboard with Thumb-Controlled Trackball, demonstrating its ergonomic design, integrated trackball, and other features.
4. නඩත්තු කිරීම
4.1. යතුරු පුවරුව පිරිසිදු කිරීම
To ensure longevity and optimal performance, clean your keyboard regularly:
- පිරිසිදු කිරීමට පෙර ඔබේ පරිගණකයෙන් යතුරු පුවරුව විසන්ධි කරන්න.
- මෘදු, ලින්ට් රහිත රෙදි තරමක් භාවිතා කරන්න dampජලය හෝ මෘදු, සීරීම් නොවන පිරිසිදු කිරීමේ ද්රාවණයකින් ආලේප කර ඇත.
- යතුරු පුවරුව මත කෙලින්ම දියර ඉසීමෙන් වළකින්න.
- යතුරු අතර දූවිලි හා සුන්බුන් සඳහා, සම්පීඩිත වාතය භාවිතා කරන්න.
4.2. Trackball Cleaning
If the trackball's movement becomes rough or inaccurate, it may need cleaning:
- Gently remove the trackball from its housing (refer to product diagrams if available for specific removal instructions).
- Clean the trackball and the inside of its housing, especially the small rollers or sensors, with a clean, lint-free cloth.
- Reinsert the trackball into its housing.
4.3. බැටරි රැකවරණය
- බැටරියේ ආයු කාලය දීර්ඝ කර ගැනීම සඳහා එය නිතර නිතර සම්පූර්ණයෙන්ම විසර්ජනය කිරීමෙන් වළකින්න.
- දීර්ඝ කාලයක් භාවිතයේ නොමැති විට යතුරු පුවරුව සිසිල් වියළි ස්ථානයක ගබඩා කරන්න.
5. දෝශ නිරාකරණය
If you encounter issues with your X9 Performance keyboard, try the following solutions:
5.1. Keyboard Not Responding / Connectivity Issues
- බලය පරීක්ෂා කරන්න: Ensure the keyboard is turned on and fully charged. Connect the USB-C charging cable to verify if the battery is low.
- USB ඇඩප්ටරය: Ensure the 2.4GHz USB-A adapter is securely plugged into a working USB port on your computer. Try a different USB port.
- අලුත්වැඩියා කරනවා: If connection is lost, try unplugging and re-plugging the USB adapter. Turn the keyboard off and on again.
- බාධා කිරීම්: Move the keyboard closer to the USB adapter or away from other wireless devices that might cause interference.
5.2. Trackball Not Moving Smoothly or Inaccurately
- පිරිසිදු ධාවන පථය: Refer to Section 4.2 for trackball cleaning instructions. Dust or debris can affect performance.
- සංවේදීතාව සකස් කරන්න: The trackball sensitivity might be too low or too high for your preference. Refer to Section 3.3 for instructions on adjusting trackball sensitivity in your operating system settings.
5.3. පසුතල ආලෝකය ක්රියා නොකරයි
- Check Brightness Level: Press the backlight control key (often with a light bulb icon) to cycle through brightness levels and ensure it's not set to 'Off'.
- බැටරි මට්ටම: Ensure the keyboard has sufficient battery charge. Low battery might disable backlighting to conserve power.
6. පිරිවිතර
| විශේෂාංගය | විස්තර |
|---|---|
| වෙළඳ නාමය | X9 කාර්ය සාධනය |
| ආදර්ශ අංකය | X9RFBLERGBAL යනු කුමක්ද? |
| නිෂ්පාදන මානයන් | 18.3"අඟල් x 8.7"අඟල් x 0.3"අඟල් (18.3 x 8.7 x 0.3 අඟල්) |
| අයිතමයේ බර | රාත්තල් 2.42 කි |
| සම්බන්ධතා තාක්ෂණය | RF 2.4G |
| ගැළපෙන උපාංග | PC (Windows), Chrome |
| යතුරුපුවරු විස්තරය | Built-in Trackball and Mouse Keys, Multi Functional, Multimedia, Full Size, Rechargeable, Split Ergonomic |
| විශේෂ ලක්ෂණය | Backlit wireless ergonomic keyboard, carpal tunnel keyboard, full size trackball keyboard for PC, rechargeable split keyboard, wireless keyboard with trackball |
| යතුරු ගණන | 128 |
| යතුරුපුවරු පසුබිම් ආලෝකකරණ වර්ණ සහාය | තනි වර්ණය (සුදු) |
| ඇතුළත් සංරචක | Keyboard, USB-A adapter, USB-C charging cable, user manual |

Image: Technical drawing showing the dimensions of the X9 Performance Ergonomic Wireless Keyboard.
7. වගකීම් සහ සහාය
X9 Performance products are designed for reliability and performance. For specific warranty information regarding your keyboard, please refer to the warranty card included with your product or visit the official X9 Performance webඅඩවිය.
If you require technical assistance, troubleshooting, or have questions about your product, please contact X9 Performance customer support through their official channels. Contact information can typically be found on the product packaging or the brand's webඅඩවිය.


