හැඳින්වීම
This manual provides comprehensive instructions for the installation, operation, and maintenance of the ENS SN4432/M 32-Channel 12MP+ Network Video Recorder (NVR). The SN4432/M is a high-performance surveillance solution designed for demanding security installations, offering advanced features such as 12MP+ resolution support, RAID capabilities, and Point-of-Sale (PoS) integration. Please read this manual thoroughly before using the device to ensure proper setup and optimal performance.
ආරක්ෂිත තොරතුරු
Always follow these safety precautions to prevent injury or damage to the device:
- බල සැපයුම් පරිමාව සහතික කරන්නtagNVR සම්බන්ධ කිරීමට පෙර e නිවැරදියි.
- Do not expose the NVR to water or moisture.
- NVR සෘජු හිරු එළියේ හෝ තාප ප්රභවයන් අසල තැබීමෙන් වළකින්න.
- Use only manufacturer-approved accessories and power adapters.
- Do not open the NVR casing; සියලුම සේවා සුදුසුකම් ලත් පුද්ගලයින් වෙත යොමු කරන්න.
- අධික උනුසුම් වීම වැළැක්වීම සඳහා නිසි වාතාශ්රය සහතික කරන්න.
පැකේජයේ අන්තර්ගතය
සියලුම අයිතම පැකේජයේ ඇති බව තහවුරු කරගන්න:
- ENS SN4432/M Video Recorder
- Installation Hardware (screws, cables)
- පරිශීලක අත්පොත (මෙම ලේඛනය)
- බල ඇඩැප්ටරය
- USB මූසිකය
- Remote Control (optional, depending on region)
නිෂ්පාදනය අවසන්view
The ENS SN4432/M NVR is designed for robust surveillance, supporting up to 32 IP cameras with resolutions exceeding 12MP. Key features include dual HDMI outputs, RAID support for data redundancy, and advanced H.265+ compression.
ඉදිරිපස පුවරුව
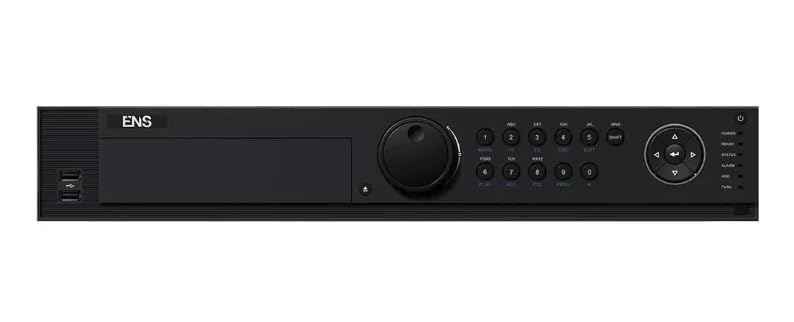
රූප විස්තරය: පෙරමුණක් view of the ENS SN4432/M NVR, showing the power indicator, status LEDs, and USB ports. This image represents the general appearance of the device. (Note: Specific front panel image not provided, using main product image as a general representation.)
පසුපස පුවරුව
The rear panel contains all essential connection ports. These typically include:
- බල ආදානය
- Ethernet Ports (LAN, IP Camera Network)
- HDMI Outputs (Dual)
- VGA Outputs (Dual)
- USB Ports
- ශ්රව්ය ආදානය/ප්රතිදානය
- අනතුරු ඇඟවීමේ ආදානය / ප්රතිදානය
- RS-485 වරාය
(Note: A specific image of the rear panel would be included here if available, detailing each port.)
සැලසුම
1 දෘඪාංග ස්ථාපනය
- දෘඪ තැටි ස්ථාපනය කරන්න: Open the NVR casing, mount the SATA hard drives into the designated bays, and connect the SATA data and power cables. Secure the drives with screws. The SN4432/M supports up to 4 SATA interfaces.
- කැමරා සම්බන්ධ කරන්න: Connect your IP cameras to the NVR's network ports or to a PoE switch connected to the NVR's LAN port.
- සම්බන්ධක සංදර්ශකය: Connect a monitor to one of the HDMI or VGA output ports.
- මූසිකය සම්බන්ධ කරන්න: USB මූසිකය NVR එකේ USB පෝට් එකකට සම්බන්ධ කරන්න.
- සම්බන්ධක ජාලය: Connect the NVR to your local network using an Ethernet cable.
- බල ගැන්වීම: Connect the power adapter to the NVR and then to a power outlet. Press the power button if available.
2. මූලික වින්යාසය
- First-Time Wizard: Upon first boot, the NVR will typically launch a setup wizard. Follow the on-screen prompts to set up basic parameters.
- මුරපදය සකසන්න: Create a strong administrator password.
- ජාල සැකසීම්: Configure network settings (DHCP or Static IP) to ensure the NVR can communicate with your network and cameras.
- වේලාව සහ දිනය: නිවැරදි වේලා කලාපය, දිනය සහ වේලාව සකසන්න.
- HDD ආරම්භය: Initialize the installed hard drives for recording. This process will format the drives.
- කැමරා එකතු කරන්න: Use the camera management interface to search for and add IP cameras to the NVR. Ensure cameras are on the same network segment or properly routed.
මෙහෙයුම් උපදෙස්
1. පරිශීලක අතුරුමුහුණත් සංචාලනය
The NVR's graphical user interface (GUI) can be accessed via a connected monitor and mouse, or remotely via a web browser or client software. The main screen typically displays live camera feeds.
- සජීවීව View: Displays real-time video from connected cameras.
- පසුධාවනය: Accesses recorded footage.
- වින්යාසය: Allows adjustment of system settings, camera parameters, and recording schedules.
- සිදුවීම් සටහන: Reviews system events and alarms.
2. කැමරා කළමනාකරණය
From the configuration menu, you can manage all connected cameras:
- Add/Delete Cameras: ඒ සඳහා සොයන්න new cameras or remove existing ones.
- පරාමිතීන් වෙනස් කරන්න: Adjust camera resolution, frame rate, bit rate, and image settings.
- චලන හඳුනාගැනීම: Configure motion detection zones and sensitivity.
- රහස්යතා ආවරණ: Define areas to be excluded from surveillance.
3. පටිගත කිරීම සහ නැවත ධාවනය
- පටිගත කිරීමේ කාලසටහන: Set continuous, motion-triggered, or alarm-triggered recording schedules for each camera.
- අතින් පටිගත කිරීම: සජීවීව සිට අතින් පටිගත කිරීම ආරම්භ කරන්න view.
- පසුධාවනය: Navigate to the playback interface, select the desired camera and time range to review වාර්තාගත footagඉ. නිශ්චිත සිදුවීම් සොයා ගැනීමට කාලරේඛාව සහ සෙවුම් කාර්යයන් භාවිතා කරන්න.
- Foo අපනයනය කරන්නtage: Select and export recorded video clips to a USB drive or network location.
4. උසස් විශේෂාංග
- RAID වින්යාසය: Access the storage management menu to configure RAID 0, 1, 5, 6, or 10 for data redundancy and performance. Refer to the RAID section for detailed setup.
- PoS Integration: Connect Point-of-Sale (PoS) devices to the NVR. Configure the PoS settings to overlay transaction data on video footage and trigger recordings based on transaction events.
- දුරස්ථ ප්රවේශය: Configure network settings for remote viewing via a web browser or mobile application. Ensure port forwarding or P2P services are correctly set up.
- අනතුරු ඇඟවීමේ කළමනාකරණය: Set up alarm inputs, outputs, and notification methods (e.g., email, push notifications).
නඩත්තු කිරීම
- ස්ථිරාංග යාවත්කාලීන කිරීම්: නිෂ්පාදකයා නිතිපතා පරීක්ෂා කරන්න website for firmware updates. Download and install updates to ensure optimal performance and security. Follow the provided instructions carefully.
- ගබඩා කළමනාකරණය: Monitor HDD health through the NVR's system status menu. Replace failing drives promptly. Configure automatic overwriting of old footage or set up archiving as needed.
- පිරිසිදු කිරීම: Periodically clean the NVR's exterior with a soft, dry cloth. Ensure ventilation openings are free from dust and obstructions.
- උපස්ථ වින්යාසය: Regularly back up the NVR's configuration settings to a USB drive or network location.
දෝෂගවේෂණය
| ගැටලුව | විය හැකි හේතුව | විසඳුම |
|---|---|---|
| මොනිටරයේ වීඩියෝ ප්රතිදානයක් නොමැත. | Loose HDMI/VGA cable, incorrect input selected on monitor, NVR not powered on. | Check cable connections. Ensure monitor is set to the correct input source. Verify NVR power. |
| Cameras not displaying | Network issue, camera not powered, incorrect camera IP address, camera not added to NVR. | Check network cables and connections. Verify camera power. Ensure camera IP is correct and added to NVR. Check firewall settings. |
| පටිගත කිරීමක් නැත | HDD not initialized, no recording schedule, HDD full, HDD failure. | Initialize HDDs. Configure recording schedules. Check HDD status and free space. Replace faulty HDDs. |
| දුරස්ථ ප්රවේශය ක්රියා නොකරයි | Network configuration issues, incorrect port forwarding, firewall blocking. | Verify NVR network settings. Check router port forwarding rules. Disable firewall temporarily for testing. Ensure P2P service is enabled if used. |
පිරිවිතර
| විශේෂාංගය | විස්තර |
|---|---|
| ආදර්ශ අංකය | SN4432/M |
| නාලිකා ගණන | 32 |
| උපරිම විභේදන සහාය | 12MP+ per channel (up to 32 channels at 1080p or 2 channels at 32MP decoding) |
| වීඩියෝ සම්පීඩනය | H.265+, H.265, H.264+, H.264 |
| වීඩියෝ නිමැවුම් | Dual HDMI (up to 8K), Dual VGA |
| ශ්රව්ය ආදානය/ප්රතිදානය | සහාය දුන්නා |
| SATA අතුරුමුහුණත් | 4 SATA අතුරුමුහුණත් |
| RAID සහාය | RAID 0, 1, 5, 6, 10 (with N+M hot spare) |
| එන කලාප පළල | 320 Mbps |
| පිටතට යන කලාප පළල | 400 Mbps |
| PoS Integration | සහාය දුන්නා |
| නිෂ්පාදකයා | ENS |
වගකීම් සහ සහාය
For warranty information and technical support, please refer to the official ENS webවෙබ් අඩවියට හෝ ඔබේ බලයලත් අලෙවිකරු අමතන්න. වගකීම් හිමිකම් සඳහා මිලදී ගැනීමේ සාක්ෂියක් ලෙස ඔබේ මිලදී ගැනීමේ රිසිට්පත තබා ගන්න.