1. හැඳින්වීම
This manual provides essential information for the safe and efficient use of your DigiLand 11-inch Android 14 Tablet. Please read this manual thoroughly before operating the device and retain it for future reference.
2 ආරක්ෂිත තොරතුරු
- ටැබ්ලටය අධික උෂ්ණත්වයන්ට, සෘජු හිරු එළියට හෝ අධික ආර්ද්රතාවයට නිරාවරණය නොකරන්න.
- ටැබ්ලටය බිම දැමීමෙන් හෝ දැඩි බලපෑමකට ලක් කිරීමෙන් වළකින්න.
- Use only the charger and charging cable provided by the manufacturer.
- ටැබ්ලටය ඔබම විසුරුවා හැරීමට හෝ අලුත්වැඩියා කිරීමට උත්සාහ නොකරන්න. සුදුසුකම් ලත් සේවා නිලධාරීන් වෙත යොමු වන්න.
- ටැබ්ලටය ජලයෙන් සහ අනෙකුත් ද්රව වලින් ඈත් කර තබන්න.
3. පැකේජ අන්තර්ගතය
ඔබගේ පැකේජයේ සියලුම අයිතම ඇති බව තහවුරු කරගන්න:
- DigiLand R11 Tablet
- R11 Stand Case
- චාජර් (බල ඇඩැප්ටරය)
- ආරෝපණ කේබලය
- පරිශීලක අත්පොත

Image: Contents of the DigiLand R11 Tablet package, showing the tablet, stand case, charger, charging cable, and user manual.
4 උපාංග පිරිසැලසුම
Familiarize yourself with the physical components of your DigiLand 11-inch Android Tablet.

රූපය: ඉදිරිපස සහ පසුපස view of the DigiLand 11-inch Android Tablet, showcasing its design and key features like the screen and rear camera module.
ප්රධාන සංරචක:
- අඟල් 11 HD IPS සංදර්ශකය: Main screen for interaction and content viewing.
- ඉදිරිපස කැමරාව (8MP): Located on the front bezel, used for video calls and selfies.
- පසුපස කැමරාව (13MP): Located on the back of the tablet, for capturing photos and videos.
- බල බොත්තම: ටැබ්ලටය සක්රිය/අක්රිය කිරීමට හෝ එය නිදා ගැනීමට/අවදි කිරීමට භාවිතා කරයි.
- වෙළුම් බොත්තම්: ශ්රව්ය පරිමාව සකසන්න.
- USB Type-C Port: අයකිරීම් සහ දත්ත හුවමාරුව සඳහා.
- ස්පීකර් ග්රිල්ස්: ශ්රව්ය ප්රතිදානය සඳහා.
- MicroSD කාඩ් පත: ගබඩාව පුළුල් කිරීම සඳහා.
5. පිහිටුවීම
5.1 ටැබ්ලටය ආරෝපණය කිරීම
Before first use, fully charge your tablet. Connect the provided USB Type-C cable to the tablet's charging port and the other end to the power adapter. Plug the adapter into a wall outlet. The battery indicator on the screen will show charging status.

Image: The DigiLand tablet connected to a charger, showing the battery charging icon and indicating its 7000mAh capacity.
5.2 බල ගැන්වීම සක්රිය / අක්රිය කිරීම
- බල ගැන්වීමට: Press and hold the Power button until the DigiLand logo appears.
- බලය අක්රිය කිරීමට: Press and hold the Power button until the power options appear on the screen. Select "Power off."
- නැවත ආරම්භ කිරීමට: Press and hold the Power button until the power options appear. Select "Restart."
5.3 මූලික සැකසුම
පළමු වරට බලගැන්වීමෙන් පසු, ටැබ්ලටය මූලික සැකසුම් ක්රියාවලිය හරහා ඔබට මග පෙන්වනු ඇත:
- ඔබ කැමති භාෂාව තෝරන්න.
- Wi-Fi ජාලයකට සම්බන්ධ කරන්න.
- ඔබගේ Google ගිණුමෙන් පුරනය වන්න හෝ නව එකක් සාදන්න. Google Play Store වෙතින් යෙදුම් බාගත කිරීමට මෙය අවශ්ය වේ.
- Review සහ නියමයන් සහ කොන්දේසි පිළිගන්න.
- ආරක්ෂාව සඳහා තිර අගුල (PIN, රටාව හෝ මුරපදය) සකසන්න.
5.4 MicroSD කාඩ්පතක් ඇතුළු කිරීම
To expand storage, insert a MicroSD card (up to 256GB, not included) into the designated slot. Ensure the tablet is powered off before inserting or removing the card.

Image: A visual representation of the tablet's memory capabilities, including RAM, internal storage, and MicroSD card expansion.
6. ටැබ්ලටය ක්රියාත්මක කිරීම
6.1 මූලික සංචාලනය
ටැබ්ලටය සංචාලනය සඳහා ස්පර්ශ අභිනයන් භාවිතා කරයි:
- තට්ටු කරන්න: අයිතමයක් තෝරන්න හෝ යෙදුමක් විවෘත කරන්න.
- ස්වයිප්: පිටු හෝ මෙනු හරහා අනුචලනය කරන්න.
- පින්ච්: රූප විශාලනය කරන්න හෝ අඩු කරන්න සහ web පිටු.
- දිගු මුද්රණ යන්ත්රය: සන්දර්භීය මෙනු වෙත ප්රවේශ වන්න හෝ යෙදුම් අයිකන ගෙන යන්න.
6.2 Wi-Fi සම්බන්ධතාවය
- වෙත යන්න සැකසීම් > ජාලය සහ අන්තර්ජාලය > Wifi.
- Wi-Fi ටොගල් කරන්න On.
- ලැයිස්තුවෙන් ඔබට අවශ්ය ජාලය තෝරාගෙන විමසන්නේ නම් මුරපදය ඇතුළත් කරන්න.
6.3 බ්ලූටූත් යුගල කිරීම
- වෙත යන්න සැකසීම් > සම්බන්ධිත උපාංග > බ්ලූටූත්.
- බ්ලූටූත් ටොගල් කරන්න On.
- The tablet will scan for available devices. Select the device you wish to pair with and follow any on-screen prompts.
6.4 කැමරා භාවිතා කිරීම
The tablet features an 8MP front camera and a 13MP rear camera.

Image: Demonstrates the tablet's dual camera functionality, with examples of a landscape photo taken by the 13MP rear camera and a video call using the 8MP front camera.
- විවෘත කරන්න කැමරාව යෙදුම.
- ඉදිරිපස සහ පසුපස කැමරා අතර මාරු වීමට කැමරා නිරූපකය තට්ටු කරන්න.
- ඡායාරූපයක් ගැනීමට හෝ වීඩියෝ පටිගත කිරීම ආරම්භ කිරීමට/නවත්වා ගැනීමට ෂටර් බොත්තම තට්ටු කරන්න.
6.5 Split Screen & Screen Mirroring
- බෙදුම් තිරය: To use two apps simultaneously, open an app, then swipe up from the bottom of the screen and hold to access recent apps. Long-press the app icon at the top of the app window and select "Split screen." Choose a second app to open in the other half of the screen.
- තිරයේ ප්රතිබිම්බය: To cast your tablet's screen to a compatible display (e.g., smart TV), go to සැකසීම් > සම්බන්ධිත උපාංග > සම්බන්ධතා මනාප > කස්ටිය. Select your desired display device.
6.6 යෙදුම් කළමනාකරණය
Your tablet comes with Google Mobile Services (GMS) certified, allowing full access to the Google Play Store.
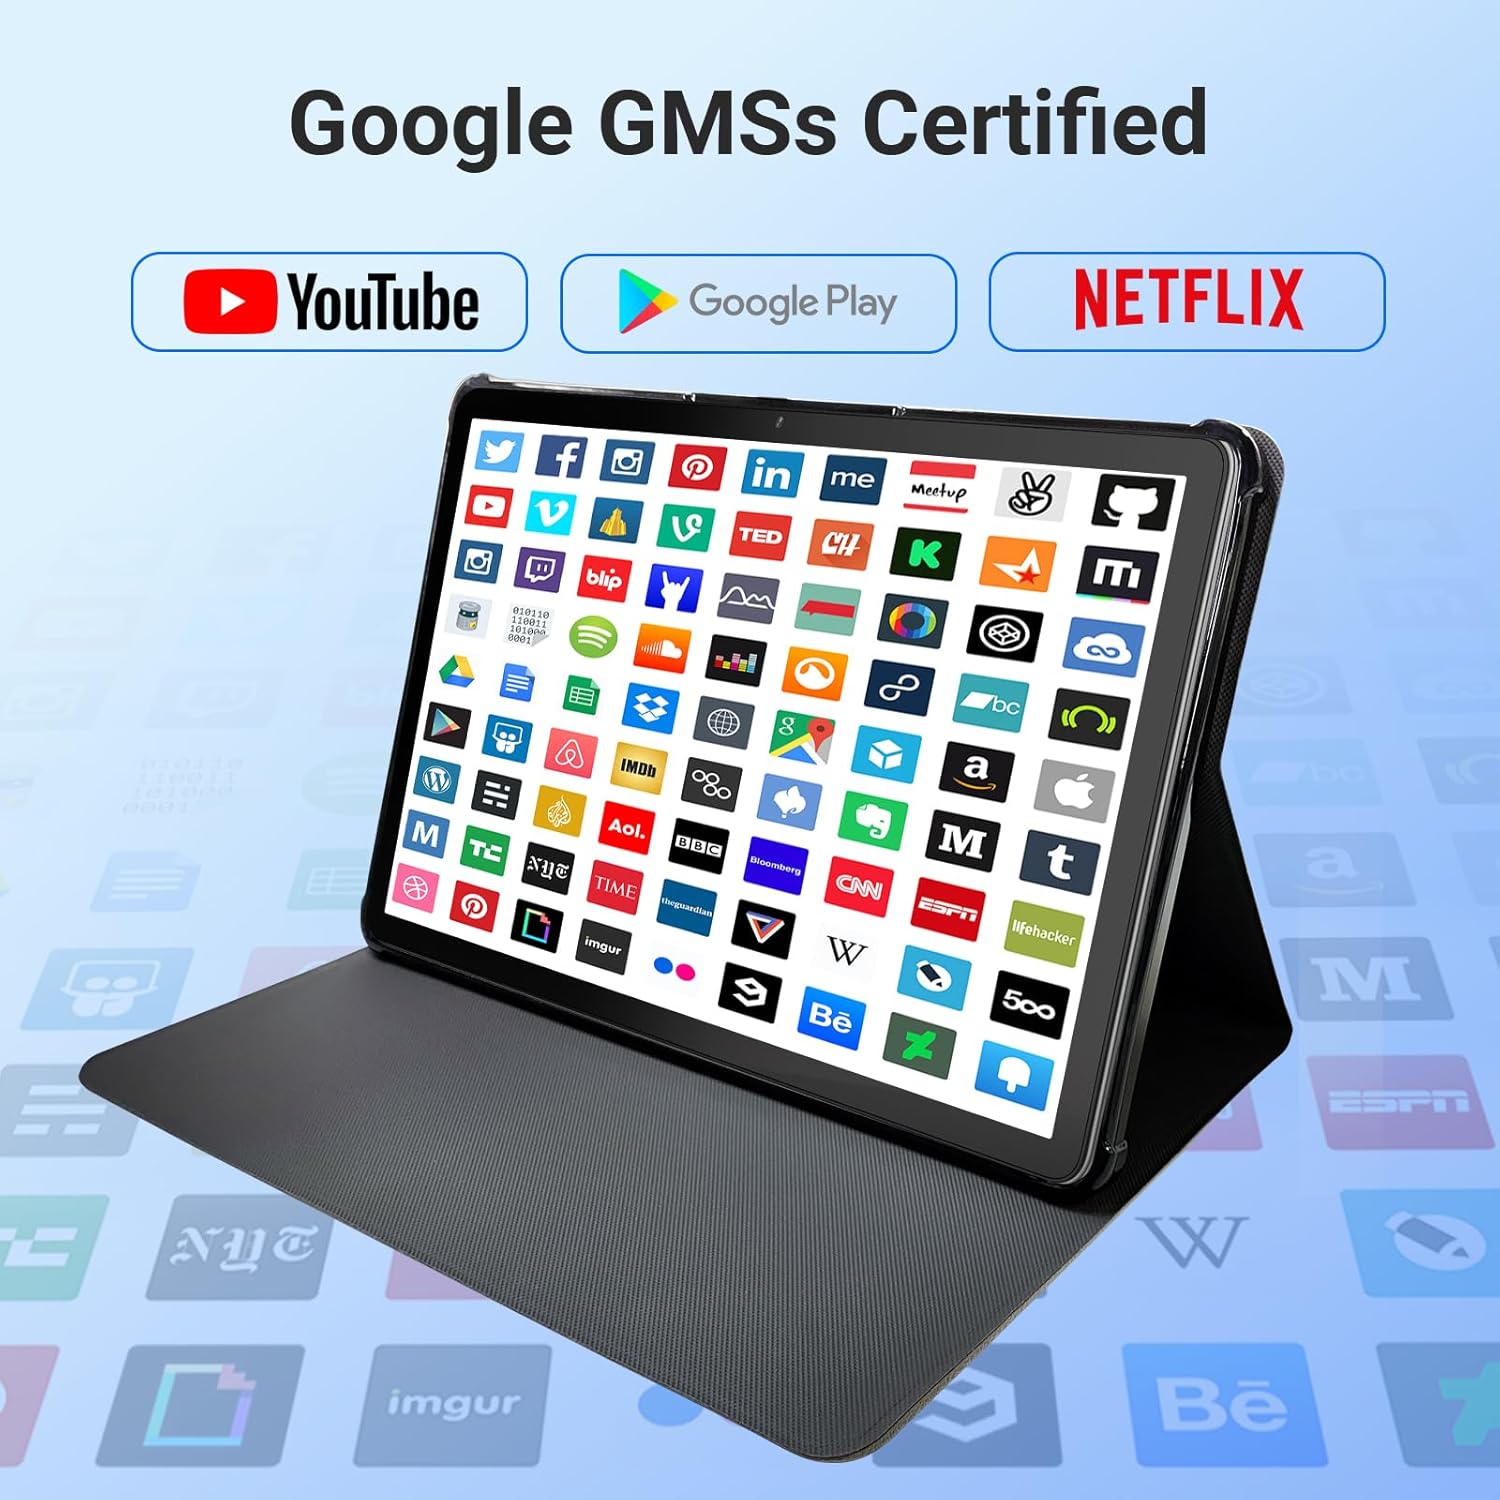
Image: The tablet screen showing numerous app icons, confirming Google GMS certification and access to popular services like YouTube and Netflix.
- යෙදුම් ස්ථාපනය කරන්න: විවෘත කරන්න Google Play Store app, search for your desired app, and tap "Install."
- යෙදුම් අස්ථාපනය කරන්න: Long-press the app icon on the home screen or app drawer, then drag it to "Uninstall" or select "App info" and choose "Uninstall."
7. නඩත්තු කිරීම
7.1 උපාංගය පිරිසිදු කිරීම
ටැබ්ලටයේ තිරය සහ බඳ පිරිසිදු කිරීම සඳහා මෘදු, ලින්ට් රහිත රෙද්දක් භාවිතා කරන්න. උල්ෙල්ඛ පිරිසිදු කරන්නන් හෝ ද්රාවක භාවිතා නොකරන්න.
7.2 මෘදුකාංග යාවත්කාලීන
Periodically check for system updates to ensure optimal performance and security:
- වෙත යන්න සැකසීම් > පද්ධතිය > පද්ධති යාවත්කාලීන කිරීම.
- පවතින ඕනෑම යාවත්කාලීනයක් බාගත කර ස්ථාපනය කිරීමට තිරයේ ඇති උපදෙස් අනුගමනය කරන්න.
7.3 ගබඩා කළමනාකරණය
ඔබගේ ටැබ්ලටයේ ගබඩාව කළමනාකරණය කිරීමට:
- වෙත යන්න සැකසීම් > ගබඩා කිරීම.
- Here you can see storage usage and free up space by uninstalling apps, deleting files, or clearing cache data.
8. දෝශ නිරාකරණය
ඔබේ ටැබ්ලටය සමඟ ගැටලු ඇති වුවහොත්, පහත පොදු විසඳුම් වෙත යොමු වන්න:
| ගැටලුව | විසඳුම |
|---|---|
| ටැබ්ලටය සක්රිය නොවේ | බැටරිය ආරෝපණය කර ඇති බවට වග බලා ගන්න. චාජරය සම්බන්ධ කර නැවත බලය ක්රියාත්මක කිරීමට උත්සාහ කිරීමට පෙර මිනිත්තු කිහිපයක් රැඳී සිටින්න. ප්රතිචාර නොදක්වන්නේ නම්, බල බොත්තම තත්පර 10-15ක් අල්ලාගෙන බලහත්කාරයෙන් නැවත ආරම්භ කරන්න. |
| Wi-Fi සම්බන්ධතා ගැටළු | Check if Wi-Fi is enabled in settings. Restart your router and the tablet. Forget the network and reconnect. |
| මන්දගාමී කාර්ය සාධනය | Close unused apps. Clear app caches (Settings > Apps > [App Name] > Storage > Clear cache). Free up storage space. Restart the tablet. |
| යෙදුම් බිඳ වැටීම හෝ කැටි වීම | Update the app to the latest version. Clear the app's cache and data (Settings > Apps > [App Name] > Storage). Uninstall and reinstall the app. |
| තිරය ප්රතිචාර නොදක්වයි | ටැබ්ලටය නැවත ආරම්භ කරන්න. ගැටලුව දිගටම පවතින්නේ නම්, පාරිභෝගික සහාය අමතන්න. |
9. පිරිවිතර
Detailed technical specifications for the DigiLand 11-inch Android 14 Tablet (Model MID1109-MX):
| විශේෂාංගය | පිරිවිතර |
|---|---|
| වෙළඳ නාමය | DigiLand |
| මාදිලියේ නම | R11 |
| අයිතම ආදර්ශ අංකය | MID1109-MX |
| මෙහෙයුම් පද්ධතිය | Android 14 |
| තිර ප්රමාණය | අඟල් 11 |
| තිර විභේදනය | 1280x800 පික්සල (HD IPS) |
| ප්රොසෙසරය | 8-Core, 2 GHz (MediaTek) |
| RAM | 12 GB LPDDR4X |
| අභ්යන්තර ගබඩාව (ROM) | 128 GB |
| පුළුල් කළ හැකි ගබඩාව | Up to 256GB via MicroSD (TF Card) |
| ග්රැෆික් කොප්රොසෙසරය | මාලි-ජී 52 |
| පසුපස Webcam විභේදනය | 13 MP |
| ඉදිරිපස Webcam විභේදනය | 8 MP |
| රැහැන් රහිත වර්ගය | 802.11a/b/g/n/ac (Dual-band 2.4G/5G Wi-Fi) |
| බ්ලූටූත් | බ්ලූටූත් 5.0 |
| බැටරි | 7000mAh ලිතියම් පොලිමර් |
| සාමාන්ය බැටරි ආයු කාලය | Up to 15 Hours (8 hours HD video playback) |
| අයිතමයේ බර | රාත්තල් 1.32 කි |
| නිෂ්පාදන මානයන් | අඟල් 10.16 x 6.69 x 0.32 |
| වර්ණය | අළු |
10. වගකීම් සහ සහාය
Your DigiLand tablet is covered by a manufacturer's warranty. Please refer to the warranty card included in your package for specific terms and conditions. For technical support, product inquiries, or warranty claims, please visit the official DigiLand webවෙබ් අඩවිය හෝ ඔවුන්ගේ පාරිභෝගික සේවා දෙපාර්තමේන්තුව අමතන්න.
DigiLand Official Webඅඩවිය: Visit DigiLand Store on Amazon


