1. හැඳින්වීම
This manual provides essential information for setting up, operating, maintaining, and troubleshooting your Acer Nitro V 15.6" Gaming Laptop. Please read this manual thoroughly to ensure proper use and to maximize the performance and longevity of your device.
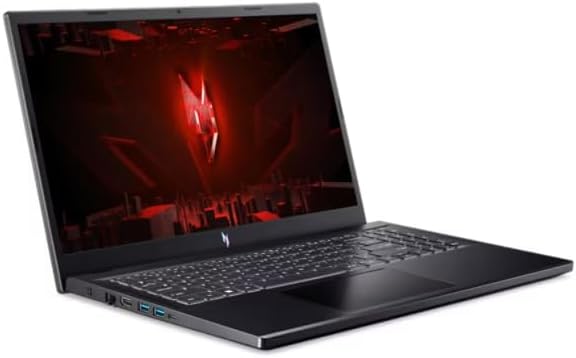
Figure 1.1: Acer Nitro V 15.6" Gaming Laptop
The Acer Nitro V 15.6" Gaming Laptop is designed for high-performance computing, featuring an Intel Core i5-13420H processor, NVIDIA GeForce RTX 4050 graphics, a 15.6" Full HD 144Hz display, 16GB DDR5 memory, and a 512GB SSD. It comes pre-installed with Windows 11 Home.
2 ආරක්ෂිත තොරතුරු
Observe the following safety guidelines to prevent damage to your laptop and ensure personal safety:
- Use only the power adapter supplied with your laptop. Using unauthorized adapters may cause damage or fire.
- ලැප්ටොප් පරිගණකය අධික උෂ්ණත්වයන්ට, සෘජු හිරු එළියට හෝ අධික ආර්ද්රතාවයට නිරාවරණය නොකරන්න.
- Avoid placing heavy objects on the laptop or power adapter.
- Keep liquids away from the laptop. In case of accidental spills, disconnect power immediately and contact support.
- Do not attempt to disassemble or repair the laptop yourself. Refer all servicing to qualified personnel.
- Ensure proper ventilation. Do not block the ventilation openings on the laptop.
3. පැකේජ අන්තර්ගතය
සියලුම අයිතම පැකේජයේ ඇති බව තහවුරු කරගන්න:
- Acer Nitro V 15.6" Gaming Laptop
- AC බල ඇඩැප්ටරය සහ විදුලි රැහැන
- ඉක්මන් ආරම්භක මාර්ගෝපදේශය (ඇතුළත් කර ඇත්නම්)
4. නිෂ්පාදන අවසන්view
4.1. ලැප්ටොප් සංරචක
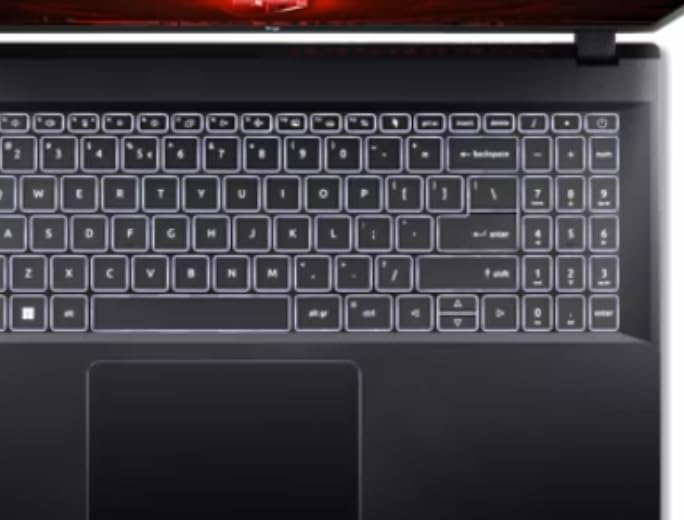
Figure 4.1: Keyboard and Touchpad
The laptop features a full-size keyboard, a precision touchpad, and a 15.6-inch Full HD display with a 144Hz refresh rate for smooth visuals.
4.2. වම් පැත්තේ තොටුපළවල්

රූපය 4.2: වම් පැත්තේ තොටුපළවල්
The left side of the laptop includes the following ports:
- බල ආදානය: AC ඇඩැප්ටරය මෙහි සම්බන්ධ කරන්න.
- ඊතර්නෙට් (RJ-45): රැහැන්ගත ජාල සම්බන්ධතාවය සඳහා.
- HDMI: බාහිර සංදර්ශක හෝ රූපවාහිනී වෙත සම්බන්ධ වන්න.
- USB 3.0 Ports (x2): USB උපාංග සම්බන්ධ කිරීම සඳහා.
- USB-C වරාය: For connecting compatible USB-C devices.
4.3. දකුණු පැත්තේ තොටුපළවල්

රූපය 4.3: දකුණු පැත්තේ තොටුපළවල්
The right side of the laptop includes the following ports:
- USB 3.0 වරාය: USB උපාංග සම්බන්ධ කිරීම සඳහා.
- හෙඩ්ෆෝන්/මයික්රොෆෝන් සංයුක්ත ජැක්: ශ්රව්ය ආදානය/ප්රතිදානය සඳහා.
- කෙන්සිංටන් ලොක් ස්ලොට්: For securing your laptop with a compatible lock.
4.4. Exterior Design

Figure 4.4: Laptop Exterior (Top Lid)
The laptop features a sleek black design with distinctive accents on the top lid, reflecting its gaming-oriented aesthetic.
5. පිහිටුවීම
5.1. බල ඇඩැප්ටරය සම්බන්ධ කිරීම
- Plug the AC adapter into the power input port on the left side of the laptop.
- විදුලි රැහැන ඒසී ඇඩැප්ටරයට සම්බන්ධ කරන්න.
- විදුලි රැහැනේ අනෙක් කෙළවර බිම්ගත විදුලි අලෙවිසැලකට සම්බන්ධ කරන්න.
- Allow the battery to charge for at least 30 minutes before initial use, or until the battery indicator shows a full charge.
5.2. මූලික බලය සක්රිය කිරීම සහ වින්ඩෝස් සැකසුම
- ලැප්ටොප් පියන විවෘත කරන්න.
- සාමාන්යයෙන් යතුරුපුවරුවට ඉහළින් හෝ පැත්තේ පිහිටා ඇති බල බොත්තම ඔබන්න.
- Follow the on-screen instructions to complete the Windows 11 Home setup process. This includes selecting your region, language, connecting to a network, and creating a user account.
6. මෙහෙයුම් උපදෙස්
6.1. බලය සක්රිය/අක්රිය සහ නිද්රා ප්රකාරය
- බල ගැන්වීම: බල බොත්තම ඔබන්න.
- වසා දමන්න: Windows Start බොත්තම ක්ලික් කරන්න, ඉන්පසු Power > Shut down ක්ලික් කරන්න.
- නින්ද ප්රකාරය: ලැප්ටොප් පියන වසන්න හෝ Windows Start බොත්තම ක්ලික් කරන්න, ඉන්පසු Power > Sleep ක්ලික් කරන්න.
6.2. යතුරුපුවරුව සහ ටච් පෑඩ් භාවිතය
- The keyboard features standard QWERTY layout with a numeric keypad.
- සංචාලනය සඳහා ස්පර්ශක පෑඩය බහු-ස්පර්ශ අභිනයන් සඳහා සහය දක්වයි. අභිරුචිකරණය සඳහා වින්ඩෝස් සැකසුම් වෙත යොමු වන්න.
- Function keys (Fn + F1-F12) provide quick access to system functions like volume, brightness, and wireless toggles.
6.3. ජාලයකට සම්බන්ධ වීම
- Wifi: Click the network icon in the taskbar, select your desired Wi-Fi network, and enter the password if required.
- ඊතර්නෙට්: ඔබගේ රවුටරයෙන් හෝ මොඩමයෙන් ඊතර්නෙට් කේබලයක් ලැප්ටොප් පරිගණකයේ වම් පැත්තේ ඇති ඊතර්නෙට් තොටට සම්බන්ධ කරන්න.
6.4. External Display Connection
Use the HDMI port on the left side of the laptop to connect an external monitor or TV. You can configure display settings (duplicate, extend, second screen only) through Windows Display Settings.
7. නඩත්තු කිරීම
7.1. ලැප්ටොප් එක පිරිසිදු කිරීම
- තිරය: මෘදු, ලින්ට් රහිත රෙද්දක් සැහැල්ලුවෙන් භාවිතා කරන්නampජලය හෝ තිර පිරිසිදු කරන්නෙකු සමඟ ආලේප කර ඇත. තිරය මත කෙලින්ම දියර ඉසින්න එපා.
- යතුරුපුවරුව සහ චැසිය: මෘදු රෙද්දක් භාවිතා කරන්න. මුරණ්ඩු අපිරිසිදුකම සඳහා, තරමක් damp මෘදු සබන් ද්රාවණයක් සහිත රෙදි කැබැල්ලක් භාවිතා කළ හැකි අතර, එමඟින් කිසිදු ද්රවයක් සිදුරුවලට ඇතුළු නොවන බව සහතික කෙරේ.
- වාතාශ්රය විවෘත කිරීම්: Use compressed air to clear dust from the vents to maintain optimal cooling.
7.2. බැටරි රැකවරණය
- බැටරිය නිතර නිතර සම්පූර්ණයෙන්ම විසර්ජනය කිරීමෙන් වළකින්න.
- දිගු කාලයක් භාවිතා නොකළහොත් ලැප්ටොප් පරිගණකය සිසිල් වියළි ස්ථානයක ගබඩා කරන්න.
- ප්රශස්ත බැටරි සෞඛ්යය සඳහා, ඉතා දිගු කාලයක් අඛණ්ඩව 100% ආරෝපණය කිරීමෙන් වළකින්න.
7.3. මෘදුකාංග යාවත්කාලීන
Regularly update your Windows operating system and device drivers to ensure optimal performance, security, and compatibility. Check for updates via Windows Update and Acer's official support webඅඩවිය.
8. දෝශ නිරාකරණය
8.1. පොදු ගැටළු සහ විසඳුම්
- ලැප්ටොප් පරිගණකය ක්රියාත්මක නොවේ: AC ඇඩැප්ටරය ආරක්ෂිතව සම්බන්ධ වී ඇති බවත් බල සැපයුම ක්රියාකාරී බවත් සහතික කර ගන්න. වෙනත් වෙළඳසැලක් උත්සාහ කරන්න.
- තිරයේ දර්ශනයක් නොමැත: Check if the laptop is powered on. If an external monitor is connected, ensure it is powered on and correctly configured in Windows Display Settings. Try pressing Fn + F5 (or similar function key) to cycle display outputs.
- Wi-Fi සම්බන්ධ නොවේ: Ensure Wi-Fi is enabled (check Fn key or Windows settings). Restart your router and modem.
- මන්දගාමී කාර්ය සාධනය: අනවශ්ය යෙදුම් වසා දමන්න. පසුබිම් යාවත්කාලීන කිරීම් සඳහා පරීක්ෂා කරන්න. ප්රමාණවත් නිදහස් ගබඩා ඉඩක් සහතික කරන්න.
8.2. කර්මාන්තශාලා සැකසීම් වෙත ප්රතිසාධනය කිරීම
If you encounter persistent software issues, you may need to restore your laptop to its factory settings. This process will erase all personal data. Back up important fileඉදිරියට යාමට පෙර
- Go to Windows Settings > System > Recovery.
- Under "Recovery options," select "Reset this PC."
- Choose whether to keep your personal files or remove everything, then follow the on-screen prompts.
9. පිරිවිතර
| විශේෂාංගය | පිරිවිතර |
|---|---|
| මාදිලියේ නම | නයිට්රෝ වී |
| ප්රොසෙසරය | Intel Core i5-13420H (Octa-Core) 2.10GHz |
| ග්රැෆික්ස් | NVIDIA GeForce RTX 4050 6GB GDDR6 |
| ප්රදර්ශනය කරන්න | 15.6" FHD (1920 x 1080) 144Hz IPS ConfyView (මැට්) |
| RAM | 16GB DDR5 SDRAM |
| ගබඩා කිරීම | 512GB PCIe NVMe M.2 SSD |
| මෙහෙයුම් පද්ධතිය | Windows 11 Home |
| රැහැන් රහිත සම්බන්ධතාව | IEEE 802.11 a/b/g/n/ac/ax (Wi-Fi 6/6E), Gigabit Ethernet |
| වරායන් | 4x USB 3.0, 1x USB-C, HDMI, Ethernet, Headphone/Mic Combo Jack, Power Input |
| බැටරි ආයු කාලය | පැය 6 දක්වා |
| මානයන් (LxWxH) | අඟල් 14.3 x 1.06 x 9.4 |
| වර්ණය | කළු |
10. වගකීම් සහ සහාය
Your Acer Nitro V laptop comes with a standard manufacturer's warranty. Please refer to the warranty card included with your product or visit the official Acer support webසවිස්තරාත්මක වගකීම් නියමයන් සහ කොන්දේසි සඳහා අඩවිය.
For technical assistance, driver downloads, or further support, please visit the Acer support website or contact Acer customer service. Have your laptop's serial number ready when contacting support.
Acer සහාය Webඅඩවිය: www.acer.com/support හි www.acer.com/support හි සහාය ලබා ගන්න.