1. හැඳින්වීම
This manual provides detailed instructions for the installation, operation, and maintenance of your Alomejor Electric Scooter Controller Kit. This kit is specifically designed for the MI4 electric scooter model, enhancing its performance with a 36V 350W motor controller and a clear LCD display dashboard.
The kit includes essential components for upgrading or replacing your scooter's control system, ensuring seamless integration and optimal functionality.
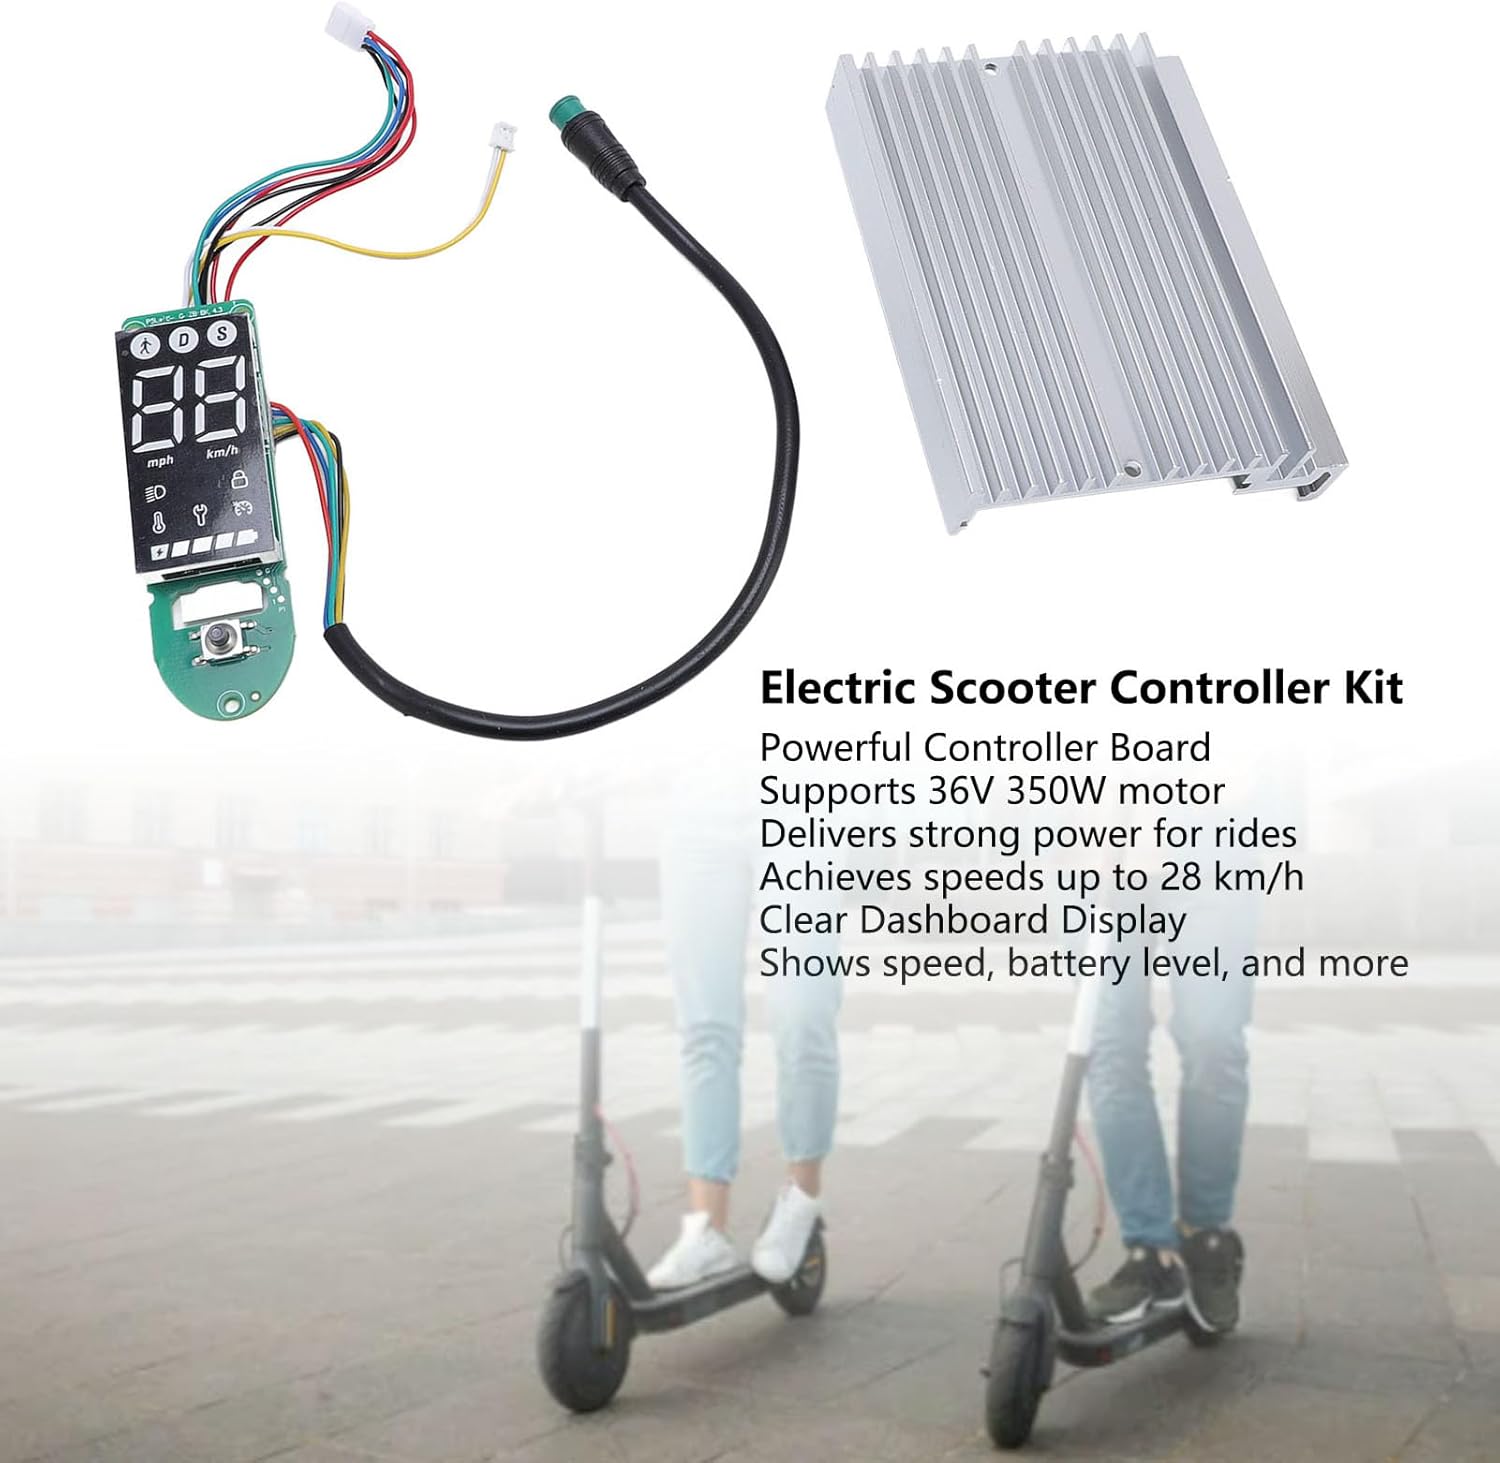
රූපය 1.1: ඉවරයිview of the Alomejor Electric Scooter Controller Kit, including the controller board, LCD display, and heat sink, shown with electric scooters in the background.
පැකේජයේ අන්තර්ගතය:
- 1 x Electric Scooter Controller
- 1 x LCD Display Dashboard
2 ආරක්ෂිත තොරතුරු
Before proceeding with installation or operation, please read and understand all safety instructions. Failure to follow these instructions may result in injury, damage to the product, or damage to your electric scooter.
- වෘත්තීය ස්ථාපනය නිර්දේශ කෙරේ: If you are not familiar with electric scooter electronics, it is highly recommended to seek professional assistance for installation.
- විදුලිය විසන්ධි කිරීම: Always ensure the electric scooter's power is completely off and the battery is disconnected before attempting any installation, removal, or maintenance.
- නිවැරදි වෙළුමtage: This kit is designed for 36V systems. Do not use it with other voltagඊ පද්ධති.
- ජලයට නිරාවරණය වීමෙන් වළකින්න: Keep the controller and display away from water and moisture to prevent electrical shorts and damage.
- ආරක්ෂිත සම්බන්ධතා: කෙටි පරිපථ වැළැක්වීම සඳහා සියලුම විදුලි සම්බන්ධතා ආරක්ෂිතව සහ නිසි ලෙස පරිවරණය කර ඇති බවට සහතික වන්න.
3. අනුකූලතාව සහ ස්ථාපනය
3.1 ගැළපුම
This Electric Scooter Controller Kit is precisely designed for the MI4 electric scooter model. Its components ensure a perfect fit and seamless integration with your scooter's existing system, providing optimal performance and reliability.

රූපය 3.1: The controller kit components, highlighting their specific design for MI4 electric scooters to ensure compatibility.
3.2 ස්ථාපන ක්රියාවලිය
The installation of this electric scooter controller kit is designed to be straightforward, facilitating convenient replacements and maintenance. Follow these general steps for installation:
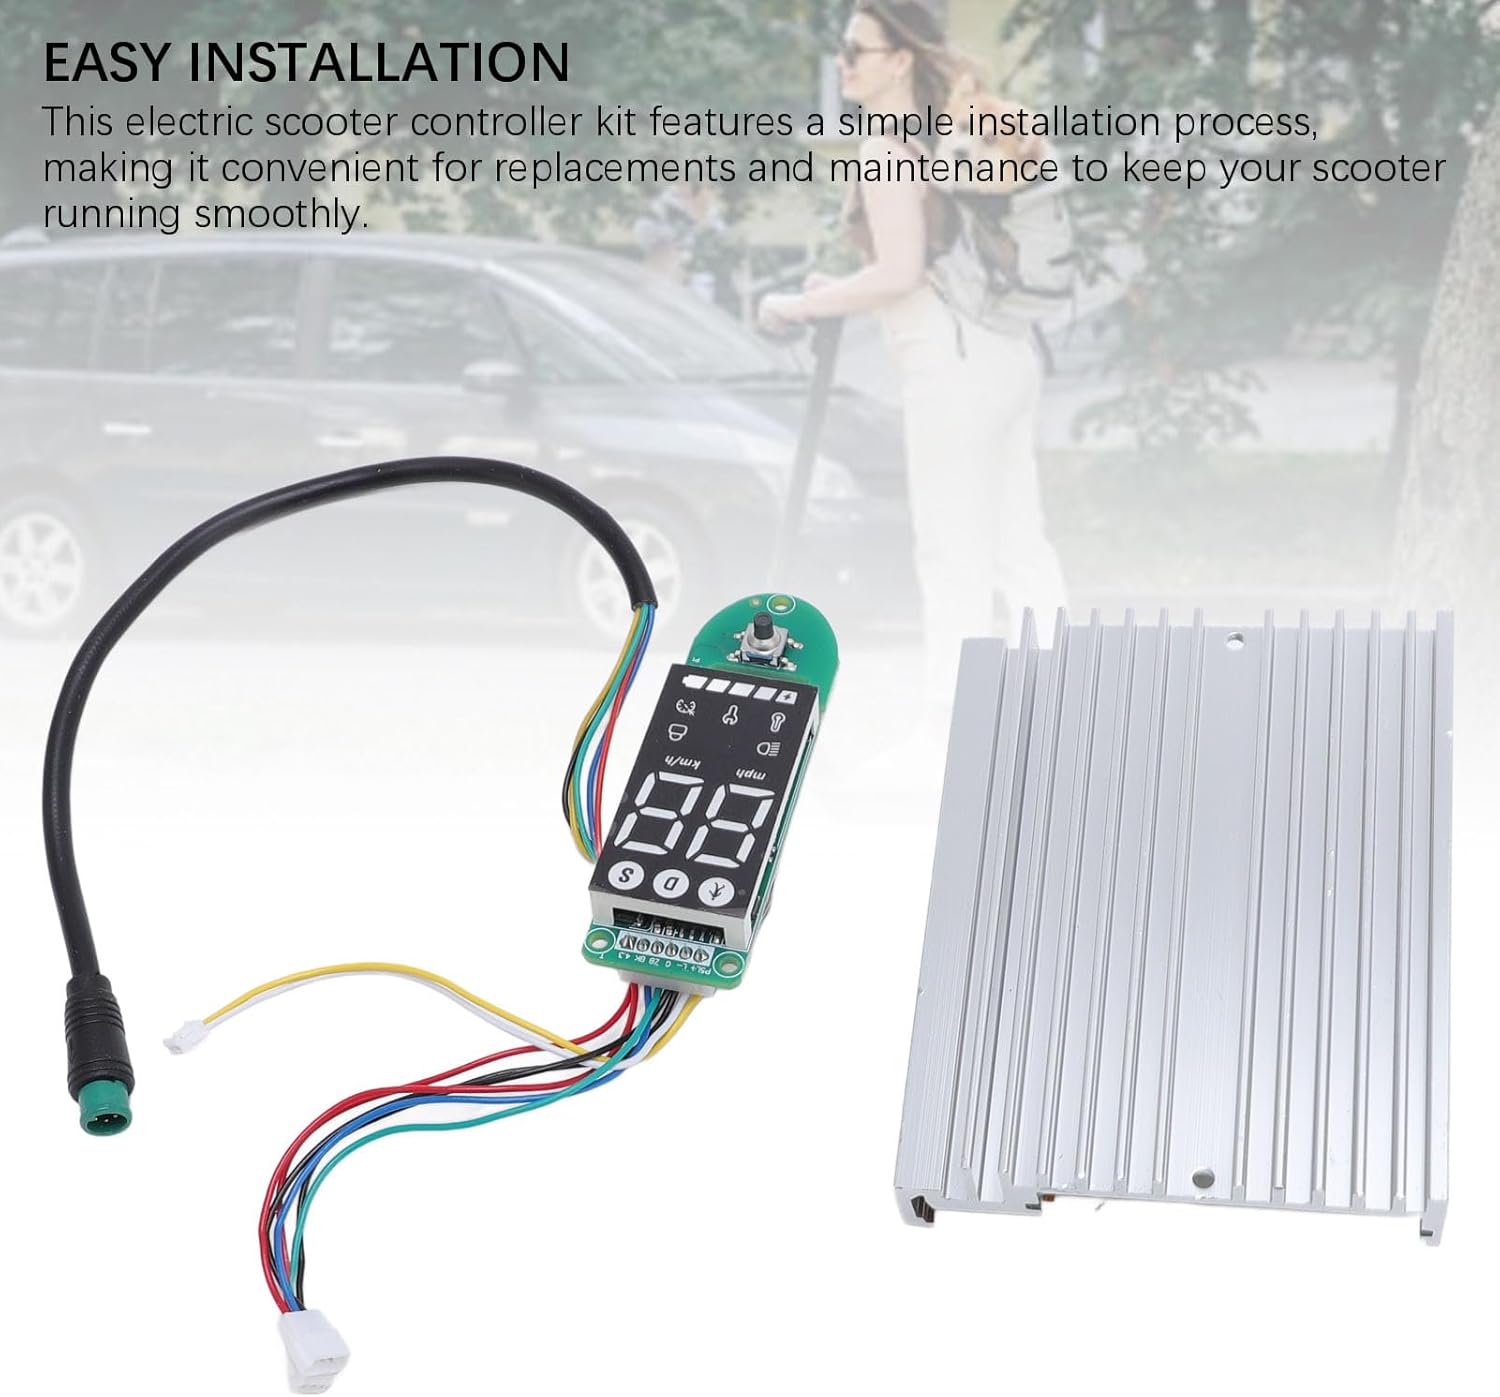
රූපය 3.2: The controller and dashboard components, emphasizing the ease of installation for replacement or upgrade.
- ස්කූටරය සූදානම් කරන්න: Ensure the electric scooter is powered off and the battery is disconnected. Remove any covers or panels necessary to access the existing controller and dashboard wiring.
- Remove Old Components (if replacing): Carefully disconnect all wires from the old controller and dashboard. Note the position and color of each wire for correct re-connection.
- Install New Controller: Mount the new controller board in the designated compartment. Connect the motor wires, battery wires, and other accessory wires (e.g., brake, throttle) to the new controller. Refer to your scooter's specific wiring diagram if available.
- Install New Dashboard: Connect the dashboard display to the controller using the provided cable. Secure the dashboard in its housing on the handlebars.
- ආරක්ෂිත රැහැන්: Ensure all connections are firm and wires are routed safely, away from moving parts or pinch points.
- පරීක්ෂණ ක්රියාකාරීත්වය: Reconnect the battery and power on the scooter. Verify that the display lights up, shows correct information, and the motor responds to throttle input.
- නැවත එකලස් කරන්න: Once functionality is confirmed, reattach all covers and panels.
4. මෙහෙයුම් උපදෙස්
The LCD display dashboard provides real-time information about your scooter's status, allowing for effortless monitoring during operation.
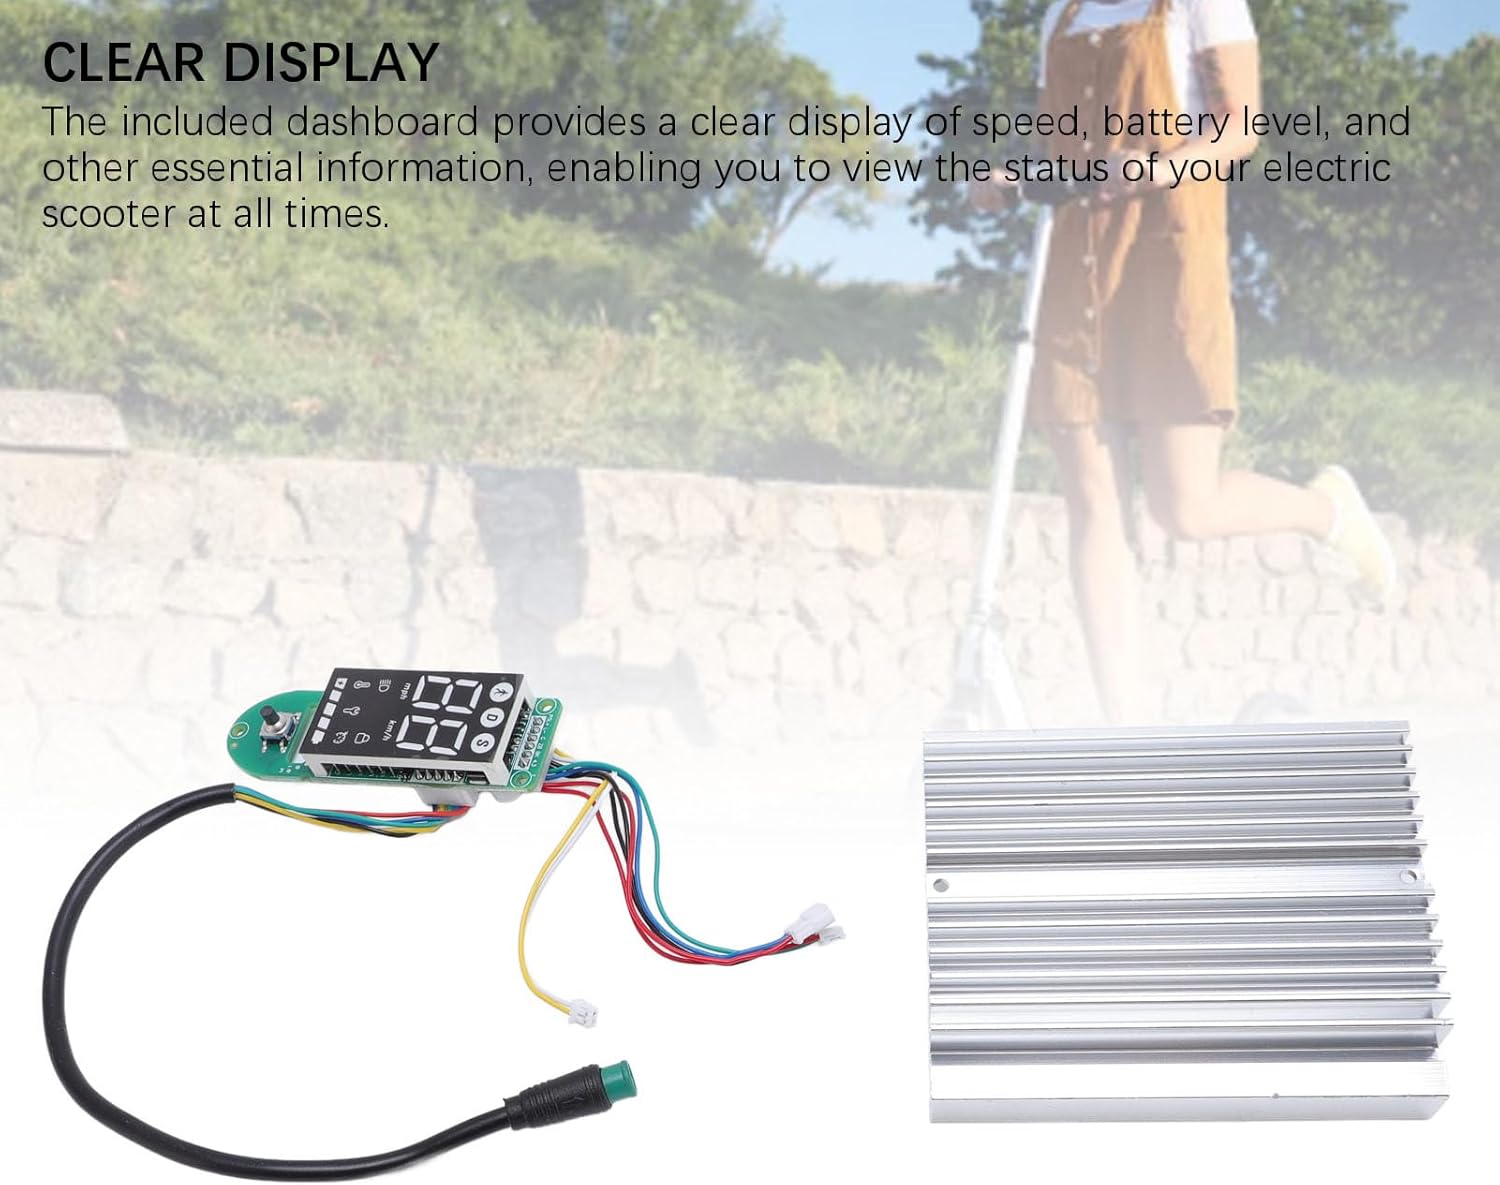
රූපය 4.1: The LCD display dashboard, showing its clear interface for monitoring scooter status.
4.1 බලය සක්රිය / අක්රිය
- බල ගැන්වීමට: Press and hold the power button on the dashboard until the display illuminates.
- බලය අක්රිය කිරීමට: සංදර්ශකය ක්රියා විරහිත වන තුරු නැවත බල බොත්තම ඔබාගෙන සිටින්න.
4.2 සංදර්ශකය අවබෝධ කර ගැනීම
The LCD dashboard provides the following key information:
- වේගය: Displays current riding speed (km/h or mph).
- බැටරි මට්ටම: ඉතිරි බැටරි ආරෝපණය දක්වයි.
- Mode/Gear: Shows the current riding mode or speed gear.
- හෙඩ්ලයිට් දර්ශකය: Illuminates when the scooter's headlights are active.
- Bluetooth/Connectivity: May indicate connection status if applicable.
Refer to your MI4 scooter's specific user manual for detailed explanations of all dashboard icons and functions.
5. නඩත්තු කිරීම
Proper maintenance ensures the longevity and optimal performance of your electric scooter controller kit. The components are crafted from durable aluminum alloy and PCB, designed for robust performance.

රූපය 5.1: The controller and dashboard, highlighting their construction from robust aluminum alloy and PCB for enhanced durability.
- පිරිසිදු කිරීම: Use a soft, dry cloth to wipe down the display and controller housing. Avoid using harsh chemicals or abrasive materials.
- පරීක්ෂාව: Periodically check all wiring connections to ensure they are secure and free from corrosion or damage.
- පාරිසරික ආරක්ෂාව: Store your scooter in a dry environment, away from extreme temperatures and direct sunlight, to protect the electronic components.
- බලපෑමෙන් වළකින්න: Protect the controller and display from physical impacts, which can damage internal components.
6. දෝශ නිරාකරණය
If you encounter issues with your controller kit, refer to the following common problems and solutions:
- සංදර්ශකය ක්රියාත්මක නොවේ:
- බැටරි සම්බන්ධතාවය සහ ආරෝපණ මට්ටම පරීක්ෂා කරන්න.
- Ensure the dashboard cable is securely connected to the controller.
- Scooter Not Responding to Throttle:
- Verify all motor and throttle connections to the controller.
- Check for any error codes displayed on the dashboard (refer to your scooter's manual for code meanings).
- Inaccurate Speed/Battery Reading:
- Ensure all sensor wires are correctly connected.
- A full power cycle (turn off, disconnect battery, reconnect, turn on) may resolve temporary glitches.
අඛණ්ඩ ගැටළු සඳහා, පාරිභෝගික සහාය හෝ සුදුසුකම් ලත් කාර්මිකයෙකු අමතන්න.
7. පිරිවිතර
The Alomejor Electric Scooter Controller Kit provides robust power and reliable performance for your MI4 electric scooter.
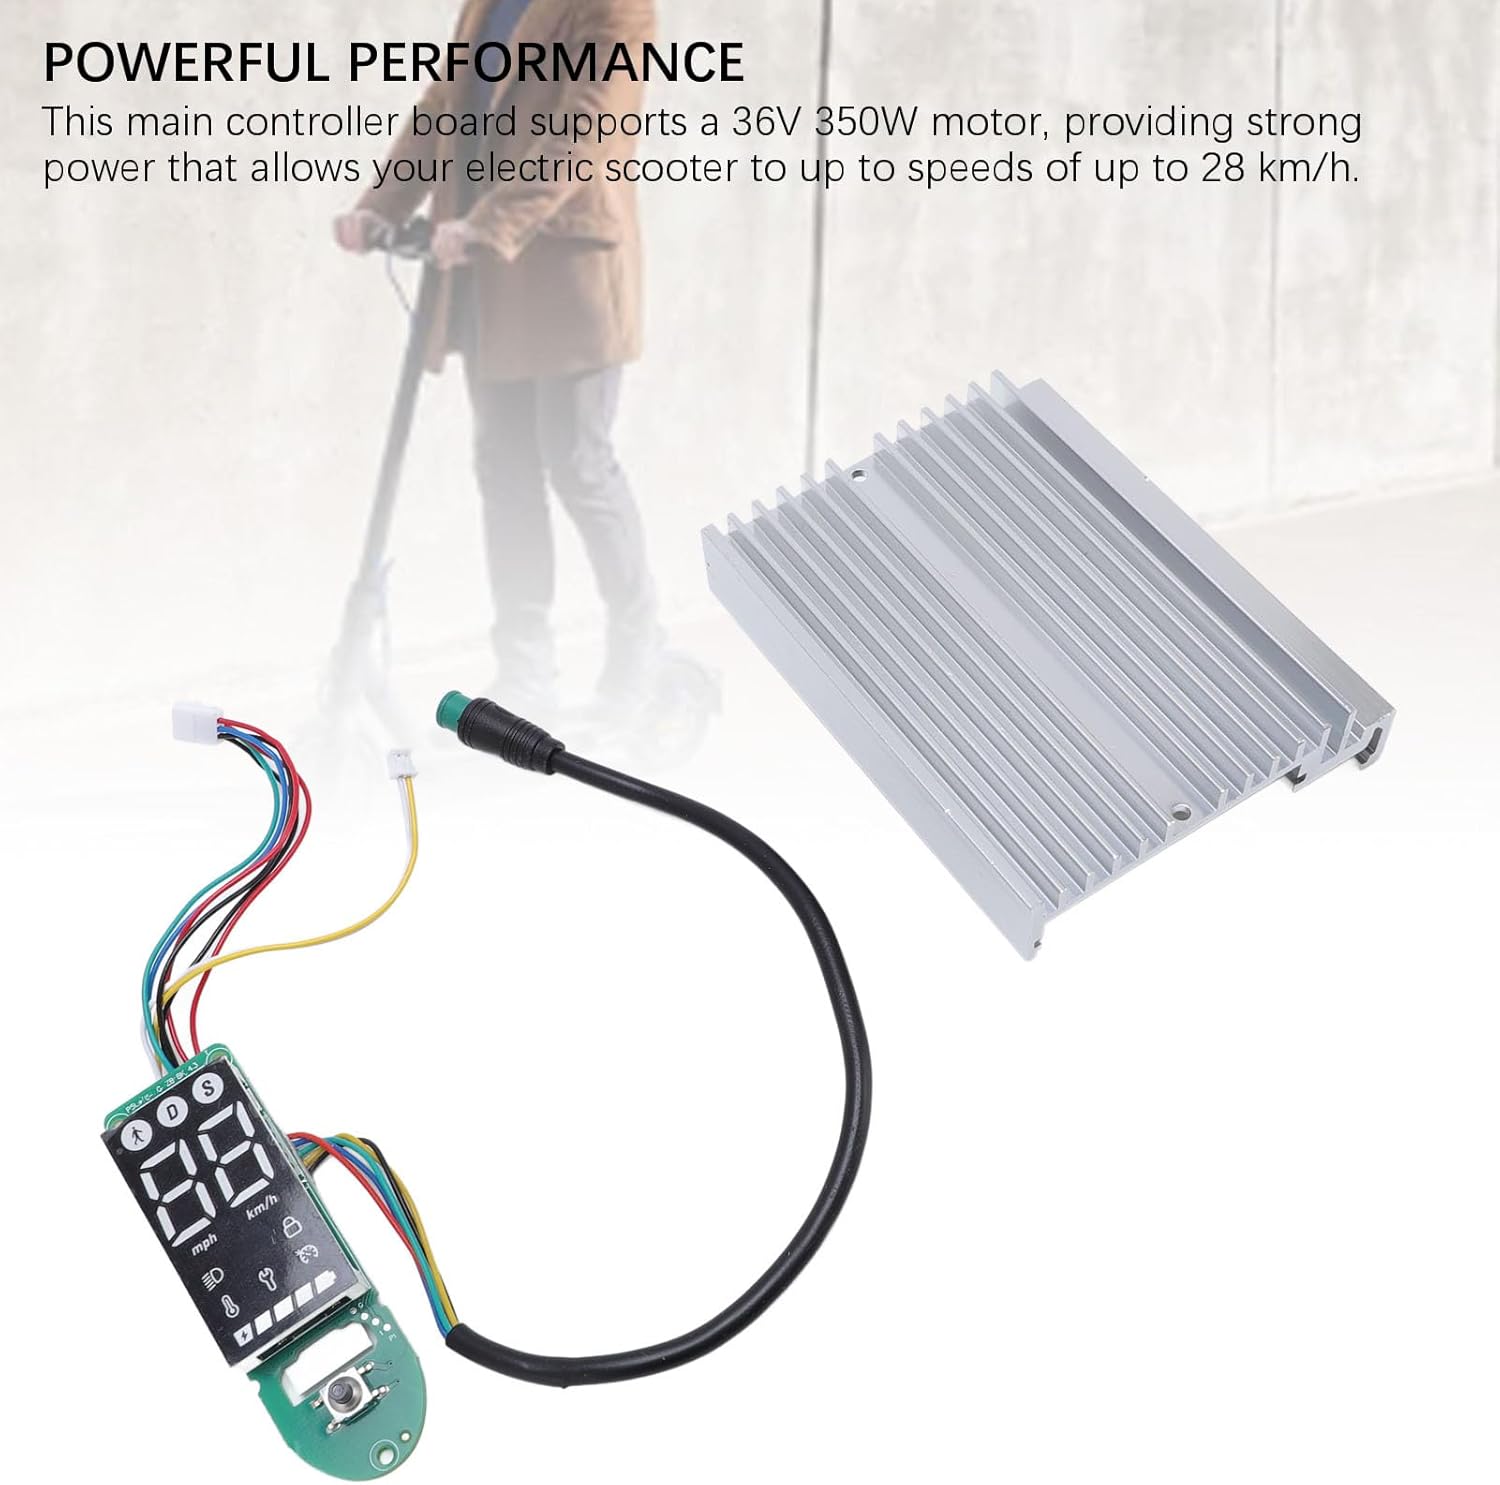
රූපය 7.1: The controller kit, illustrating its capability to deliver powerful performance for electric scooters.
| විශේෂාංගය | පිරිවිතර |
|---|---|
| අයිතමයේ වර්ගය | Electric Scooter Dashboard and Controller |
| යෙදුම | For MI4 electric scooter |
| මෝටර් සහාය | 36V 350W |
| උපරිම වේගය | 28 km/h දක්වා |
| ද්රව්ය | Aluminum Alloy + PCB |
| පැකේජ මානයන් (L x W x H) | අඟල් 7.09 x 5.12 x 1.57 |
| පැකේජ බර | ග්රෑම් 167 යි |
| වෙළඳ නාමය | Alomejor |
| Model Name (Internal) | Alomejorzhvy51os3n |
8. වගකීම් සහ සහාය
මෙම නිෂ්පාදනය සම්මත නිෂ්පාදක වගකීමක් සමඟින් පැමිණේ. නිශ්චිත වගකීම් විස්තර සහ කාලසීමාව සඳහා කරුණාකර නිෂ්පාදන ඇසුරුම්කරණය හෝ විකුණුම්කරුගේ නියමයන් සහ කොන්දේසි බලන්න.
For technical support, troubleshooting assistance, or warranty claims, please contact the seller or manufacturer directly. Keep your purchase receipt as proof of purchase.


