1. හැඳින්වීම
This manual provides detailed instructions for the safe and efficient operation of your QKMPOM L206 Portable Tire Inflator. Please read this manual thoroughly before first use and retain it for future reference. This device is designed for inflating tires on cars, motorcycles, and bicycles, as well as sports balls, offering convenience and reliability.
2 ආරක්ෂිත තොරතුරු
- උපාංගය දරුවන්ට ළඟාවිය නොහැකි ලෙස තබා ගන්න.
- Do not overinflate tires or other items. Always refer to the manufacturer's recommended pressure.
- අධික උනුසුම් වීම වැළැක්වීම සඳහා දිගුකාලීන අඛණ්ඩ ක්රියාකාරිත්වයෙන් වළකින්න. අවශ්ය නම්, භාවිතයන් අතර උපාංගය සිසිල් වීමට ඉඩ දෙන්න.
- උපාංගය වැසි හෝ තෙතමනය නිරාවරණය නොකරන්න.
- Use only the provided accessories and adapters.
- උපාංගය භාවිතා නොකරන විට සිසිල් වියළි ස්ථානයක ගබඩා කරන්න.
3. පැකේජ අන්තර්ගතය
සියලුම අයිතම පැකේජයේ ඇති බව තහවුරු කරගන්න:
- Portable tire inflator (x1)
- Air hose (x1)
- 12V DC car adapter (x1)
- Tire nozzle (x1)
- Presta valve adapter (x1)
- Schrader valve adapter (x1)
- Ball needle (x1)
- USB-C කේබලය (x1)
- Storage bag (x1)
- පරිශීලක අත්පොත (x1)
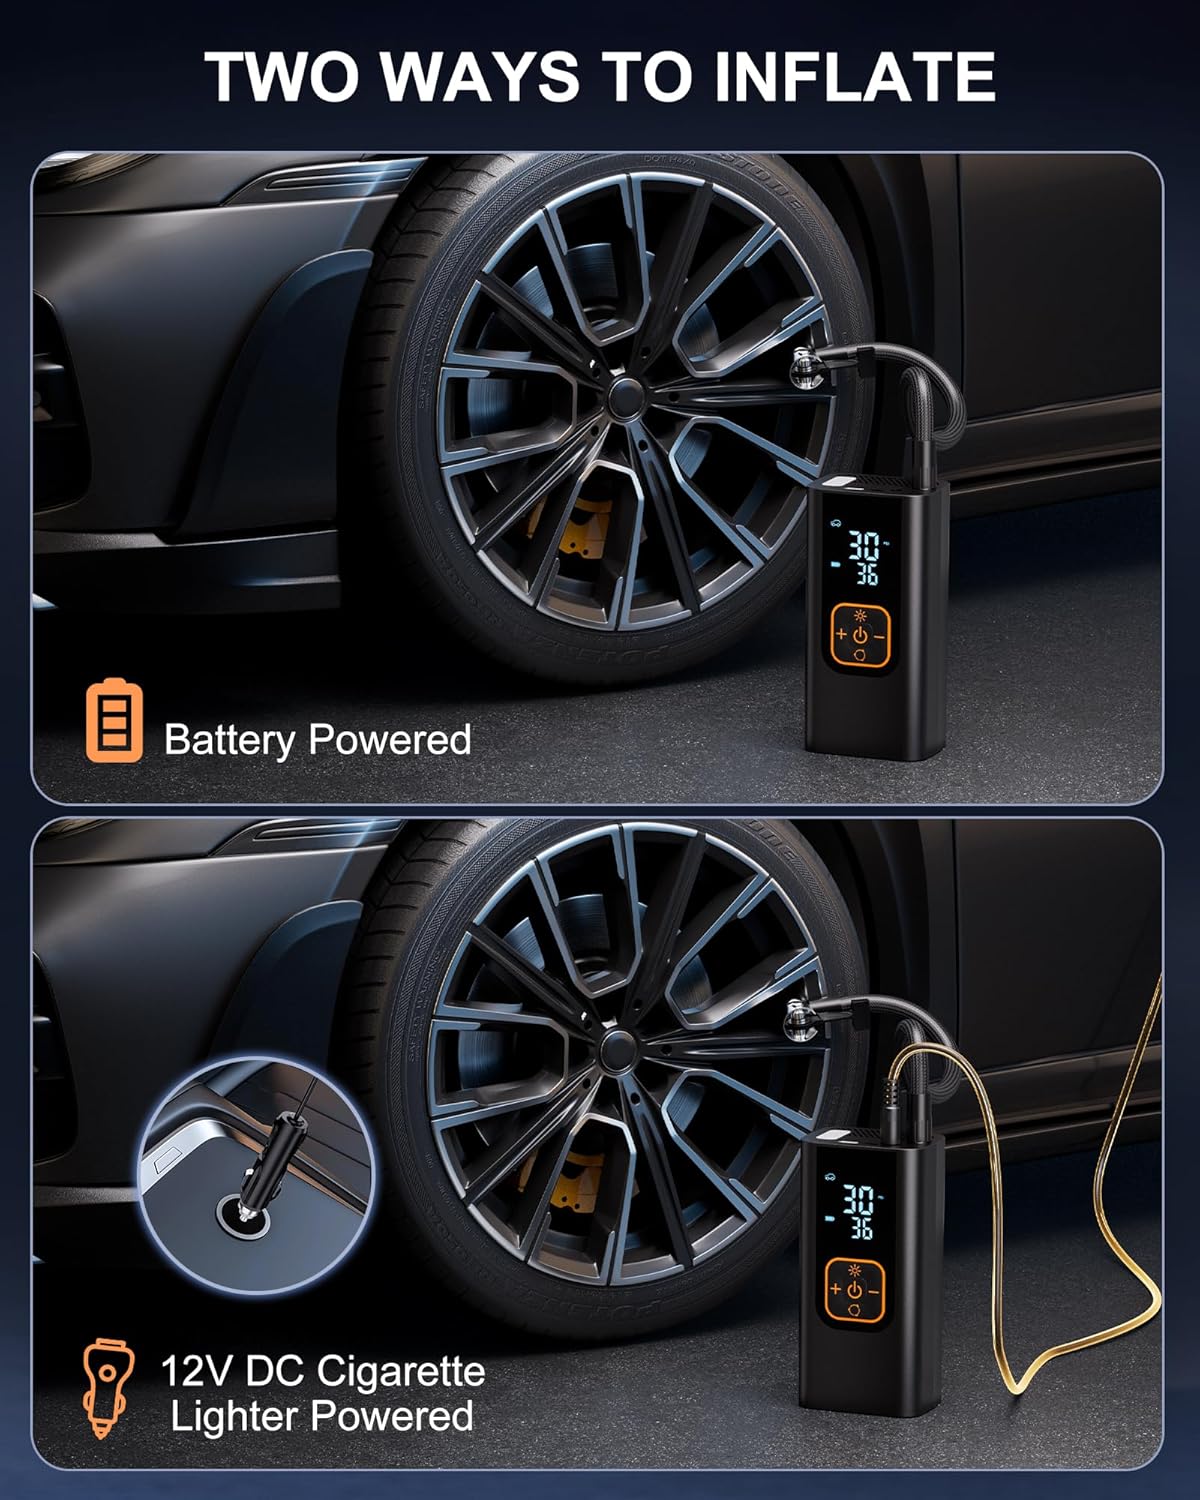
Image: The QKMPOM L206 Portable Tire Inflator shown with all its included accessories, including the air hose, various nozzles, 12V DC adapter, USB-C cable, and storage bag.
4. නිෂ්පාදන අවසන්view
The QKMPOM L206 features a clear digital display and intuitive controls for ease of use. It includes multiple inflation modes and a built-in LED light for convenience.

Image: Detailed diagram illustrating the buttons and screen elements of the QKMPOM L206 inflator, including real-time pressure, preset pressure, battery level, light, input/output charging indicators, power button, preset adjustment buttons, and mode selection/unit switch.

Image: Close-up of the inflator's dual digital LCD display, showing both the real-time pressure and the preset target pressure simultaneously for clear monitoring.
5. උපාංගය ආරෝපණය කිරීම
The QKMPOM L206 can be powered by its internal rechargeable battery or directly from a 12V DC car adapter.
5.1. බැටරි ආරෝපණය
Use the provided USB-C cable to charge the device. Connect the USB-C cable to the inflator's charging port and the other end to a suitable USB power source (e.g., wall adapter, car charger, power bank). The battery indicator on the display will show charging status.
5.2. Dual Power Supply
For extended use or when the battery is low, the inflator can be powered directly by your vehicle's 12V DC cigarette lighter socket using the included adapter.

Image: Illustration showing the two power options for the inflator: battery-powered for cordless use and 12V DC cigarette lighter powered for continuous operation in a vehicle.
5.3. බලශක්ති බැංකු ක්රියාකාරිත්වය
The inflator includes a 5V/2A USB output port and a C-type charging port, allowing it to function as a power bank to charge your phone or other devices.

Image: The QKMPOM L206 inflator connected via USB-C to a smartphone, demonstrating its power bank functionality.
6. මෙහෙයුම් උපදෙස්
6.1. Basic Inflation Steps
- වායු සොඬ නළය සම්බන්ධ කරන්න: Screw the air hose securely onto the inflator's air outlet.
- කපාට අමුණන්න: Remove the valve cap from the item to be inflated. Connect the air hose nozzle to the valve stem. Ensure a tight seal. Use appropriate adapters for different valve types (Presta, Schrader, ball needle).
- බල ගැන්වීම: බල බොත්තම දිගු ඔබන්න (U) to activate the machine.
- මාදිලිය තෝරන්න: Press the mode selection button (circular arrow) to cycle through the preset inflation modes (Car, Motorcycle, Bicycle, Ball) or select the Custom mode.
- පීඩනය සකසන්න: Use the '+' and '-' buttons to adjust the target pressure. The display will show the preset value.
- උද්ධමනය ආරම්භ කරන්න: බල බොත්තම ඔබන්න (U) again to start inflation. The inflator will automatically stop when the preset pressure is reached.
- විසන්ධි කරන්න: Once inflation is complete, quickly disconnect the nozzle from the valve stem and replace the valve cap.

Image: Step-by-step visual guide demonstrating how to connect the inflator to a tire valve, power on, select mode, and start inflation.
6.2. Preset Inflation Modes
The device offers 5 preset modes and 4 pressure units (PSI, kPa, Bar, kg/cm²).
- කාර් මාදිලිය: Recommended pressure range typically 28-50 PSI.
- යතුරුපැදි මාදිලිය: Recommended pressure range typically 26-45 PSI.
- බයිසිකල් මාදිලිය: Recommended pressure range typically 30-120 PSI.
- බෝල මාදිලිය: Recommended pressure range typically 4-16 PSI.
- අභිරුචි ප්රකාරය: Allows manual setting of pressure up to 180 PSI for various inflatables like air mattresses or swimming rings.

Image: Display showing the five preset inflation modes (Car, Motorcycle, Bike, Ball, Custom) with their typical pressure ranges, and the available pressure units.
6.3. ස්වයංක්රීයව වසා දැමීම
The inflator features an accurate pressure sensor that provides real-time monitoring. It will automatically stop inflation once the preset pressure is reached, preventing overinflation. The device also powers off after 3 minutes of inactivity to conserve battery life.

Image: The inflator connected to a tire, illustrating the automatic shut-off function once the desired pressure is achieved.
6.4. LED ආලෝක ක්රියාකාරිත්වය
The built-in LED flashlight offers three modes for various situations:
- ආලෝකකරණ මාදිලිය: සාමාන්ය ආලෝකකරණය සඳහා.
- Alarm Light Mode: A flashing light for attracting attention.
- SOS ආලෝක මාදිලිය: Flashes the international SOS signal for emergencies.

Image: The QKMPOM L206 inflator with its LED light activated, demonstrating its use as a flashlight and emergency signal.
6.5. නිෂ්පාදන නිරූපණ වීඩියෝව
Video: A demonstration of the QKMPOM L206 Portable Tire Inflator in use, showcasing එහි ලක්ෂණ සහ ක්රියාකාරිත්වය.
7. නඩත්තු කිරීම
- පිරිසිදු කිරීම: මෘදු, d ද්රාවණයකින් පිම්බීමේ යන්ත්රයේ පිටත කොටස පිස දමන්න.amp රෙදි. දරුණු රසායනික ද්රව්ය හෝ උල්ෙල්ඛ පිරිසිදු කරන්නන් භාවිතා නොකරන්න.
- ගබඩා: Store the device and its accessories in the provided storage bag in a cool, dry place, away from direct sunlight and extreme temperatures.
- බැටරි සත්කාර: For optimal battery life, charge the device fully before long-term storage and recharge every 3-6 months if not in regular use.
8. දෝශ නිරාකරණය
- උපාංගය ක්රියාත්මක නොවේ: Ensure the battery is charged or connect the 12V DC car adapter. Check if the power button was long-pressed.
- පුම්බන යන්ත්රය ආරම්භ නොවේ: Ensure the air hose is securely connected to both the inflator and the item's valve. Check if a target pressure has been set.
- වැරදි පීඩන කියවීම: Ensure the nozzle is tightly sealed to the valve stem. If issues persist, compare with a known accurate pressure gauge.
- මන්දගාමී උද්ධමනය: Check for any kinks in the air hose. Ensure the battery is sufficiently charged or use the 12V DC adapter for consistent power.
- අධික උනුසුම් වීම: If the device feels hot, stop operation and allow it to cool down for at least 15-20 minutes before resuming use.
9. පිරිවිතර
| විශේෂාංගය | පිරිවිතර |
|---|---|
| වෙළඳ නාමය | ක්කිඑම්පීඕඑම් |
| මාදිලියේ නම | L206 |
| උපරිම මෙහෙයුම් පීඩනය | 180 PSI |
| වායු ප්රවාහ ධාරිතාව | විනාඩියකට ලීටර් 36 |
| වෙළුමtage | වෝල්ට් 12 |
| බලශක්ති ප්රභවය | Battery Powered / 12V DC Adapter |
| ශබ්ද මට්ටම | ඩෙසිබල් 50 යි |
| හෝස් දිග | අඩි 11 |
| අයිතමයේ බර | රාත්තල් 1.58 කි |
| ද්රව්ය | ABS ප්ලාස්ටික්, ලෝහ |
| විශේෂ ලක්ෂණ | Automatic Shut-Off, Built-In Gauge, Cordless, LCD Display, LED Light, Power Bank Function |
10. වගකීම් සහ සහාය
QKMPOM offers a වසර 2ක නිෂ්පාදන වගකීමක් සහ ජීවිත කාලය තාක්ෂණික සහාය for the L206 Portable Tire Inflator. For any questions, issues, or warranty claims, please contact QKMPOM customer service through your purchase platform or the contact information provided in the original packaging.


